7
VIIFR102 © Danfoss 03/2014
Installation manual Danfoss Link™ HP kit
3. Using the rear panel as a template, mark perpendicular
drill holes at a suitable height on the wall close to the
heat pump.
4. Drill holes with a diameter suitable for the rawlplugs
and screws to be used. The size and type of screw will
depend on the wall material. Screws and rawlplugs are
not included in the installation kit.
5. Insert the rawlplugs into the drilled holes and screw the
rear panel securely into position.
6. Re-fit the front.
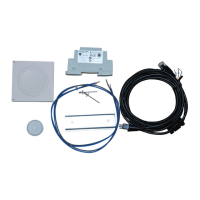
7. Connect the DCM03 cable to the outlet marked RS 485 on
the DCM03 unit.
8. Secure the cable to the wall using cable clamps.
RS 485
Start-up
C Before connecting power to the GateWay card, make sure that the electrical installation has been
carried out correctly and that there is no risk of injury or damage.
1. Start the heat pump as specified in the heat pump installation guide.
2. Connect to Danfoss Link™ CC (see Chapter “Connection to Danfoss Link™ CC”)
en