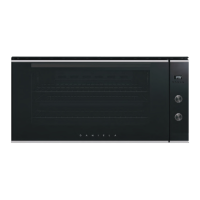
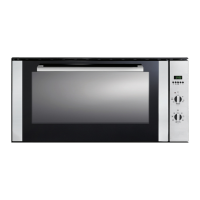
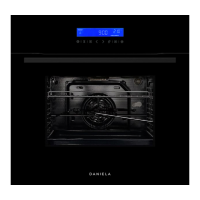
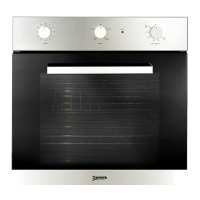
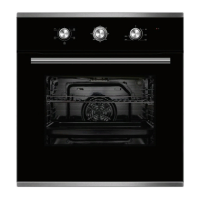
The DAN90ASO is a 90cm built-in 10-function oven with rotisserie, designed by Daniela Appliances. It combines the advantages of traditional convection ovens with modern fan-assisted models, offering a versatile cooking experience.
Function Description:
The oven features 10 cooking functions, including:
- DEFROST: For thawing frozen foods.
- CONVENTIONAL: Standard top and bottom heating for general baking and roasting.
- GRILL: For grilling dishes.
- FAN GRILL: Combines grilling with fan assistance for more even grilling.
- PIZZA BAKE: Optimized for baking pizzas.
- FAN FORCE: Utilizes a fan to circulate heat evenly throughout the oven, ideal for multi-shelf cooking.
- FAN BAKE: Combines fan assistance with traditional baking elements.
- PASTRY BAKE: Specifically designed for baking pastries.
- TOP ELEMENT: Uses only the top heating element.
- MULTI-COOKING MODE: A versatile mode for various cooking styles.
The oven is equipped with an electronic programmer that allows users to set desired cooking times, including cooking duration and end cooking time. It can also function as a timer. An oven indication light illuminates when the oven is heating up to the set temperature or when the heat plate is active according to the heating model.
Rotisserie Feature:
The DAN90ASO includes a rotisserie function. To use it:
- Insert the rotisserie rod "A" into the drive unit and groove "B" into bend "C".
- Turn the plastic handle "D" anti-clockwise and slide the rack into the oven runners, ensuring the rod "E" slots into hole "F".
- The rotisserie rack must always be fitted in the middle of the oven (second position from bottom).
- Start the turnspit by selecting the appropriate setting using knob "B".
A dripping pan should be placed on the bottom shelf of the oven to collect sauce and grease when using the rotisserie.
Control Panel Elements:
- Control Panel (A): The main interface for operating the oven.
- Cooking Mode Selection Knob (B): Used to select different cooking functions.
- Cooking Temperature Selection Knob (C): Used to set the desired cooking temperature.
- Electronic Programmer (D): For programming cooking times, duration, and end time, and as a timer.
- Oven Indication Light (E): Indicates when the oven is heating.
- Dripping Pan or Baking Sheet (N): For collecting drips during cooking.
- Carrying Backward Button (F): Used for navigation or adjustment.
- Oven Rack (G): For placing cookware.
- Carrying Forward Button (H): Used for navigation or adjustment.
- Guides for sliding racks (I): Internal guides for easy insertion and removal of racks.
- Automatic Program (6): For pre-set cooking programs.
- End Cooking Time Knob (J): For setting the end time of cooking.
- Timer (K): For setting a minute minder.
- Cooking Duration Time with Automatic Operation (L): For setting the duration of cooking in automatic mode.
- End of Cooking Time (M): Displays the programmed end of cooking time.
- Carrying Backwards Button (N): Used for navigation or adjustment.
- Carrying Forward Button (O): Used for navigation or adjustment.
- Duration, Delay and Manual Cooking (7): Controls for setting cooking duration, delay, and manual operation.
- Minute Minder (8): For setting a short-term timer.
Important Technical Specifications:
- Inner dimensions of the oven: Width 65.7cm, Depth 43.5cm, Height 35.1cm.
- Inner Volume: 105 litres.
- Voltage and Frequency of Power Supply: 220-240V ~50/60Hz or 50H.
- Power Cord: For single phase, minimum cross-sectional area is 4mm². For three phases, minimum cross-sectional area is 2.5 mm².
- Oven Lamp: Voltage AC220V-240V, Wattage 15W, Socket E14.
Usage Features:
- First Use: Before using the oven for the first time, heat it while empty at 200°C for approximately 15 minutes to burn off any excess finishes on the liners and elements and any moisture absorbed by the insulation. Ensure the room is well ventilated during this process.
- Cooling Ventilation: The oven is equipped with a cooling fan that automatically activates when the oven is hot to cool down its exterior. The fan will continue to run until the oven has cooled sufficiently after cooking.
- Setting the Time (Clock): Simultaneously press the Duration (2) and End of Cooking (3) time keys, then adjust with the +/- (4+5) keys. All programs will be cancelled, and the relay will switch off. The oven will not operate until the time has been set.
- Manual Operation: Simultaneously press the Duration (2) and End of cooking (3) time keys to cancel auto mode. The saucepan symbol will light up.
- Semi-Automatic Operation (Cooking Duration): Press the Cooking duration (2) key and set the duration with the +/- (4+5) keys. The saucepan symbol appears, and the relay output is activated. When the clock equals the end of cooking time, the relay and saucepan symbol turn off, the buzzer sounds, and symbol A blinks.
- Semi-Automatic Operation (End of Cooking Time): Press the end of cooking time key (3) and set the required time with the +/- (4+5) keys. Symbol A and the saucepan symbol light up, and the relay output is activated. When the clock equals the end of cooking time, the relay and saucepan symbol turn off, the buzzer sounds, and symbol A blinks.
- Completely Automatic Operation: Press the duration key (2) and set the required time with the +/- keys (4+5). Symbol A appears. The relay activates, and the saucepan symbol appears. Select the End of cooking time function (3) and set the required time. The saucepan symbol reappears when the clock time equals the calculated switch-on time. After setting, symbol A blinks, the buzzer sounds, and the saucepan symbol and relay switch off.
- Minute Minder: Press the Minute control key (1) and set the required time with the +/- (4+5) keys. The bell symbol appears. When the time elapses, the buzzer sounds.
- Buzzer: Remains active for 7 minutes after the minute control cycle or cooking program finishes. Press any function key to stop it.
- Program Start-Up and Check: A set program runs when the required time is set. Remaining timers can be checked by selecting the relevant function.
- Setting Error: An error occurs if the clock time is between the beginning and end of the cooking time, indicated by a buzzer and blinking Auto symbol. Correct by re-setting either the beginning or end of cooking time.
- Cancelling a Program: Can be cancelled by selecting the manual function or automatically when it reaches the end of its cycle.
- Oven Light: Set knob "B" to the symbol to turn it on. It stays on when any electrical heating elements are active.
Maintenance Features:
- General Cleaning: Unplug the oven before cleaning. Clean frequently to extend its life.
- Oven Interior: Wait until the oven has cooled. Remove shelving and racks. Wash in lukewarm soapy water (and household cloudy ammonia if necessary) and dry. Clean after every use to prevent grease and fat build-up. Use non-caustic specialized cleaning products for stubborn stains.
- Control Panel: Regularly wipe with a microfiber cloth to prevent damage to the panel and enamel.
- Stainless Steel Surfaces: All grades of stainless steel can stain or discolour. Clean regularly. Avoid cleaning lettering or symbols as they can be damaged. Always clean in the direction of the grain to prevent scratching.
- Chrome Shelves: Use detergent and hot water. For very dirty shelves, use a non-abrasive nylon scour.
- Oven Pan/Tray: Wash with warm soapy water and a suitable sponge after every use, while still warm. Rinse and dry. Dishwasher friendly.
- Oven Door Cleaning: Wait until cooled. Wash in lukewarm soapy water and dry with a microfiber cloth. Clean after every use to prevent grease and fat build-up. Do not use metal scrapers or rough abrasive materials as they can scratch or shatter the glass.
- Removing the Oven Door:
- Open the door fully.
- Lift up and turn the small levers on the two hinges.
- Grip the door on the two external sides, shut it slowly but not completely.
- Pull the door towards you, pulling it out of its seat.
- Reassemble by following the steps in reverse.
- Replacing the Lamp:
- Unplug the oven and wear rubber gloves.
- Disconnect the oven from the power supply (main switches or unplug).
- Unscrew the glass cover attached to the lamp holder.
- Replace with a new lamp (AC220V-240V, 15W, E14 socket).
- Remount the glass cover and reconnect the appliance to the power supply.
Safety Warnings:
- The appliance must be installed by a qualified person according to instructions.
- Not intended for use by persons (including children) with reduced physical, sensory, or mental capabilities, or lack of experience and knowledge, unless supervised.
- Electrical safety is guaranteed only if correctly and efficiently earthed.
- When first used, an odour may be emitted; ensure good ventilation.
- Ensure the appliance is switched off before maintenance.
- Ventilation openings must not be covered.
- Do not replace the supply cable; call an authorized service centre.
- Appliance parts and cooking surfaces retain heat after use; allow to cool.
- Heating elements and oven door become extremely hot during use; keep children away.
- If the surface is cracked, switch off the appliance to avoid electric shock.
- Never stretch, pull, or damage the mains cable.
- Do not modify appliance characteristics.
- Do not leave the appliance outside in rain or sun.
- Do not touch electrical appliances with wet hands or feet.
- Do not use the appliance barefoot.
- Do not allow unsupervised children or unfamiliar persons to use the appliance.
- Do not use steam cleaners, caustic oven cleaning products, abrasive chemicals, harsh solvents, wax polish, metal scrapers, or steel wool, as these can damage the oven cavity or glass.
- Do not use the oven door as a shelf, bench, or seat.
- Do not push down on the open oven door.
- Ensure the room is well ventilated when first using the oven.
- The appliance and accessible parts become hot during use; be careful not to touch heated elements. Children must be supervised.
- Do not use the base of the oven for cooking as this could damage it.
- Do not grill with the oven door open.
- Do not use this appliance as a space heater.
- Never pick up oven or grill items with bare hands at the end of cooking.
- Never pull the appliance by the door handle.
- Do not use the appliance if the mains cable is damaged.
- Do not use the appliance if it is damaged or malfunctions; contact Daniela Appliances Pty Ltd.
- Any damage from incorrect removal or installation of the oven door will not be covered under warranty.
- Proof of purchase is required for warranty service. Warranty is void if not installed by a licensed technician or tradesman.