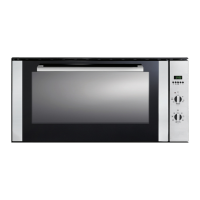
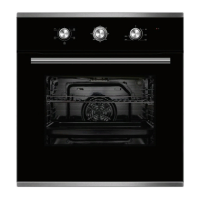
This document serves as the user manual for the Daniela DAN90AFS 90cm Built-In 11 Function Electric Oven with Rotisserie.
Function Description:
The Daniela DAN90AFS is a multifunction electric oven designed for domestic use, combining traditional convection cooking with modern fan-assisted capabilities. It offers 11 cooking functions, including a rotisserie, and is intended solely for cooking foodstuffs. The oven is equipped with a control panel, oven rack, side support rails, and a baking tray with a grill insert.
Important Technical Specifications:
- Model: F948-100STMR, F948-101STIX
- Power Source: 220-240V – 50/60Hz
- Volume (usable capacity): 105 L
- Output Power: 3,166-3,660 W
- Weight Net: 51kg approx
- Weight Shipping: 58.5kg approx
- Dimensions (W x H x D):
- Outside: 900 x 480 x 560.5 mm
- Inner: 657 x 435 x 351 mm
- Cutout: 867 x 470 x 550mm
- Lamp Specifications: Voltage: AC220V-240V, Wattage: 15W, Socket: E14
- Electrical Connection: Three-pole power supply cable with a yellow-green earth wire. Minimum cross-sectional area for single phase is 4mm², and for three phases is 2.5mm². An omni polar circuit breaker with a minimum contact opening of 3mm is required for direct mains connection.
Usage Features:
The oven offers a variety of cooking modes and user-friendly features:
- Light: Turns on the oven light, useful for cleaning or monitoring food.
- Defrost: Uses the fan only to distribute air, allowing food to defrost quickly without protein alteration.
- Convection: Activates the top and lower heating elements for natural conduction. Ideal for keeping foods moist, low and slow cooking, roasts, cakes, casseroles, and ribs.
- Fan Forced: Operates both the fan and rear element for multi-layer cooking, roasting, and baking (cookies, meringues, pastries).
- Grill: Perfect for grilling and gratin. Must be used with the oven door half-open and control protection in position. Recommended temperature is a minimum of 210°C, using the top 3 shelf positions.
- Fan Grill: Utilizes the rear fan and full grill simultaneously for even heat distribution. Recommended temperature is a minimum of 210°C, using the top 3 shelf positions. Food should be placed on the grill inset rack to allow air circulation. No need to rotate food when used properly. Ideal for grilling meat, chicken, fish, and sausages.
- Bottom Element with Fan: Uses the bottom element and rear fan for a crunchy base. Best for pizza (fresh and frozen), quiche, etc., using the bottom 3 shelf positions.
- Top Element: Activates the top heating elements (thermostat knob between 60°C and Max). Used for browning food at the end of cooking, such as cauliflower and macaroni cheese.
- Fan Assist: Circulates heated air from top and bottom elements for even temperature, reduced cooking time, and energy saving. Perfect for cooking on two levels (pastries, biscuits), low temperature defrosting, and dehydrating fruit and vegetables.
- Turbo Multi-Cook: Alternately activates the top circle and bottom heating elements, as well as the fan, for constant and uniform heat. Allows cooking various dishes simultaneously if they require the same temperature. Recommended for dishes requiring a gratin finish or prolonged cooking times (lasagne, pasta packs, roast chicken, potatoes). Excellent heat distribution allows for lower temperatures when cooking roasts, resulting in more tender meat. Suitable for cooking fish and vegetable-based side dishes. Single rack use only in this mode.
- Pizza Mode: Activates bottom and circle heating elements and the fan for rapid heating and prevalent bottom heat. Ideal for foods requiring high temperatures like pizzas and bread. Use one oven tray or rack at a time, positioned closer to the bottom.
- Rotisserie: To start, insert the rotisserie rod into the drive unit and groove, then slide the rack into the oven runners. The rotisserie rack must be fitted in the middle of the oven (second position from bottom).
- Cooling Ventilation: A cooling fan automatically activates when the oven is hot to cool the exterior. It remains on until the oven cools sufficiently.
- Time Setting: The oven only operates when the time has been set. The clock function button allows setting and changing the current time.
- Memory Function: Saves frequently used oven settings (function, temperature, cook time, end time).
- Clock Functions:
- Minute Minder: Sets a countdown timer that does not affect oven operation. An audible signal sounds when the time elapses.
- Cook Time: Sets the duration for which the oven will be in use. The oven switches off automatically after the set time.
- End Time: Sets when the oven is to switch off.
- Delayed Cooking (Cook Time and End Time Combined): Allows the oven to switch on and off automatically at a later time by setting both cook time and end time.
- Pre-Heat Power Boost: Speeds up pre-heating of the empty oven. The symbol lights up, and flashing bars indicate operation. An audible signal sounds when the set temperature is reached.
- Child Safety Device: Engages to prevent the oven from being switched on.
- Button Beep: Can be switched on or off.
- Display On/Off: The display can be switched off to save energy and comes on automatically when the appliance is switched on again.
Maintenance Features:
- Cleaning:
- Always unplug the oven before cleaning or maintenance.
- Wait for the oven to cool down before removing shelving and racks.
- Wash shelves and racks in lukewarm soapy water (with household cloudy ammonia if necessary) and dry.
- Regularly wipe the control panel with a microfibre cloth.
- When using stainless-steel cleaning products, avoid cleaning lettering or symbols.
- Chrome shelves can be cleaned with detergent and hot water, using a non-abrasive nylon scour for stubborn dirt.
- Oven pan/tray is dishwasher friendly.
- Clean the front frame with stainless steel cleaners, avoiding lettering or symbols.
- Always clean stainless steel in the direction of the grain to prevent scratches.
- For the oven door, wipe clean with lukewarm soapy water and a microfibre cloth after it has cooled.
- The electronic programmer window and oven door can be cleaned with a window washing product applied to a soft cloth.
- Oven Door Removal: For thorough cleaning, the oven door can be removed by opening it fully, lifting and turning small levers on the hinges, gripping the external sides, shutting it slowly but not completely, and pulling it out. Reassemble by reversing the steps.
- Lamp Replacement: Unplug the oven, wear rubber gloves, and disconnect from the power supply. Unscrew the glass cover, replace the 15W E14 bulb (AC220V-240V), remount the glass cover, and reconnect the power supply.
- General Care: Clean after every use to prevent grease and fat build-up. Do not use metal scrapers or rough abrasive materials on the oven glass to avoid scratching or shattering.
Important Safety and Care Instructions:
- Installation must be carried out by a qualified person according to instructions.
- The appliance is not intended for use by persons (including children) with reduced physical, sensory, or mental capabilities, or lack of experience and knowledge, unless supervised.
- Electrical safety is guaranteed only if the appliance is correctly and efficiently earthed.
- When first used, an odour may be emitted; this will cease after a period of use. It is recommended to burn out excess finishes on oven liners before usage.
- Ensure the appliance is switched off before maintenance.
- Ventilation openings must never be covered.
- Do not replace the supply cable; call an authorized service centre.
- Use the appliance only for its expressly designed purpose (cooking foodstuffs).
- Parts of the appliance and cooking surfaces retain heat after switching off.
- Heating elements and parts of the oven door become extremely hot during use; keep children away.
- Do not allow the mains cable to be stretched, pulled, or damaged.
- Do not modify appliance characteristics.
- Do not leave the appliance outside.
- Do not touch electrical appliances with wet hands or feet, or use the appliance barefoot.
- Do not use steam cleaners, caustic oven cleaning products, abrasive chemicals, harsh solvents, wax polish, metal scrapers, or steel wool.
- Do not use the oven door as a shelf, bench, or seat.
- Do not push down on the open oven door.
- Before first use, run the oven empty at 200°C for approximately 15 minutes with the door shut, then open the door to ventilate. Ensure the room is well ventilated during initial use.
- Do not place anything on the bottom of the oven during operation.
- Accessible parts become hot during use; keep young children away.
- Any damage from incorrect removal or installation of the oven door will void the warranty.
- Proof of purchase is required for warranty service calls.
- Warranty is void if not installed by a licensed technician or tradesman.