D4-9 / D4-9X Four-Post Lifts 36 P/N 5900251 — Rev. A1— August 2021
7. Route Cable A over to its Crosstube Sheave, under it, up and past the Slack Safety Sheave, and
then up to the Top Cap and through the hole in the Top Cap.
Make sure to route the cable on the correct side of the Slack Safety Sheave.
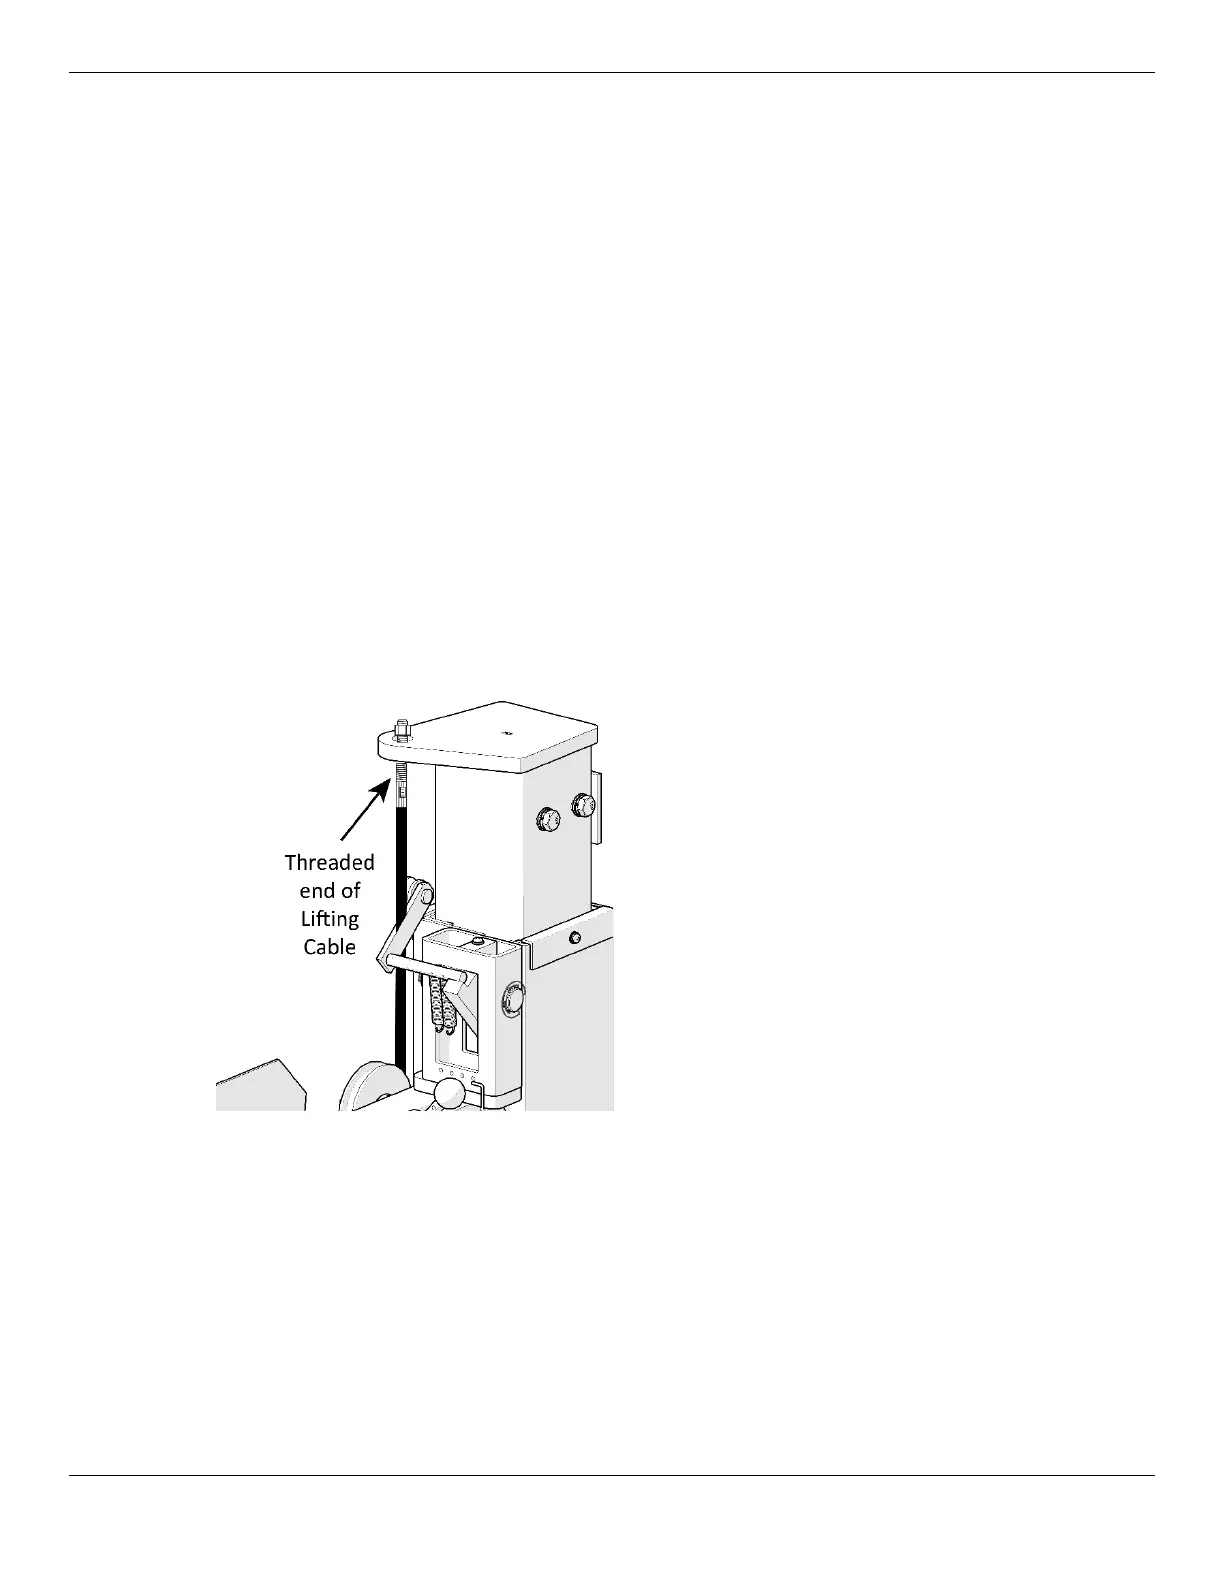
The Threaded end of the cable should go through the hole in the Top Cap about an inch.
However, if the cable is way too short or long, check to make sure you have the correct cable.
8. Put a Washer and Nut into place above the Top Cap, then finger tighten the Nut to hold Cable A in
place.
You only want to finger tighten the Nut at this point so that there is a little play in the cabling.
9. Re-install the Retainer Bolt under the Crosstube Sheave.
10.
Switching to just Cable C
, route it all the way around the Double Sheave and then back
towards the other end of the Powerside Runway.
11. When you get to the other end of the Runway, route it around the single sheave and then towards
its Crosstube Sheave.
12. Remove the Retainer Bolt under the Crosstube Sheave.
13. Route Cable C under the Crosstube Sheave, up and past the Slack Safety Sheave, and then up to
the Top Cap and through the hole in the Top Cap.
14. Put a Washer and Nut into place above the Top Cap, then finger tighten the Nut to hold Cable C in
place.
Not drawn to scale. Not all components shown. Springs not fully connected in graphic.
15. Re-install the Retainer Bolt under the Crosstube Sheave.
16. Perform Steps 1 through 15 again, but this time for Cables B and D.
NOTICE: Routing Cables B and D is the same process as routing Cables A and C, just to the other
two Posts and using a different set of Sheaves.
17. When all Lifting Cables are correctly routed, securely tighten all four Nuts above the Top Caps.