28 ∙ page title page title ∙ 29
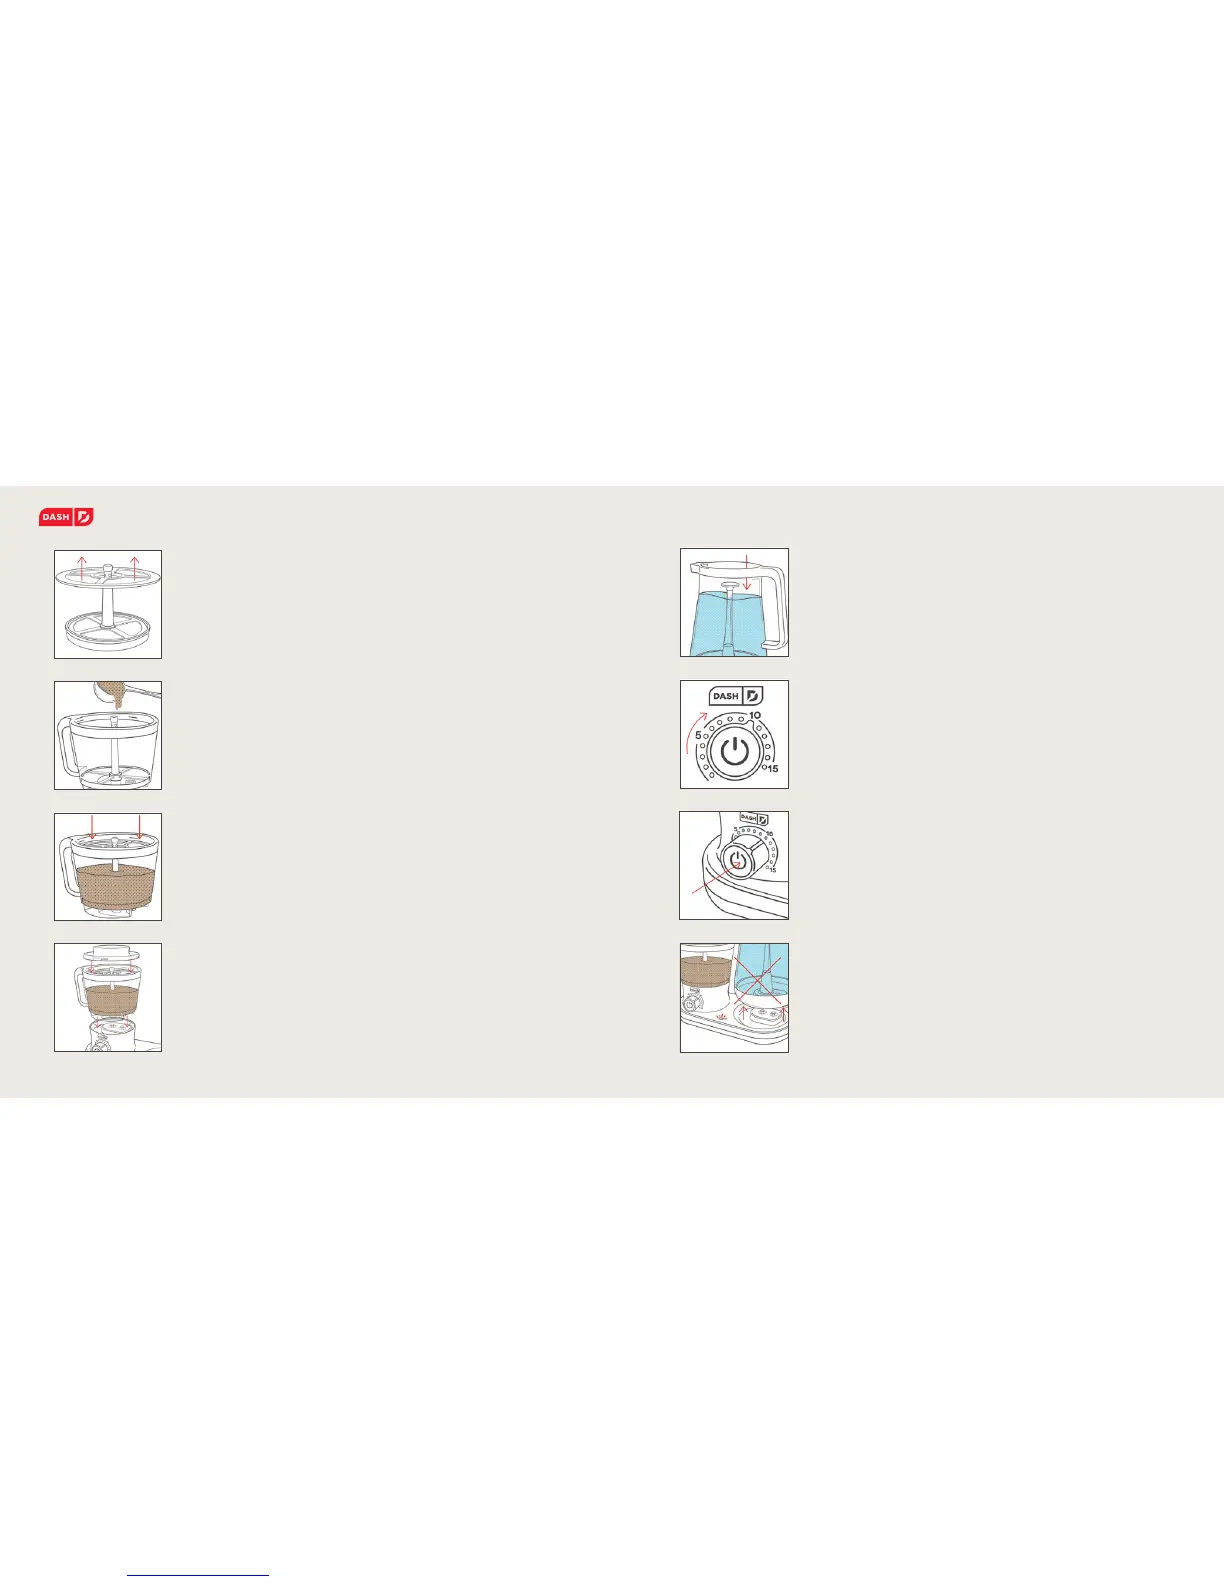
Remove the Carafe Lid and pour water into the Carafe.
Ensure that the spout on the Carafe Lid is closed.
Note: The maximum capacity for the Carafe is 1500 ml.
/1.5 liters. Do not overll the Carafe past the 1500 ml/
MAX line, or below the 1000 ml/MIN line. The Carafe must
be lled with at least 1 liter of water to function properly.
After you have set the brewing time, press the Power Button
to get started. The white Brewing Light on the base will turn on.
The white LED Timer around the Control Dial will illuminate
displaying the brewing time. It will shut off when the brewing
is nished and the full amount of cold brew will rise to ll the
Carafe and will bubble gently.
IMPORTANT: Do not remove the Carafe or Container Lid
while the machine is operating
IMPORTANT: Wait until the white LED Indicator is off before
removing the Carafe. Rotate the Carafe Lid to open the spout.
Enjoy your Cold Brew!
Pour your desired amount of ground coffee beans into
the Coffee Container and replace the upper lter, then
replace the Coffee Container Lid. Secure the lid tightly
on the container.
NOTE: Do not overll the Coffee Container past the
MAX line. The maximum capacity for coffee grounds
is 2 cups.
The Filter Assembly is located inside the Coffee
Container. Open the Coffee Container and remove
the Upper Filter from the Filter Assembly.
Secure the Coffee Container on the Brewing Base by
matching the two circular columns on the underside
of the Coffee Container with the corresponding holes
in the Brewing Base.
Place the lower lter back into the Coffee Container
before adding the grounds. See our recommended
ratio below for starting your cold brew.
IMPORTANT: Secure the Filter Assembly in the
container by aligning the notch at the bottom of the
Coffee Container with the notch at the bottom of the
Filter Assembly.
Place the Carafe on the Base and rotate the Control
Dial to set the brewing time between 5-15 minutes. When
the Rapid Cold Brew System is brewing, the Control Dial
can be adjusted to increase or decrease the brewing time.
3
7
2
6
1
5
4
8
28 ∙ step by step step by step ∙ 29
STEP BY STEP INSTRUCTIONS