Installing the Anemometer
Page 8 Standard and Industrial Anemometer
Attaching the Wind Vane
To mount the wind vane, you will need to look at the console display in order to
orient the vane accurately. You may wish to have a friend or family member on
the ground do this for you. Or, you may wish to bring the console and SIM/junc-
tion box onto the roof with you.
1.
Connect the anemometer cable to the
SIM/junction box.
2.
Press WIND key on console if
necessary to display wind direction in
degrees.
3.
Use the compass or map to determine
in which direction (N, S, E, W,) the
anemometer arm is pointing.
4.
Use the wind direction chart to find
the degree reading which corresponds
to that direction.
5.
Slowly turn the wind direction shaft
with your fingers. Stop turning when the weather station display reaches
the degree reading obtained in step 4.
Because of the low pass filter used by the station (see “Testing the Anemom-
eter” on page 2), the wind direction reading requires approximately 5 sec-
onds to stabilize each time you turn the shaft. You will need to turn the
shaft, wait, and turn it again until you eventually “zero in” on the desired
wind direction reading.
6.
Being careful to keep the stainless steel shaft from turning, place the wind
vane on the shaft with the bullet-shaped nose of the vane pointing in the
same direction as the arm.
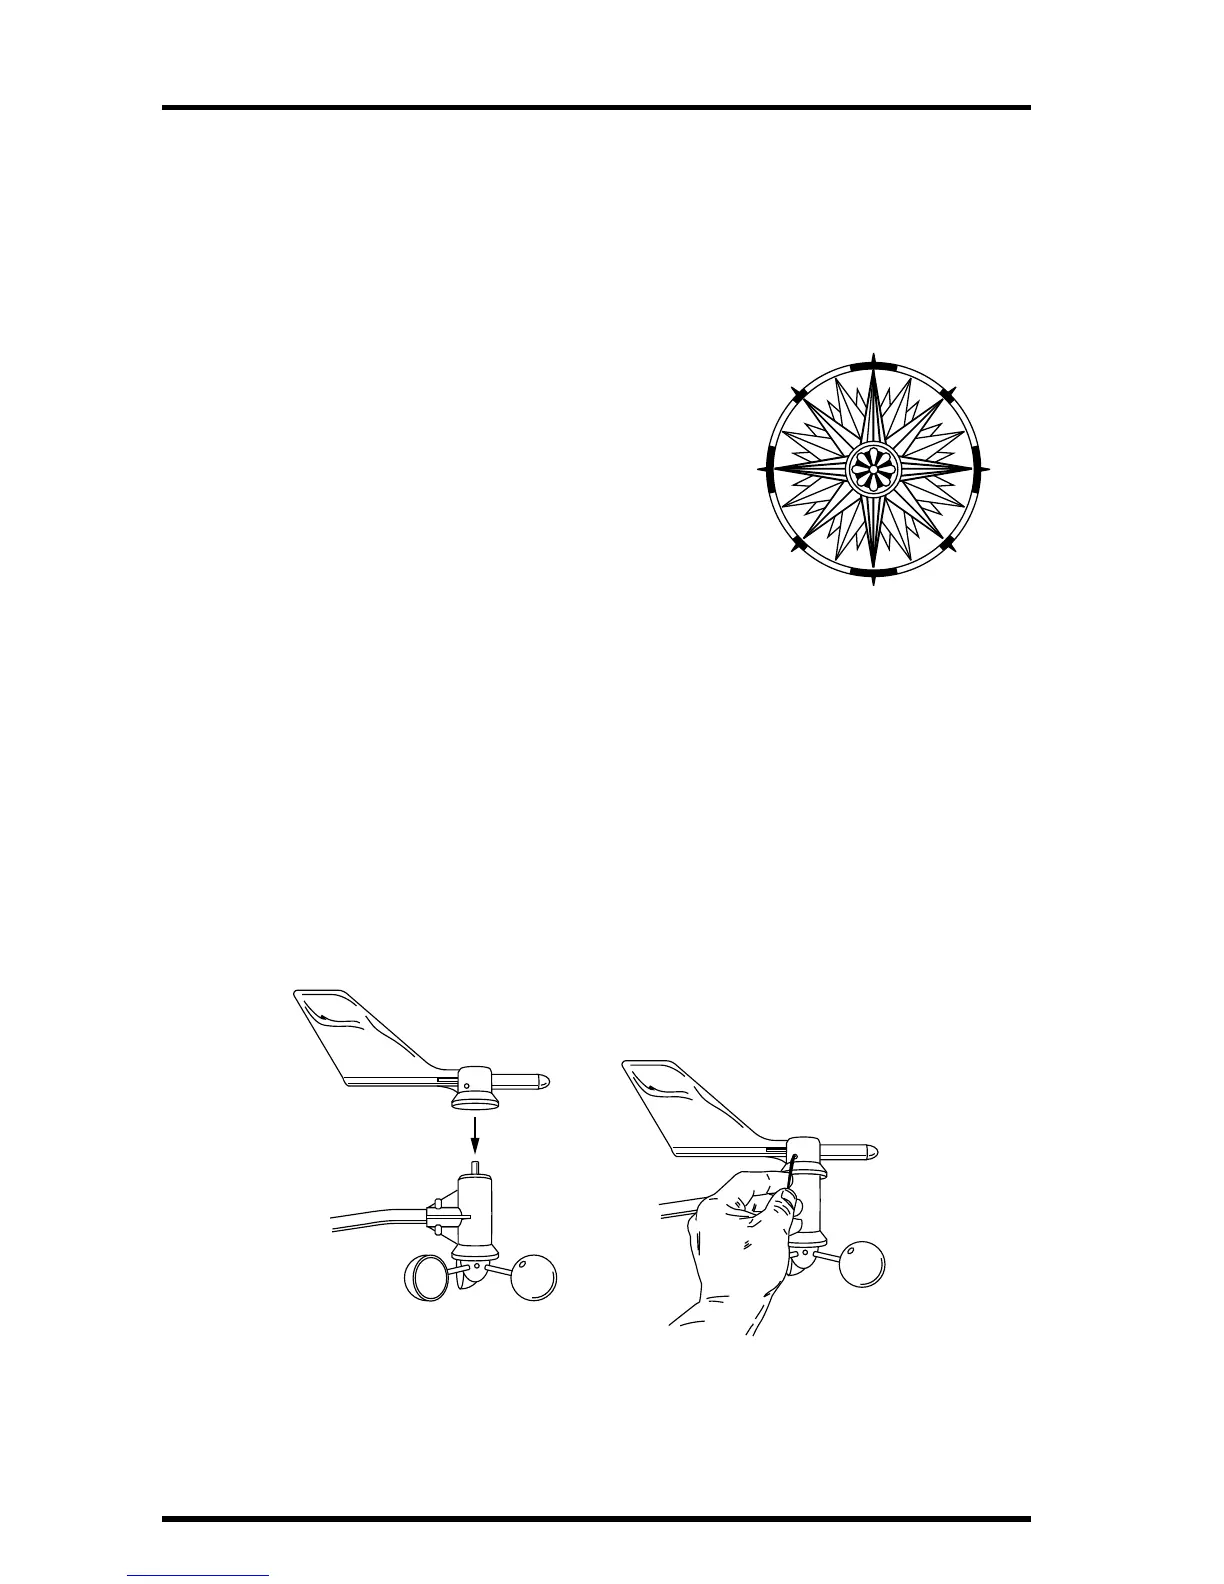
Installing the wind vane
0° N
180° S
270° W90° E
45° NE315° NW
135° SE225° SW
Wind direction chart
Push the
wind vane
onto the
stainless steel
shaft
Tighten set screw
with allen wrench