3
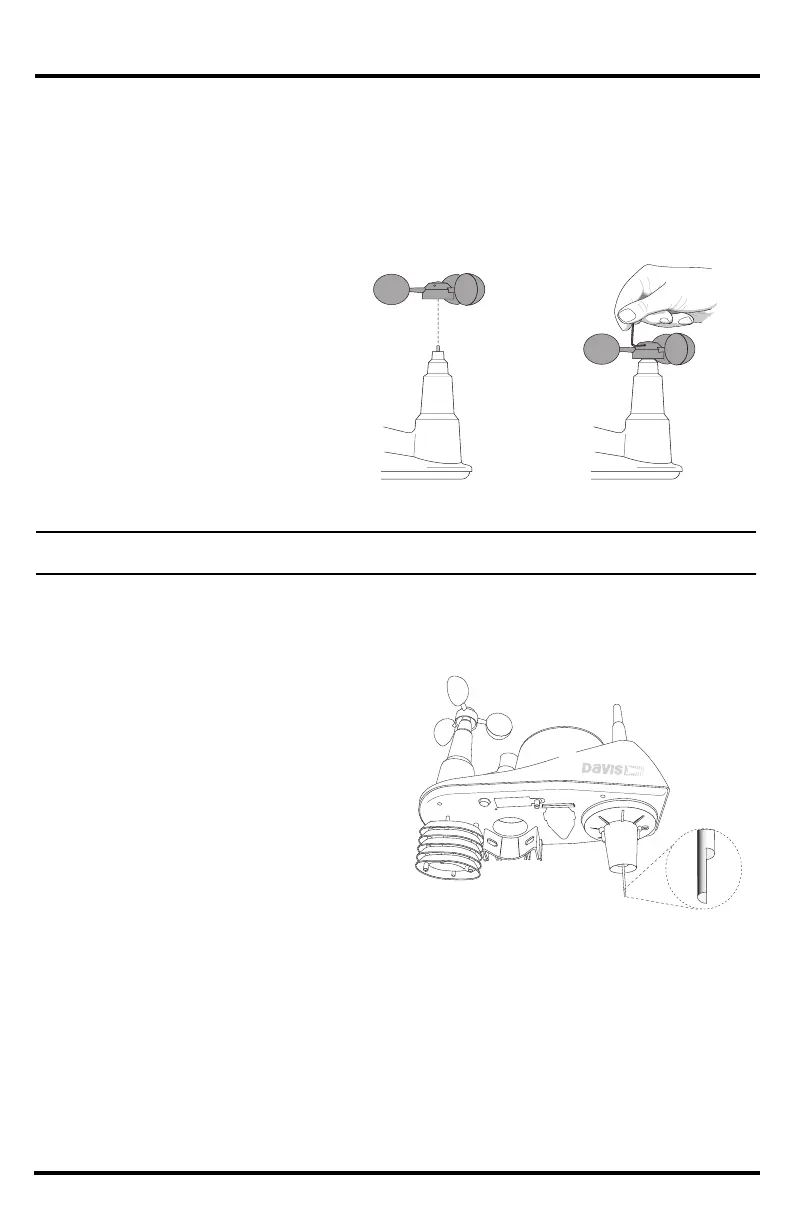
Attach the Wind Cups to the Anemometer
The Vantage Vue anemometer measures wind speed. The wind cups are mounted on the
anemometer shaft on the top of the sensor suite assembly.
1. Gently slide the wind cup assembly
down onto the anemometer’s
stainless steel shaft as far as it will
go, as shown.
2. Use the Allen wrench provided to
tighten the set screw near the top of
the “hub” section of the wind cups,
as shown. Ensure that the set screw
is screwed in fully and is tight.
3. Pull gently on the hub to ensure
that the anemometer is securely
fastened to the shaft.
4. Spin the wind cups to make sure
they spin freely.
Note: If the wind cups don’t spin freely, loosen the set screw, remove the wind cups from the shaft, and repeat
the installation steps.
Attach the Wind Vane
The Vantage Vue wind vane measures wind direction. The wind vane is mounted on a stainless
steel shaft on the opposite side of the sensor suite assembly from the wind cups.
1. Hold the sensor suite assembly on its
side with the anemometer and
radiation shields on your left, the wind
vane shaft on your right and the wind
cups away from you.
2. When the sensor suite is held in this
manner, the wind vane shaft is
horizontal, and will orient itself so that
its flat side will be facing to the right,
as shown.
3. Holding the sensor suite assembly with
your left hand, grasp the wind vane
with your right hand so that the “arrowhead” end is pointed down.
4. Gently slide the wind vane onto the wind vane shaft, rotating the wind vane slightly left and
right if necessary, until the end of the shaft is visible and protrudes slightly from the bottom
surface of the wind vane.
5. Secure the wind vane to the shaft by firmly tightening the wind vane set screw with the
Allen wrench provided.
Install cups onto
stainless steel shaft.
Tighten set screw
with Allen wrench.
 Loading...