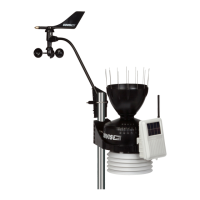
38
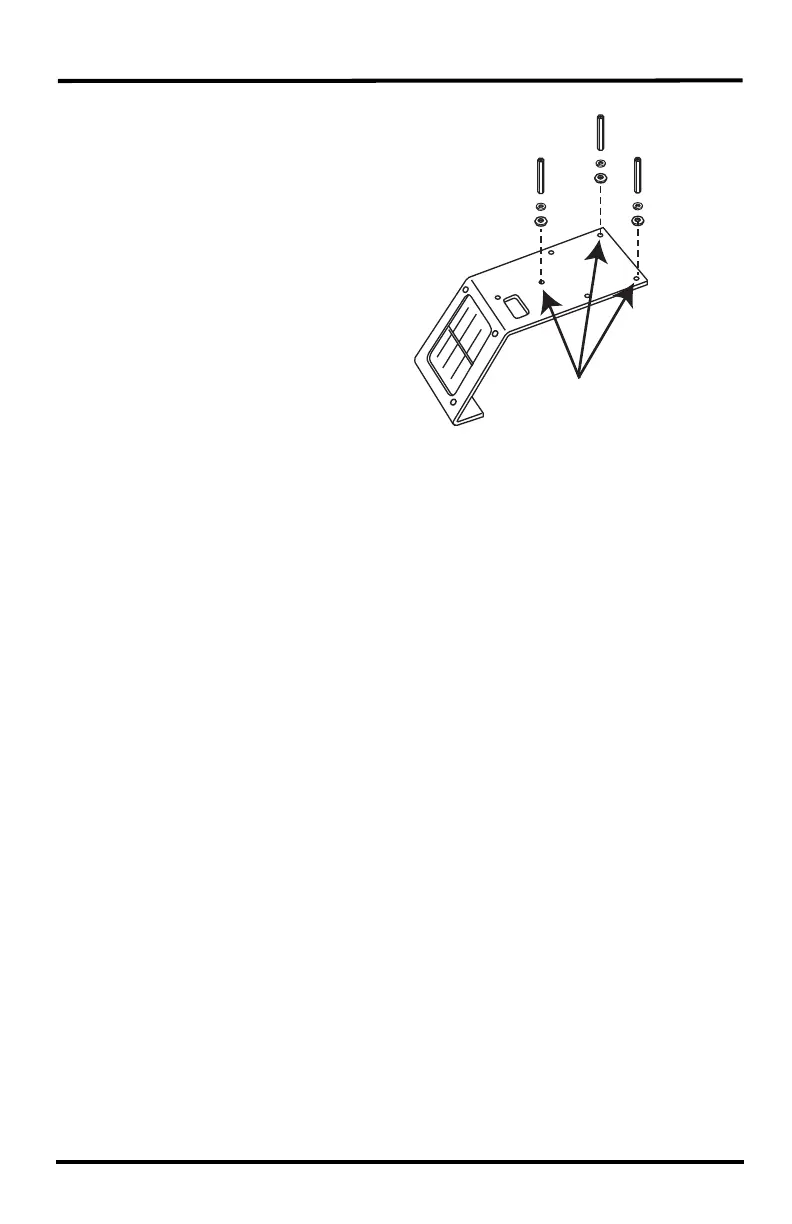
16.Replace the two cap plates.
(Note that the closed plate goes
on top.) Replace the solar
bracket and the threaded spacers,
with lock washers and flat
washers.
17.Align the threaded spacers with
the screws in the rain collector
base. Note that cables should
exit from the radiation shield
toward the mounting pole or
post. Screw the screws into the
threaded spacers.
18.Route the temperature/humidity
cable over the solar bracket and
back into the transmitter shelter.
Plug it back in, then replace the
foam insert snugly. Check other sensor cables to make sure they are plugged in
tightly. If you disconnected the door’s solar panel cable, plug it back in.
19.Replace the door.
USE THESE HOLES
Threaded
Spacer
Lock Washer
Flat Washer