9 ASSEMBLY OF PRODUCT
Checking the Wall
n Wall must be flat, straight and
have the sufficient bearing
capacity.
n Depth of drilling holes must
comply with the length of bolts.
n The nuts and dowels provided are
suitable for brick walls. For other
construction material (e.g. drywall,
plate, porous concrete), suitable
fixing dowels and nuts shall be
used.
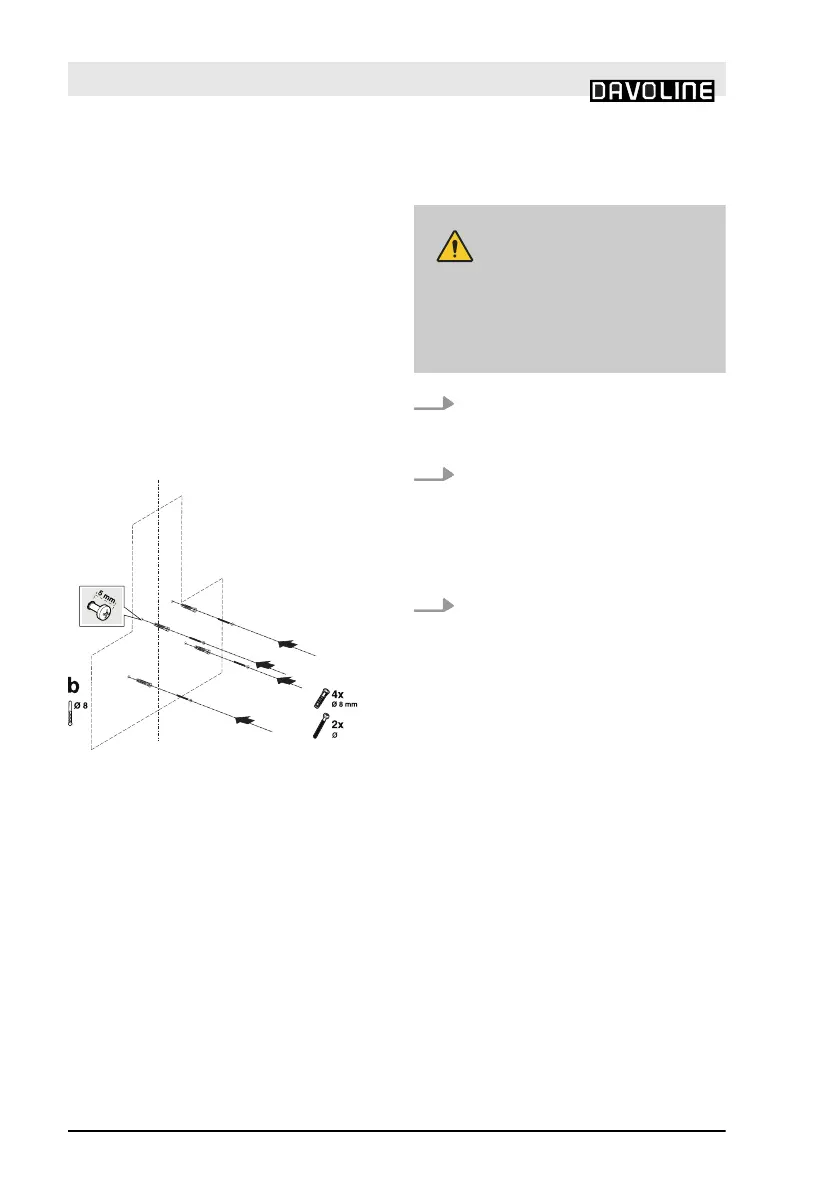
Fig. 12
DANGER!
Before drilling, ensure that
there are no power, gas or
water pipes in the close prox-
imity of the drilling locations.
1.
Draw a mid location line from
the ceiling perpendicular to the
lower edge of the hood (Fig. 12).
2.
To drill the suspension holes of
the flue, place the mounting
template on the surface where
the appliance will be mounted
on and mark the mounting holes
(Fig. 12/b).
3.
Drill the suspension holes with
Ø8mm drill and place the
dowels (Fig. 12/b).
2 piece 4,9x950 suspension
screw with a clearance of 5 mm
between the screw head and the
wall (Fig. 12/b).
Preparing the Device
n Open the filter cover.
n Open the metal oil filters
( ).
n If the air discharge pipe radius is
less than150mm, mount Ø150/120
mm flue adapter.
ASSEMBLY OF PRODUCT
12.08.2020
User Manual
20