COMPONENTES DE
INSTALACION
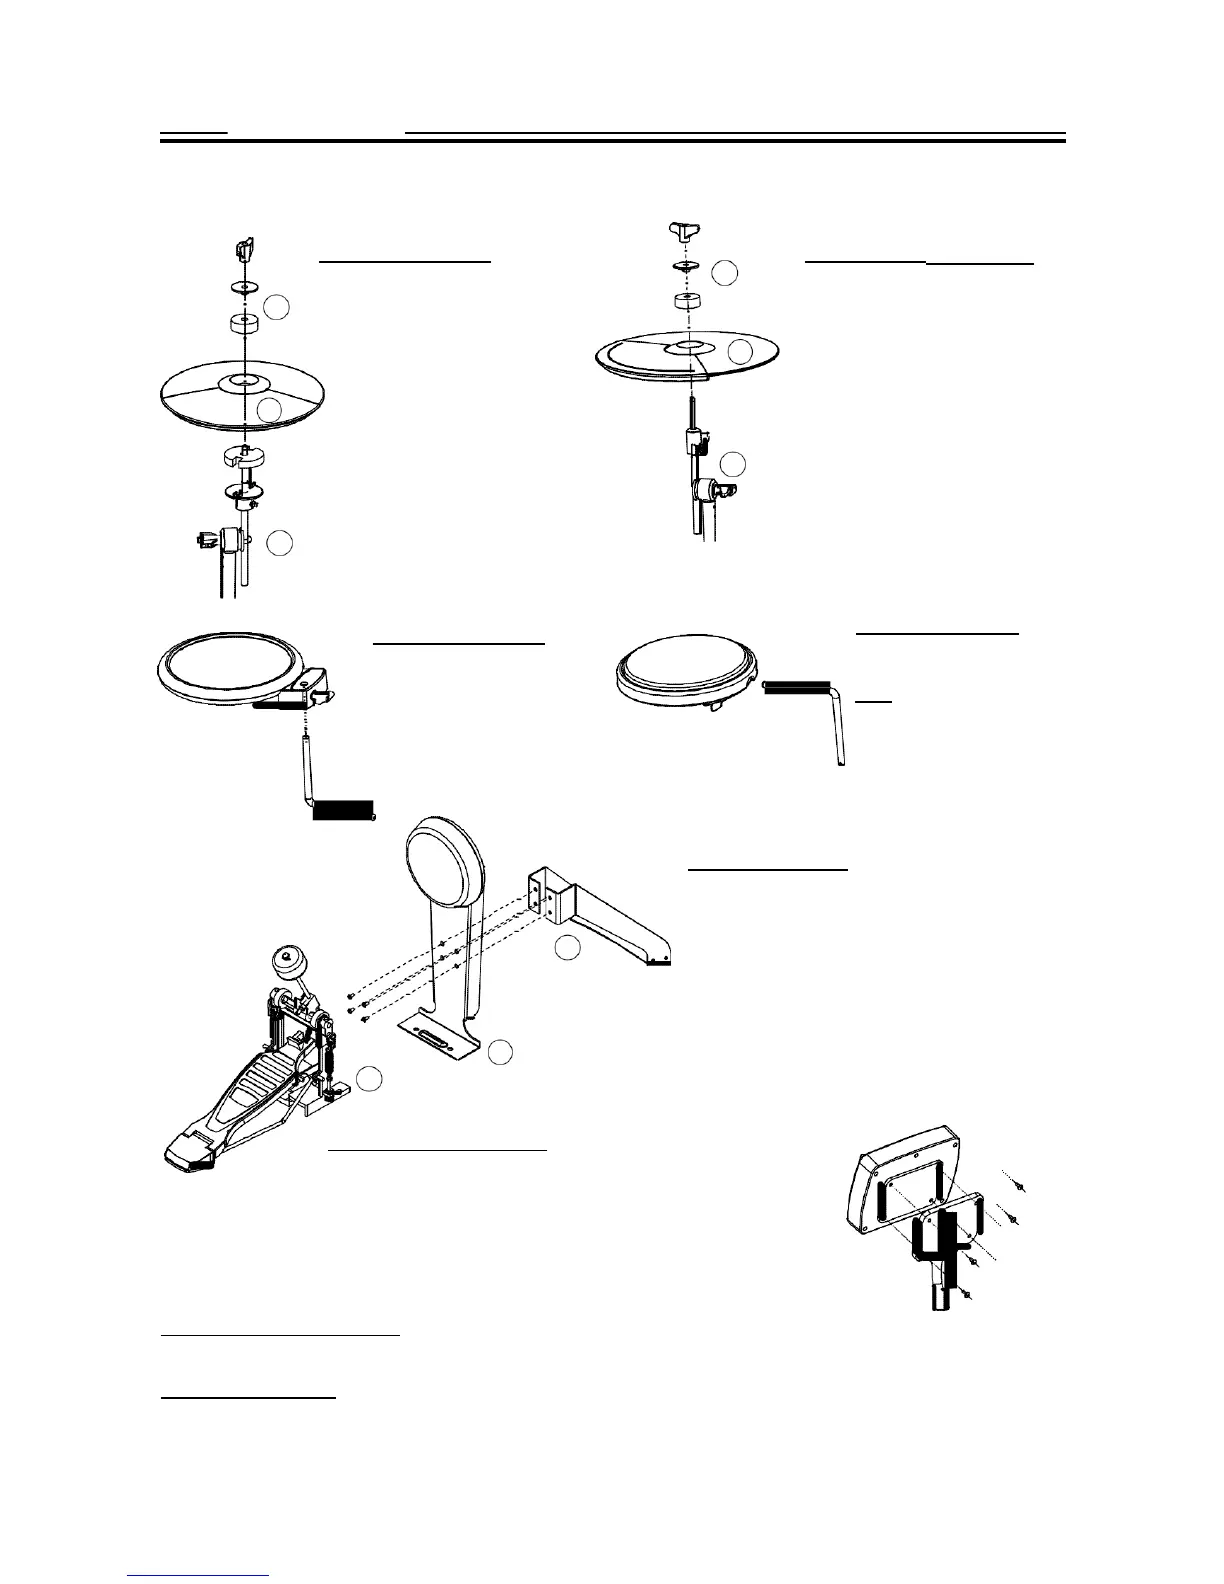
Instalación de Hi-Hat Instalación de
Crash y Ride
1
1.
Rem
ove the
win
g nut,
1
washer and felt pad
2. Put the Hi-Hat into the rod
along with parts removed in
step 1. Fasten the wing nut.
2
3.Adjust the angle and height
of
the rod before tightening
the
wing nut.
3
1. Remove the wing nut, washer
and felt pad
2
2. Put the cymbal pad into the
rod along with parts removed in
step 1. Fasten the wing nut
modertly to give the pad a little
bit wobbling like the real acous-
3 tic cymbal.
Note: Crash and Ride have dif-
ferent part numbers. Please re-
fer to indication on page 5.
3.Adjust the angle of the rod then tighten the wing nut.
Snare Installation
1. Insert the snare into the
L-Rod, then tighten the
wing nut.
2. Adjust the angle of the
L-Rod then tighten the
wing nut in the clamp.
Instalación del Tom
1. Insertar el tom en el L-Rod,
ajuste la tuerca mariposa.
Nota: Todos los toms usan el
mismo pad.
2. Ajustar el ángulo del L-Rod antes de
aprietar la tuerca mariposa en la
abrazadera.
Instalación del Kick
1. Align holes in the kick stand
2
with
these in the bracket
with screws.
1
then fasten them
2. Insert tongue of the kick stand into slot
of the
pedal
3
. Tighten the wing nut on
the pedal level to fix it.
Sound module Installation
1.
Align holes in supporting
board
with these
in
sound then tighten the wing nut.
Finalización de la instalación
Ajustar los brazos, abrazaderas y varillas a la mejor posición que desea para finalizar la instalación.
Conexión electrónica
Por favor, consulte el Capítulo MÓDULO DE SONIDO electrónico para la comunicación.
1- Retire la tuerca mariposa,
arandela y felpa del pad.
2- Ponga el Hi-Hat en la barra
junto con partes retiradas en
paso 1. Apriete la tuerca
mariposa.
3- Ajuste el ángulo y la altura
de la varilla antes de apretar la
tuerca mariposa.
1- Retire la tuerca de mariposa, la arandela
y almohadilla de fieltro
2- Coloque el pad de plato en la barra junto
con partes retiradas en
el paso 1. Fije la tuerca mariposa
suavemente para dar al pad un poco de
movimiento, como un platillo acústico real.
Nota: Crash y Ride tienen números de parte
diferentes. Vuelva a ver la indicación en la
página 5.
3- Ajuste el ángulo de la varilla y apriete la
tuerca de mariposa.
 Loading...