393
1
65
3
19
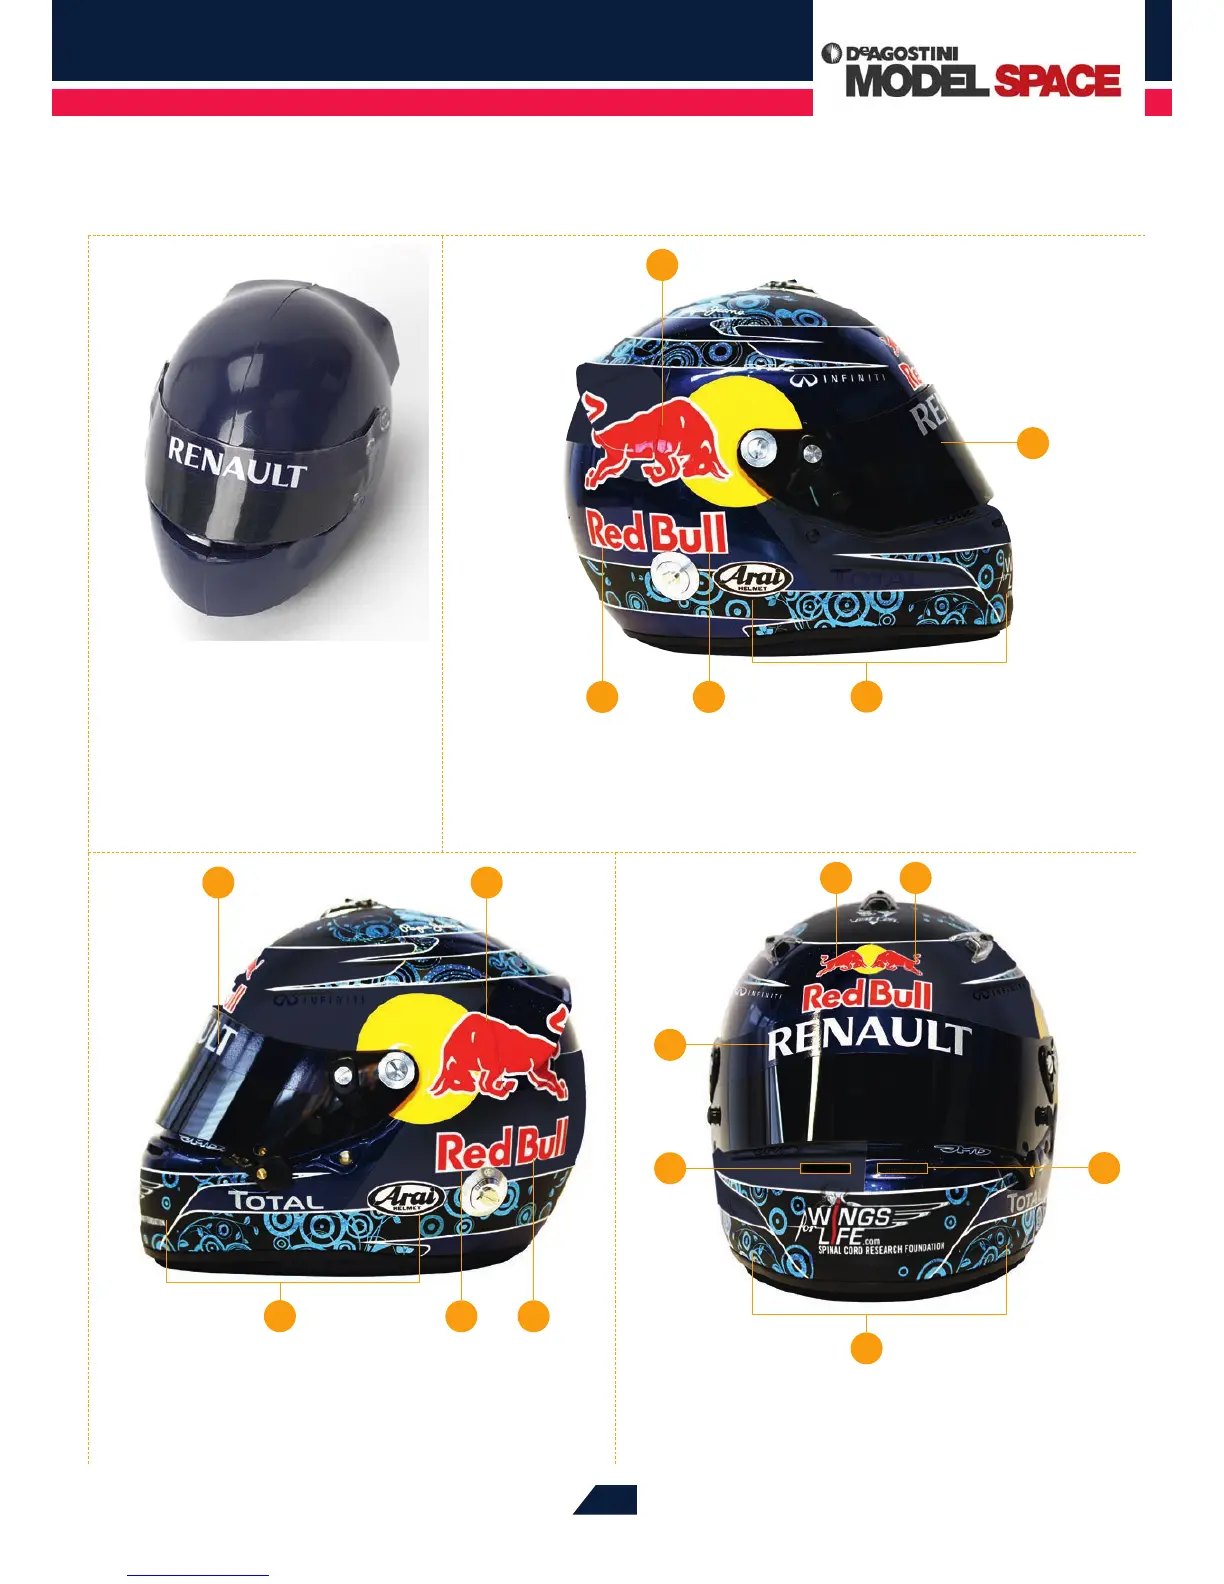
Do the same for stickers 2 and 4-6 to the left side of the
helmet.
5 6
2
1
20
The photo above shows the locations of stickers 7-9. Apply
these as you did for the other stickers, again making sure
no air bubbles or creases occur.
8 9
1
7
7
4
4
17
Your assembly should look like
this from the front.
18
Repeat the process described in Steps 13 to 17 to apply the stickers numbered
3-6, as shown above, to the right side of the helmet cover. Again, apply the
stickers very carefully to ensure no air bubbles or creases occur.
4