Page 8
Installing the hob
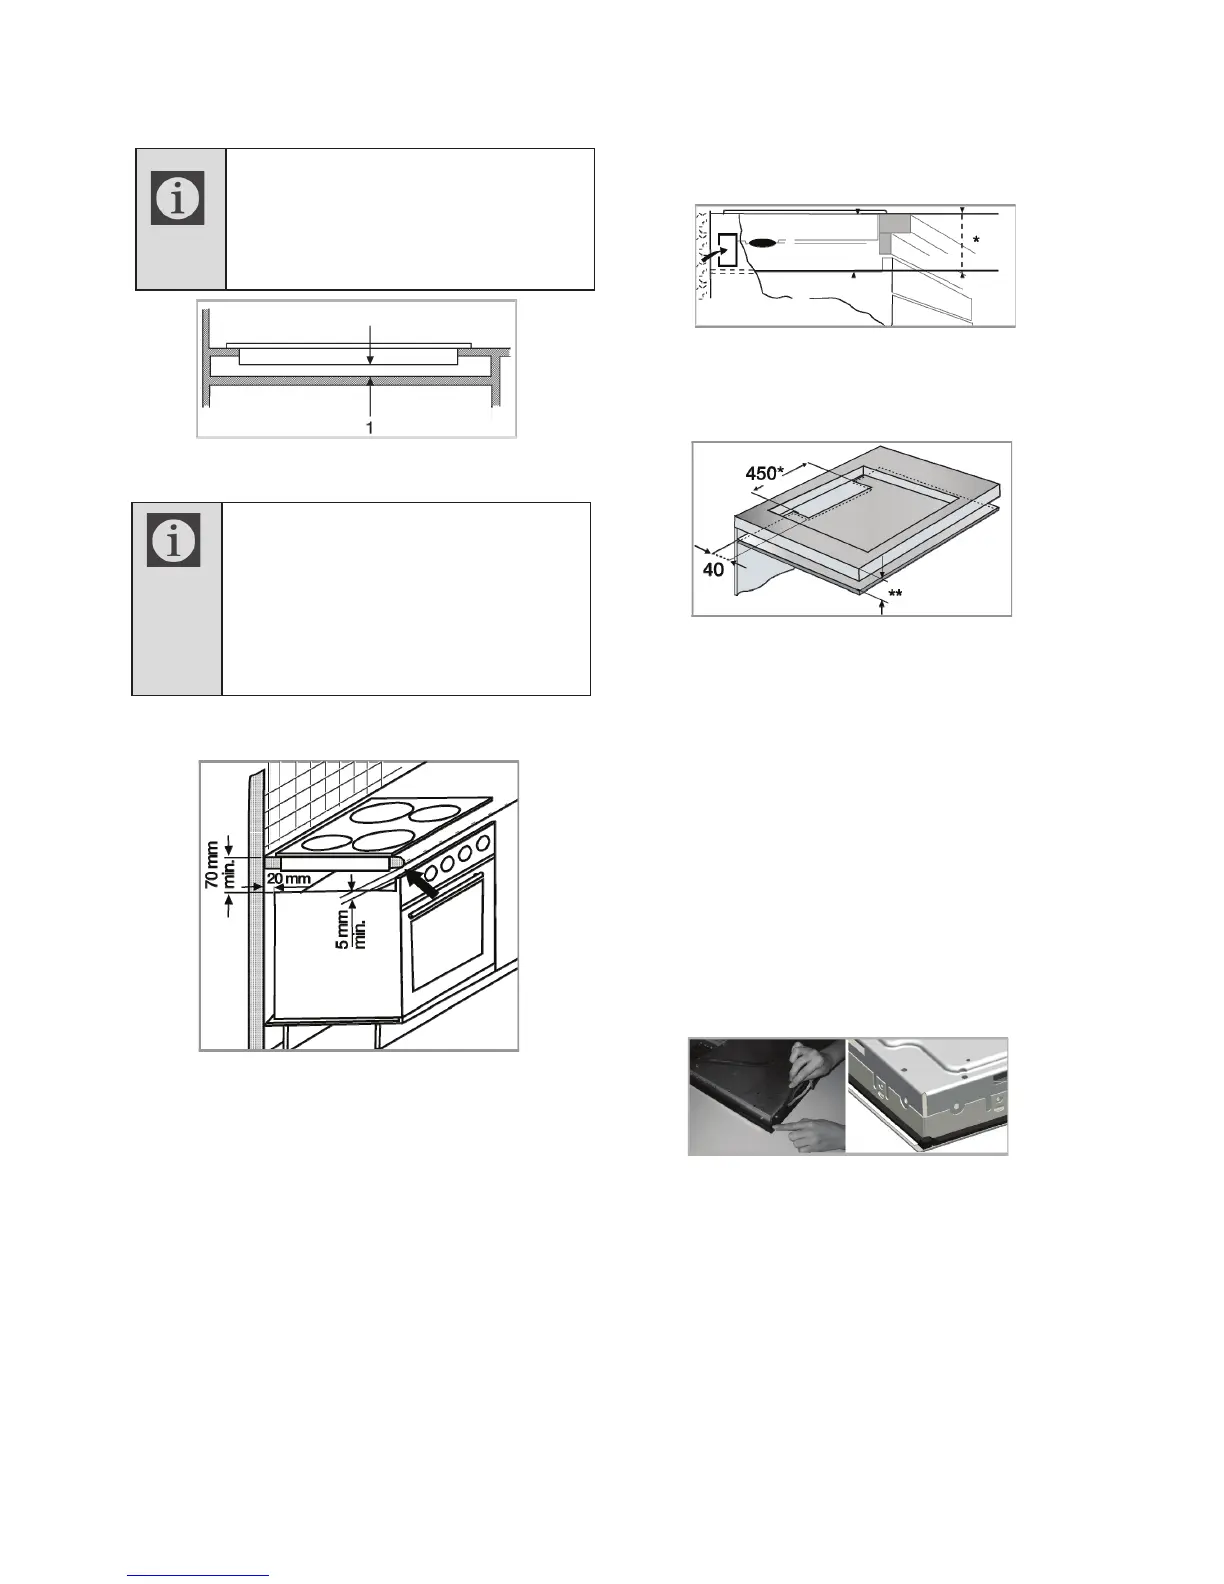
It is required to leave a ventilation opening of
minimum 180 cm
2
at the rear section of the
enclosure as illustrated in the following
figure.
x
min. 70 mm
If the board is below:
* min.
* min. 70 mm
During the installation of your induction hob,
place the hob parallel to the installation
surface. Apply the sealing gasket to the
parts of the hob contacting the counter as
described below in order to prevent any
liquid from penetrating between the product
and the counter.
1. Prepare the surface of the counter as
shown in the figure.
2. Apply the sealing gasket provided with the
product to the edges of the hob's lower
housing that come into contact with the
counter as illustrated in figure.
3. Center the product in the counter.
4. Using the installation clamps secure the
hob by fitting them through the holes on
the lower casing.
If it is possible to touch the bottom
of the hob once it has been
installed, then this exposed area
must be covered with a wooden
board.
When installing the hob onto a
cabinet, a shelf must be installed
in order to separate the cabinet
from the hob as illustrated in the
above figure. This is not required
when installing onto a built-in
oven.
1 Minimum of 30 mm
If the oven is below: