INSTALLATION
In order to capture all of the spray cone, install the shower tray 10cm from the wall: we
recommend recessed shower trays or sloping gutters. If a small, raised shower tray is installed, the
shower nozzle can be replaced with a grid (Ref. GR) to concentrate the jet.
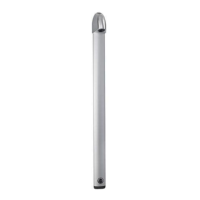
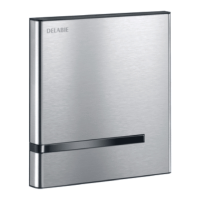
SPORTING shower panel (fig. A)
• Unscrew the 2 screws
4 using a Phillips screwdriver
and remove the end-cap
2
and the screw cap
3.
• Position the panel so that the shower diffuser
5
is 2.10m from the floor. Mark and drill the 2
holes
6
and the hole
7
. Fix the panel to the wall using the screws supplied (use rawl plugs that are
suitable for the wall type).
• Replace the end-cap
2
, tighten the 2 screws
4
and replace the screw cap
3
.
• Install the supplied filter 8 to protect the non-return valve 9 and connect to the mixed water supply at
37°C
(recommended max. 41°C for the UK and Ireland).
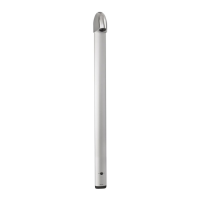
Exposed, wall-mounted SPORTING shower (fig. B)
• Position the shower diffuser 2.10m from the floor. If necessary, insert the white plastic wedge
between the shower head and the wall to equalise the tile thickness.
• Assemble the two parts of the shower column
10
with the push-button starter
1
and the collar
11
. Put the white plastic tubes
12
into the column.
• Insert the column into the hole beneath the shower diffuser
5
. Mark, drill then fix the column
using the 2 chrome-plated screws provided (use rawl plugs that are suitable for the wall type).
• Position the collar
11
in the middle of the column to cover the joint. Mark, drill then fix the
collar
11
and the push-button starter
1
using the 4 screws provided (use rawl plugs that are
suitable for the type of wall).
•
Install the filter 8 supplied to protect the non-return valve 9 and connect to the mixed water supply at
37°C
(recommended max. 41°C for the UK and Ireland). Ensure that all the connections are
waterproof.
Recessed, wall-mounted SPORTING shower (fig. C)
• Recess the connection pipe and connectors
13-14
in the wall so that the shower diffuser is
2.10m from the floor. Take care to maintain the recessing dimensions of the unions (0-9 mm
from the exterior wall surface
fig. D
).
• Remove the 2 plastic protective caps
15 (fig. D)
.
• Screw the shower head
16
on to the upper connection screw
17
which is situated inside the
recessed upper union
14
.
• Screw the push-button starter
1 on to the lower connection screw 18
which is situated inside the
recessed lower union
14
.
• Mark, drill then fix the shower head
16
and the push-button starter
1
using the screws provided
(use rawl plugs that are suitable for the wall type).
• Install the supplied filter
8 to protect the non-return valve 9 and connect to the mixed water supply
at 37°C
(recommended max. 41°C for the UK and Ireland). Ensure that the all connections are
waterproof.
OPERATION
• Press the push-button starter 1 (figs. A, B, C, E) to open the valve.
• Automatic shut-off after ~30 seconds (+5/-10 according to the European standard EN 816).
GB