Getting Started 15
3
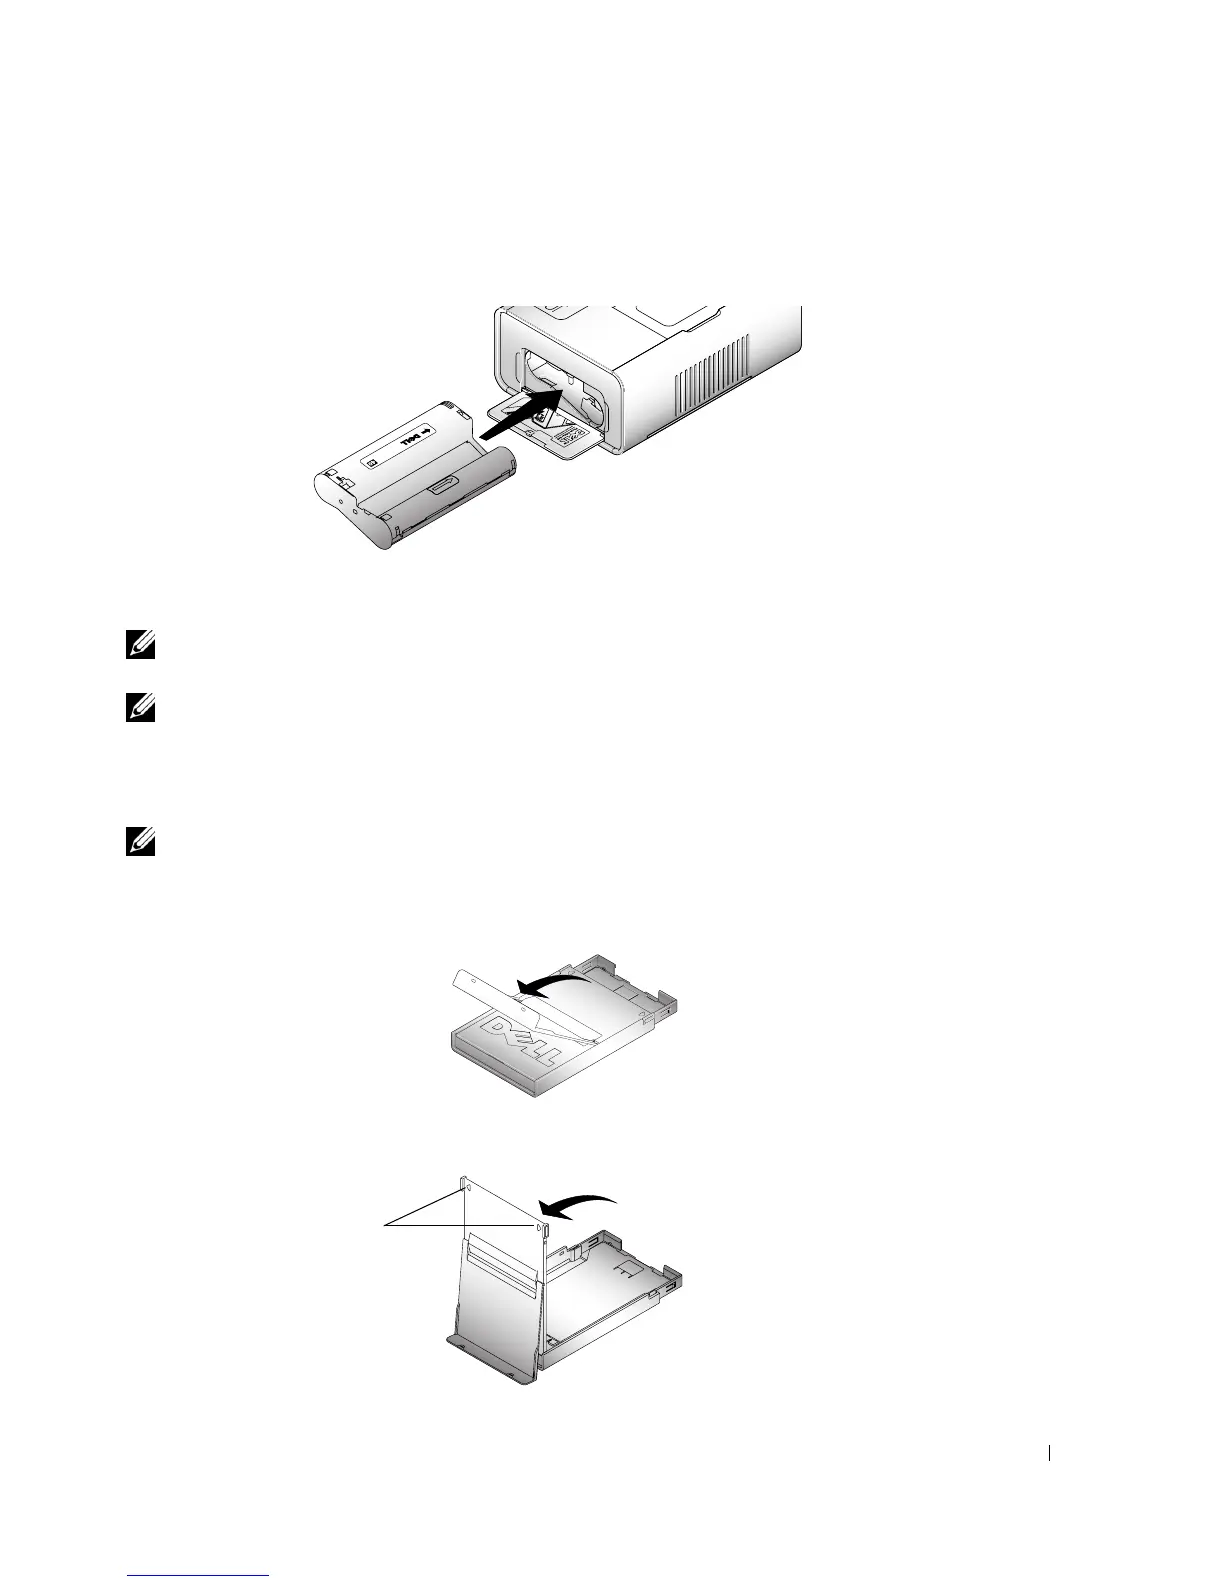
Slide the photo cartridge in, label side up, with the arrow pointing toward the printer. Push
the photo cartridge until it clicks into place.
4
Close the photo cartridge door.
5
To remove the photo cartridge, push up on the green lever and slide the photo cartridge out.
NOTE: The photo cartridge may lock in place if there is a paper jam. Do not attempt to remove the photo
cartridge without first clearing the paper jam.
NOTE: Warning messages and reorder instructions are displayed on the LCD when the photo cartridge
is low. When there are 5 or fewer prints remaining, the error light blinks
Loading the Photo Paper
NOTE: Use only the perforated photo paper from a Dell Photo Print Pack. Do not use inkjet paper or any
other photo paper. Do not remove perforated tabs from the photo paper until a photo is printed.
1
If the paper tray is in the printer, pull it out.
2
Open the top paper tray cover.
3
Open the bottom paper tray cover by grasping the sides as indicated by the arrows. Do not
insert your fingers under the cover to open it.
Arrows
 Loading...