Removing the 2.5–inch drive from the drive bracket
Steps
1. Follow the procedure in Before Working Inside Your Computer.
2. Remove the:
a. cover
b. 2.5–inch drive assembly
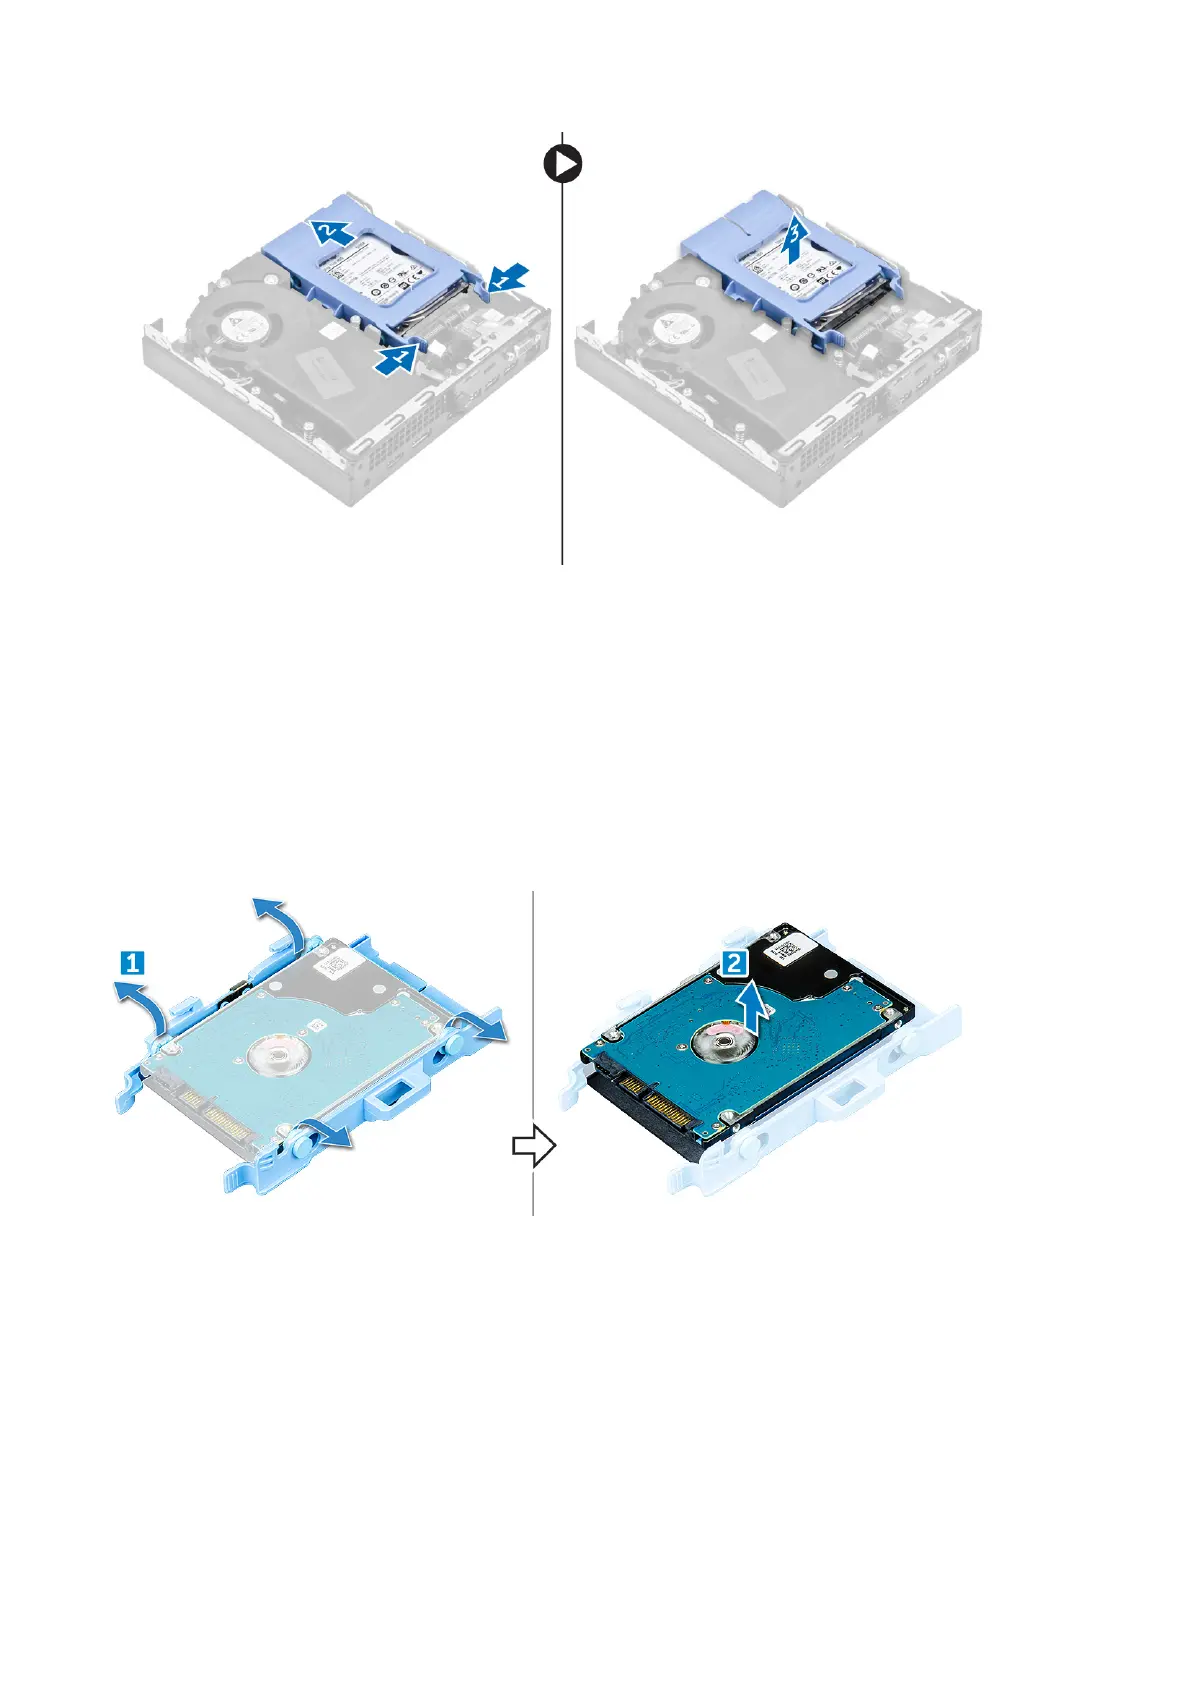
3. To remove the drive bracket:
a. Pull one side of the drive bracket to disengage the pins on the bracket from the slots on the drive [1] and lift the drive
[2].
Installing the drive into the drive bracket
Steps
1. Align and insert the pins on the drive bracket with the slots on one side of the drive.
2. Flex the other side of the drive bracket, and align and insert the pins on the bracket into the drive.
3. Install the:
a. 2.5–inch drive assembly
b. cover
4. Follow the procedure in After working inside your computer.
14
Removing and installing components