Figure 25 B13 sliding rail assembly - 2U systems (continued)
3. screw (4)
4. washer (4)
Install the rails
About this task
The rails are labeled left and right, and cannot be interchanged. The front side of each rail is labeled Left Front or
Right Front when viewed from the cabinet front.
Procedure
1. Determine where to mount the system, and use masking tape or a felt-tip pen to mark the location at the front
and back of the cabinet.
Note: Install the left rail assembly first.
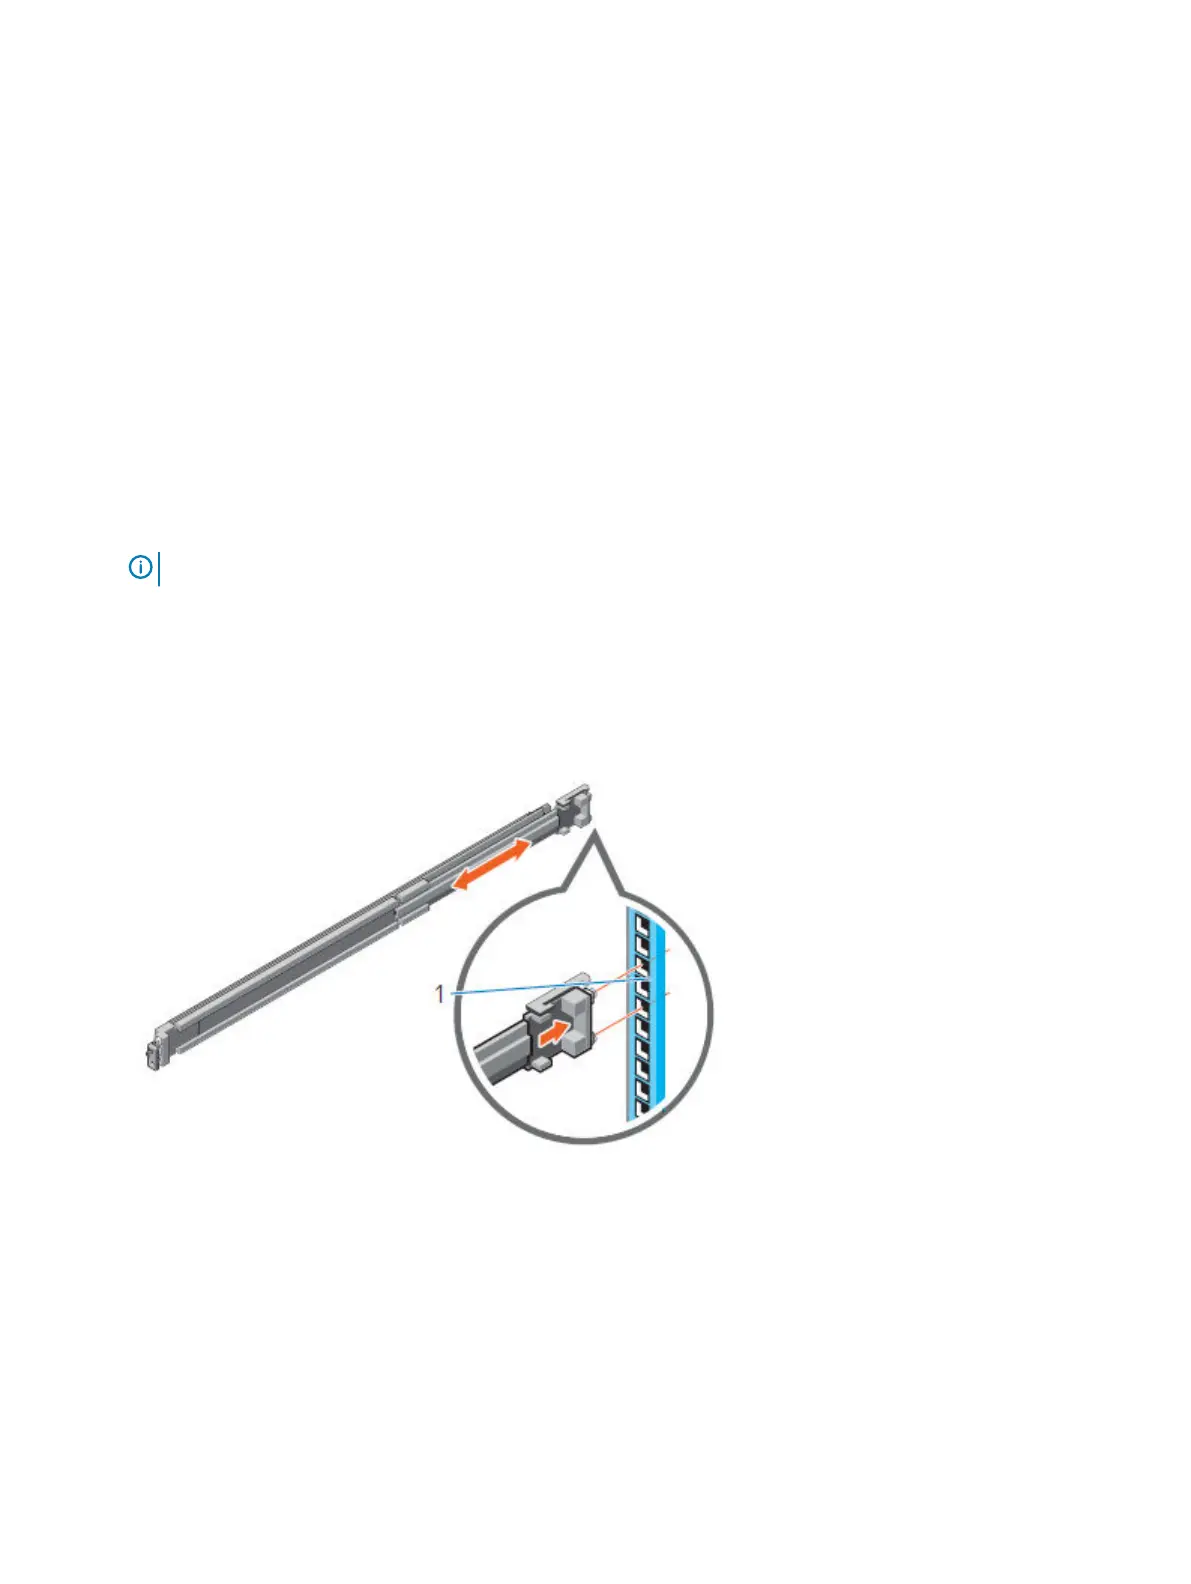
2. Fully extend the rear sliding bracket of the rail.
3. Position the rail end piece labeled Left Front facing inward and orient the rear end piece to align with the holes
on the rear cabinet flanges.
4. Push the rail straight toward the rear of the rack until the latch locks in place.
Figure 26
Installing the rear end of the rail
5. For the front end piece, rotate the latch outward and pull the rail forward until the pins slide into the flange, and
release the latch to secure the rail in place.
R740XD Configuration Equipment Installation
Dell EMC VxFlex Ready Node Server Installation Guide 61
 Loading...