PS6210 Hardware Owner's Manual 2 Maintaining Drives
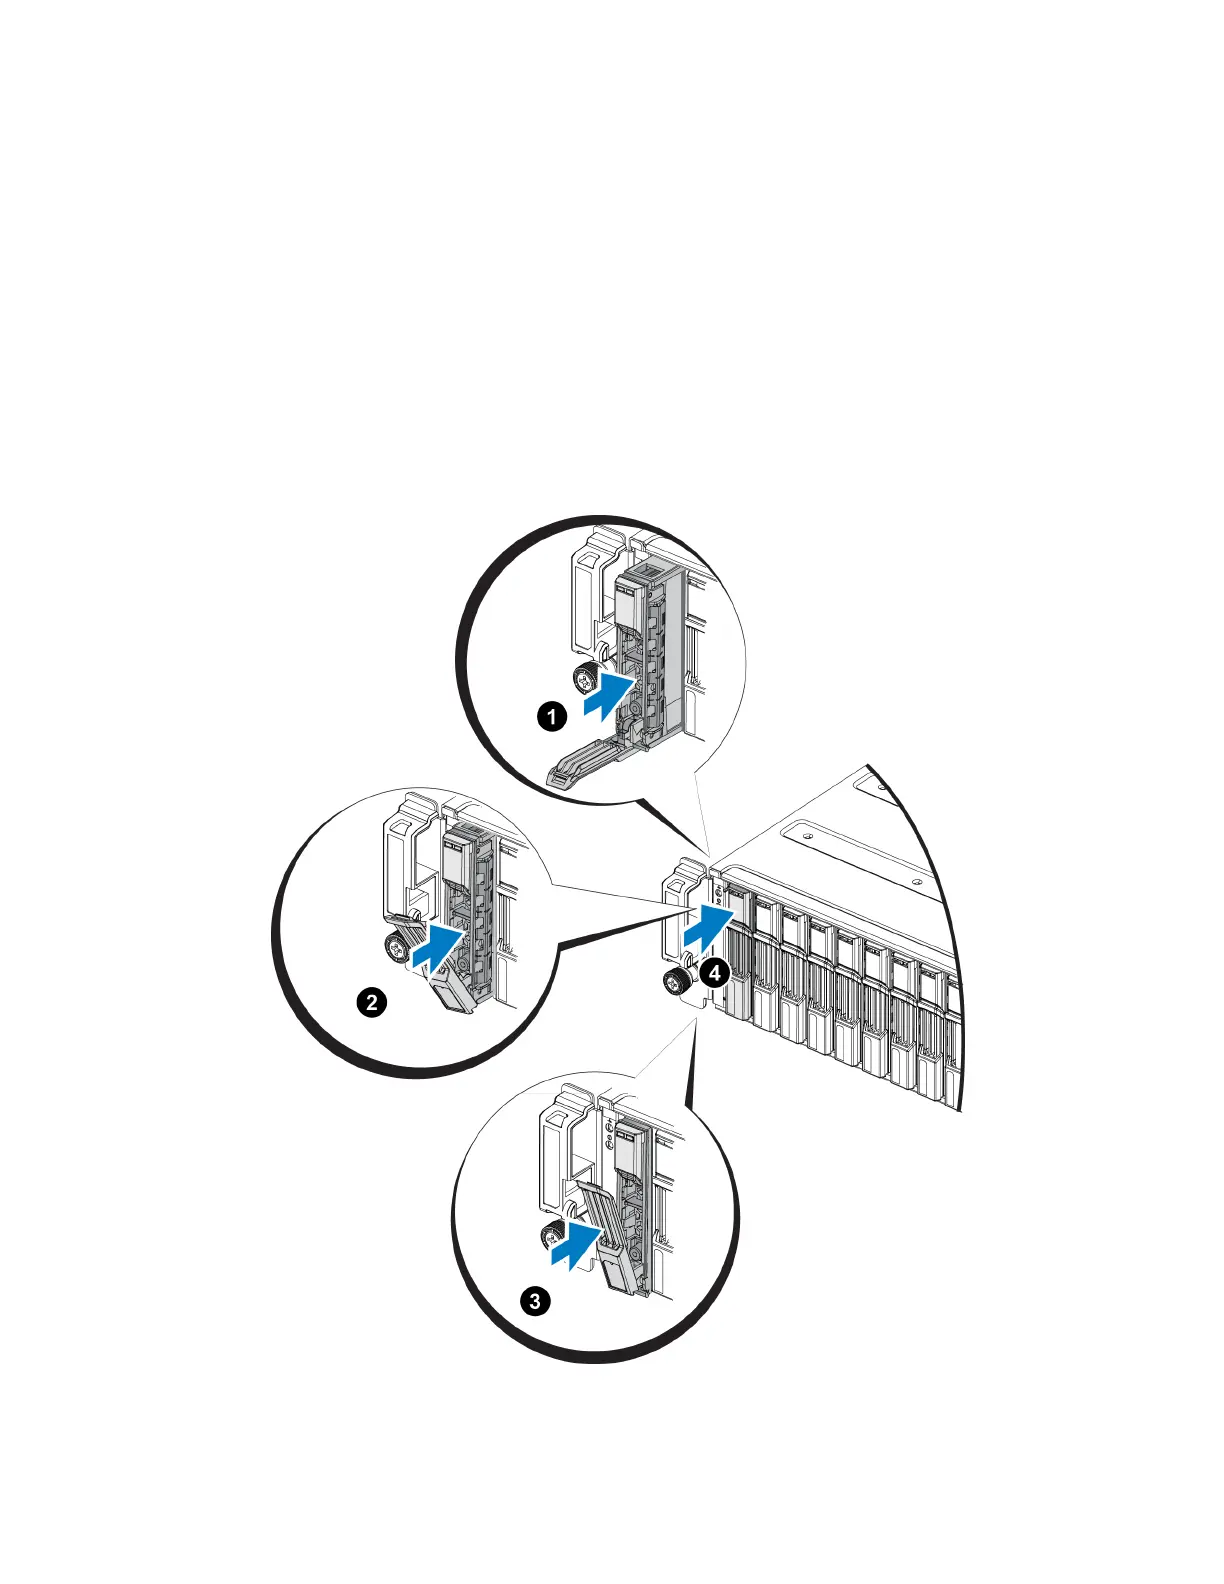
Installing a 2.5-inch Drive
The 2.5-inch drives are installed vertically, with the drive release latch on the top and the drive label on
the bottom.
1. Wear electrostatic protection when handling a drive. See Protecting Hardware on page 1.
2. Open the drive release latch.
3. Hold the drive by the carrier and slide the drive most of the way into a slot (callout 1 in Figure 11).
4. Push the drive completely into the slot (callout 2). The drive handle will begin to close onto the
drive (callout 3).
5. Push in the handle until you hear a click (callout 4).
Figure 11: Installing a 2.5-inch Drive
Verify that the new drive is operational by examining the LEDs on the front panel, as described in
Interpreting Drive LEDs on page 7. In addition, examine the GUI Member Disks window and the CLI
member select show disks command output.
11