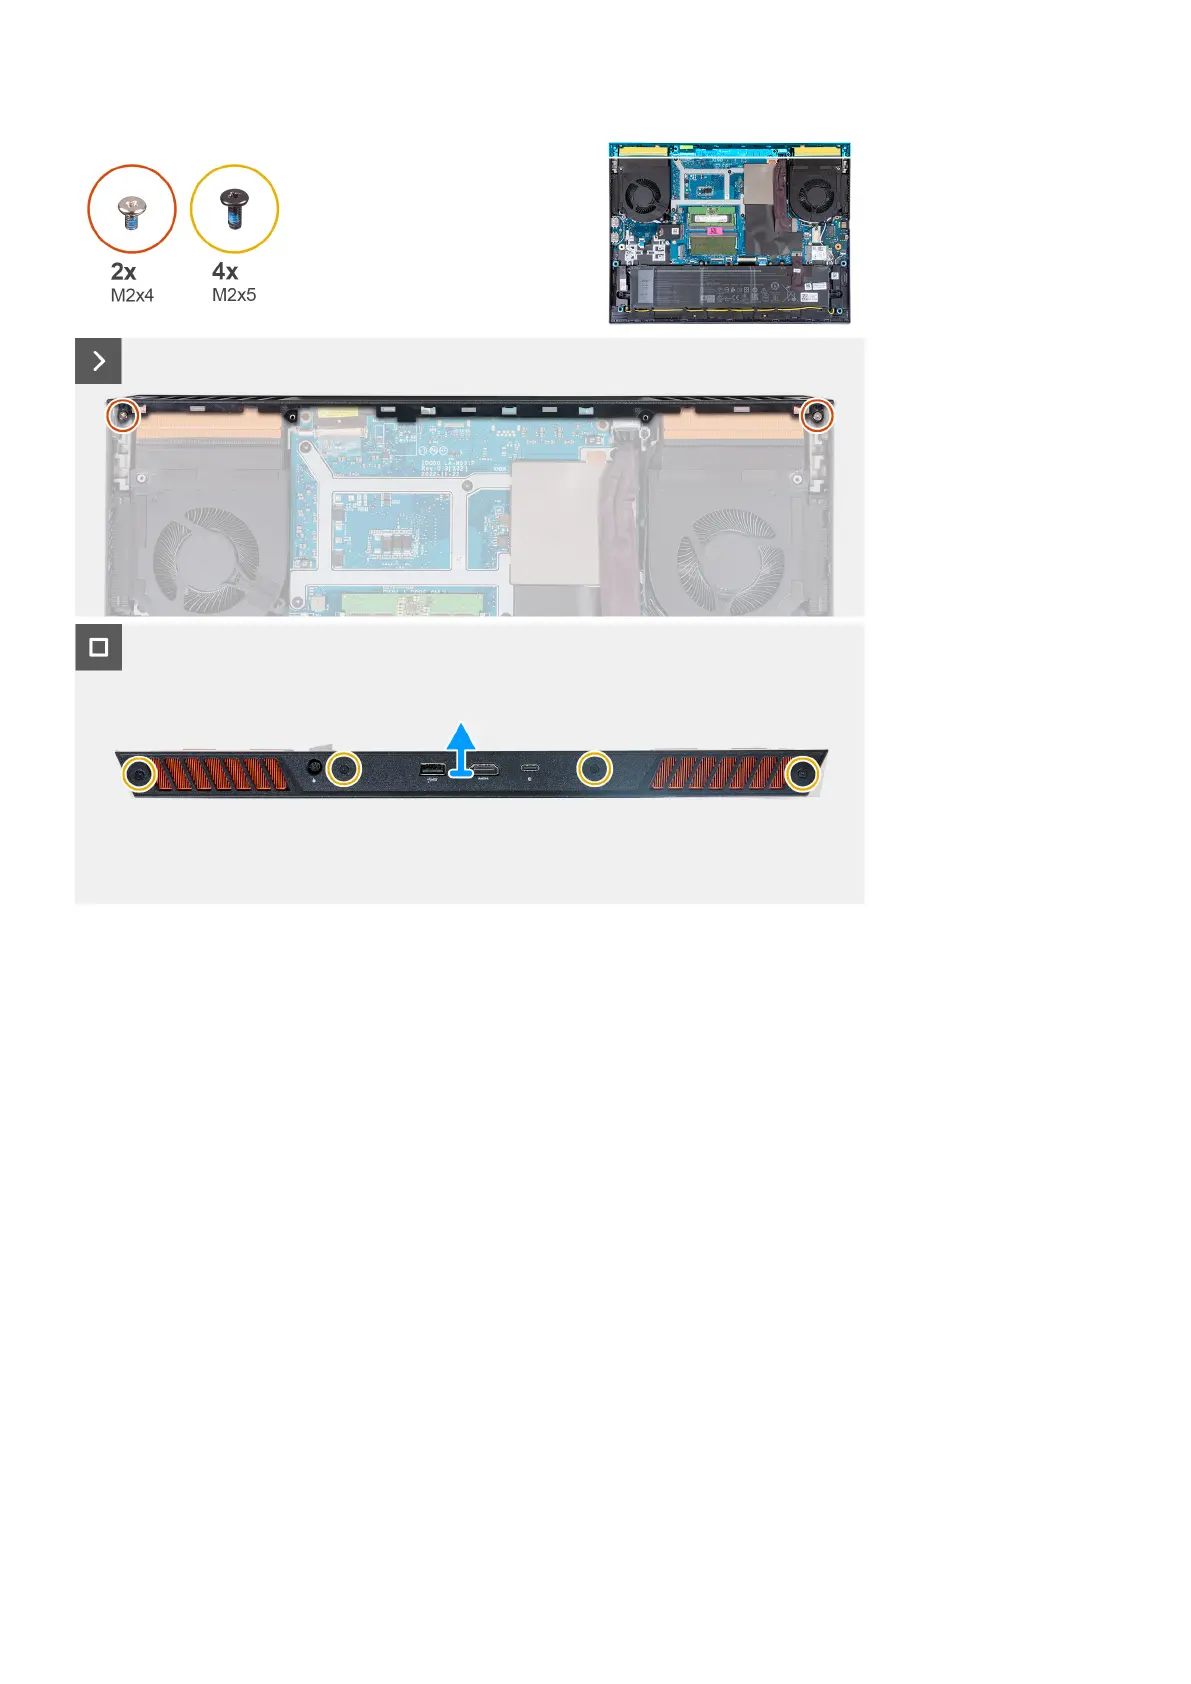
Steps
1. Remove the two screws (M2x4) that secure the rear cover to the system board.
2. Remove the four screws (M2x5) that secure the rear cover to the palm-rest and keyboard assembly.
3. Turn the laptop over and grip both edges of the laptop, with the thumbs placed at the bottom edge of the rear cover, near
the air vents.
4. Use both thumbs to push the rear cover away from cooling fans, and lift the rear cover off the palm-rest and keyboard
assembly.
Installing the rear cover
Prerequisites
If you are replacing a component, remove the existing component before performing the installation procedure.
About this task
The following image indicates the location of the rear cover and provides a visual representation of the installation procedure.
50
Removing and installing Customer Replaceable Units (CRUs)
 Loading...