9. Remove the memory module.
10. Remove the speakers.
11. Remove the power adapter port.
12. Remove the system board.
NOTE: The system board can be removed as an assembly with the fan and heat-sink assembly, ethernet and audio
board, and USB board attached.
13. Remove the keyboard-controller board, if applicable.
14. Remove the power-button assembly.
About this task
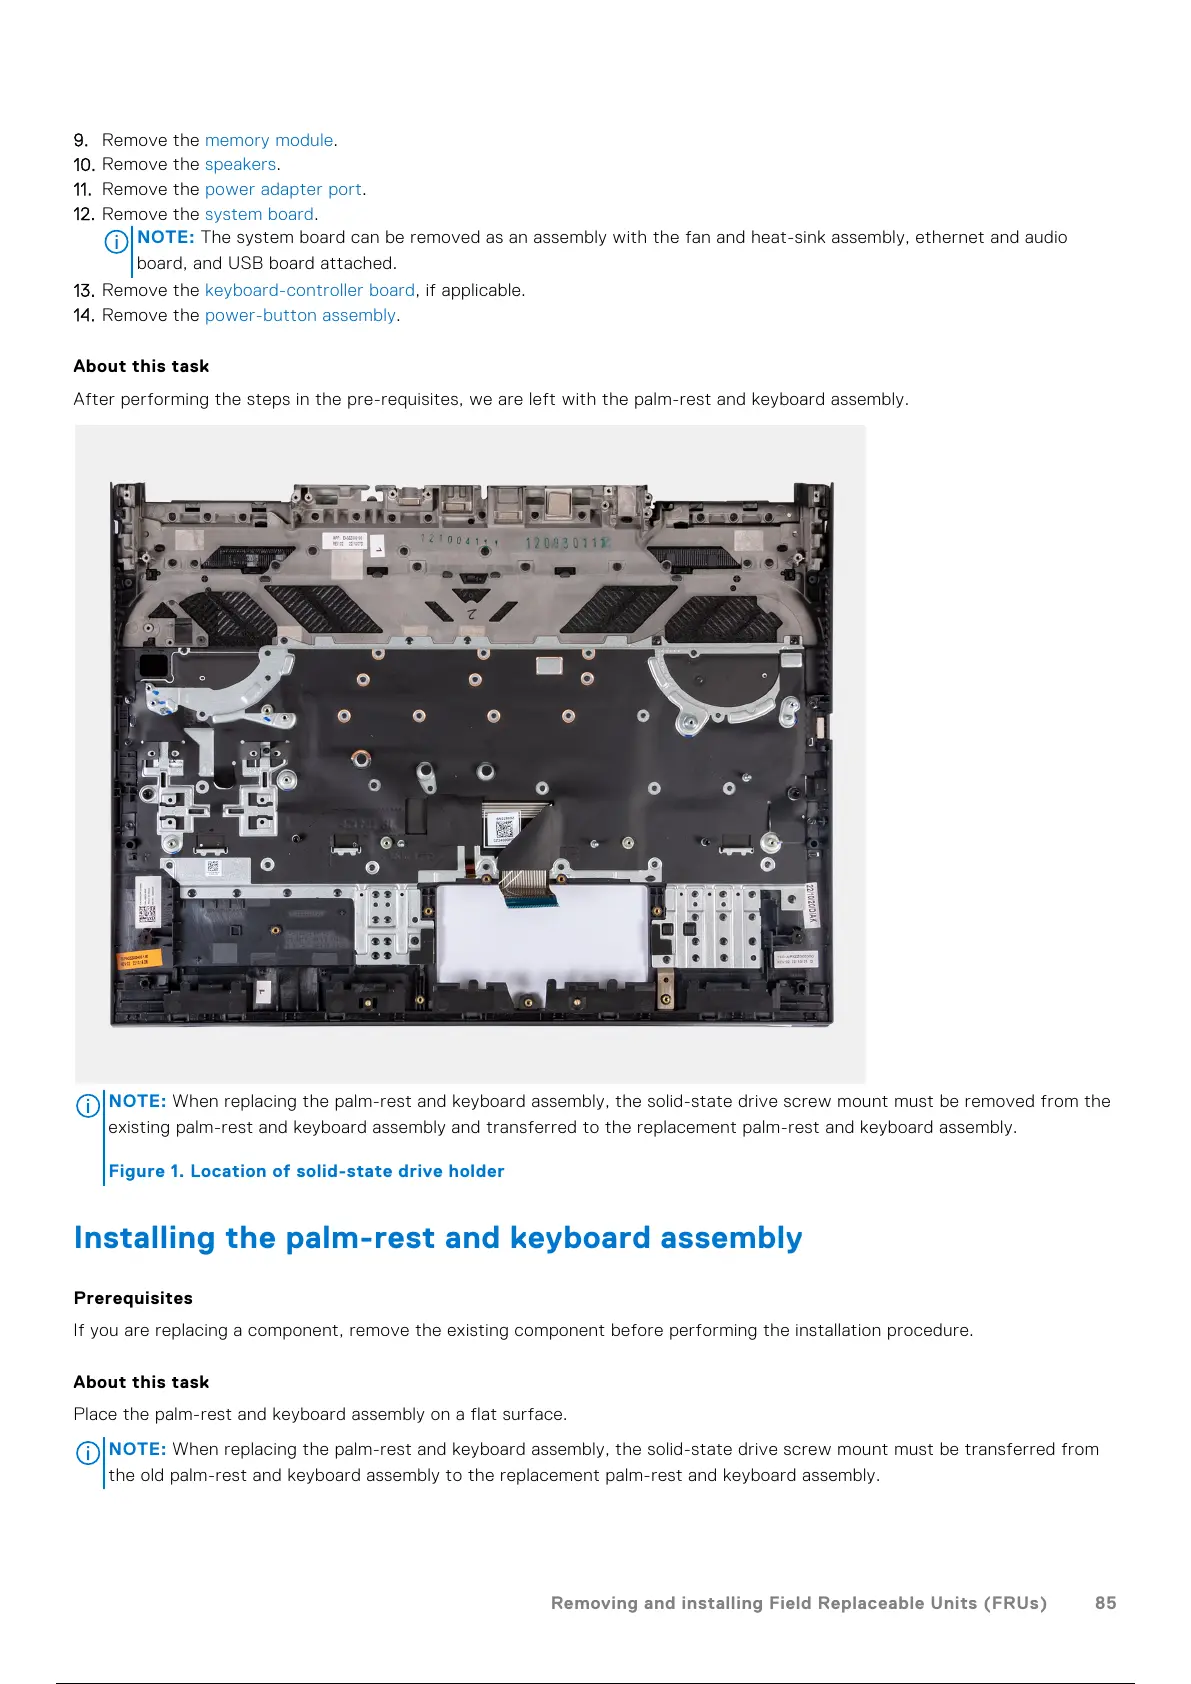
After performing the steps in the pre-requisites, we are left with the palm-rest and keyboard assembly.
NOTE: When replacing the palm-rest and keyboard assembly, the solid-state drive screw mount must be removed from the
existing palm-rest and keyboard assembly and transferred to the replacement palm-rest and keyboard assembly.
Figure 1. Location of solid-state drive holder
Installing the palm-rest and keyboard assembly
Prerequisites
If you are replacing a component, remove the existing component before performing the installation procedure.
About this task
Place the palm-rest and keyboard assembly on a flat surface.
NOTE:
When replacing the palm-rest and keyboard assembly, the solid-state drive screw mount must be transferred from
the old palm-rest and keyboard assembly to the replacement palm-rest and keyboard assembly.
Removing and installing Field Replaceable Units (FRUs) 85
86 / 111 85 / 109 86 / 111