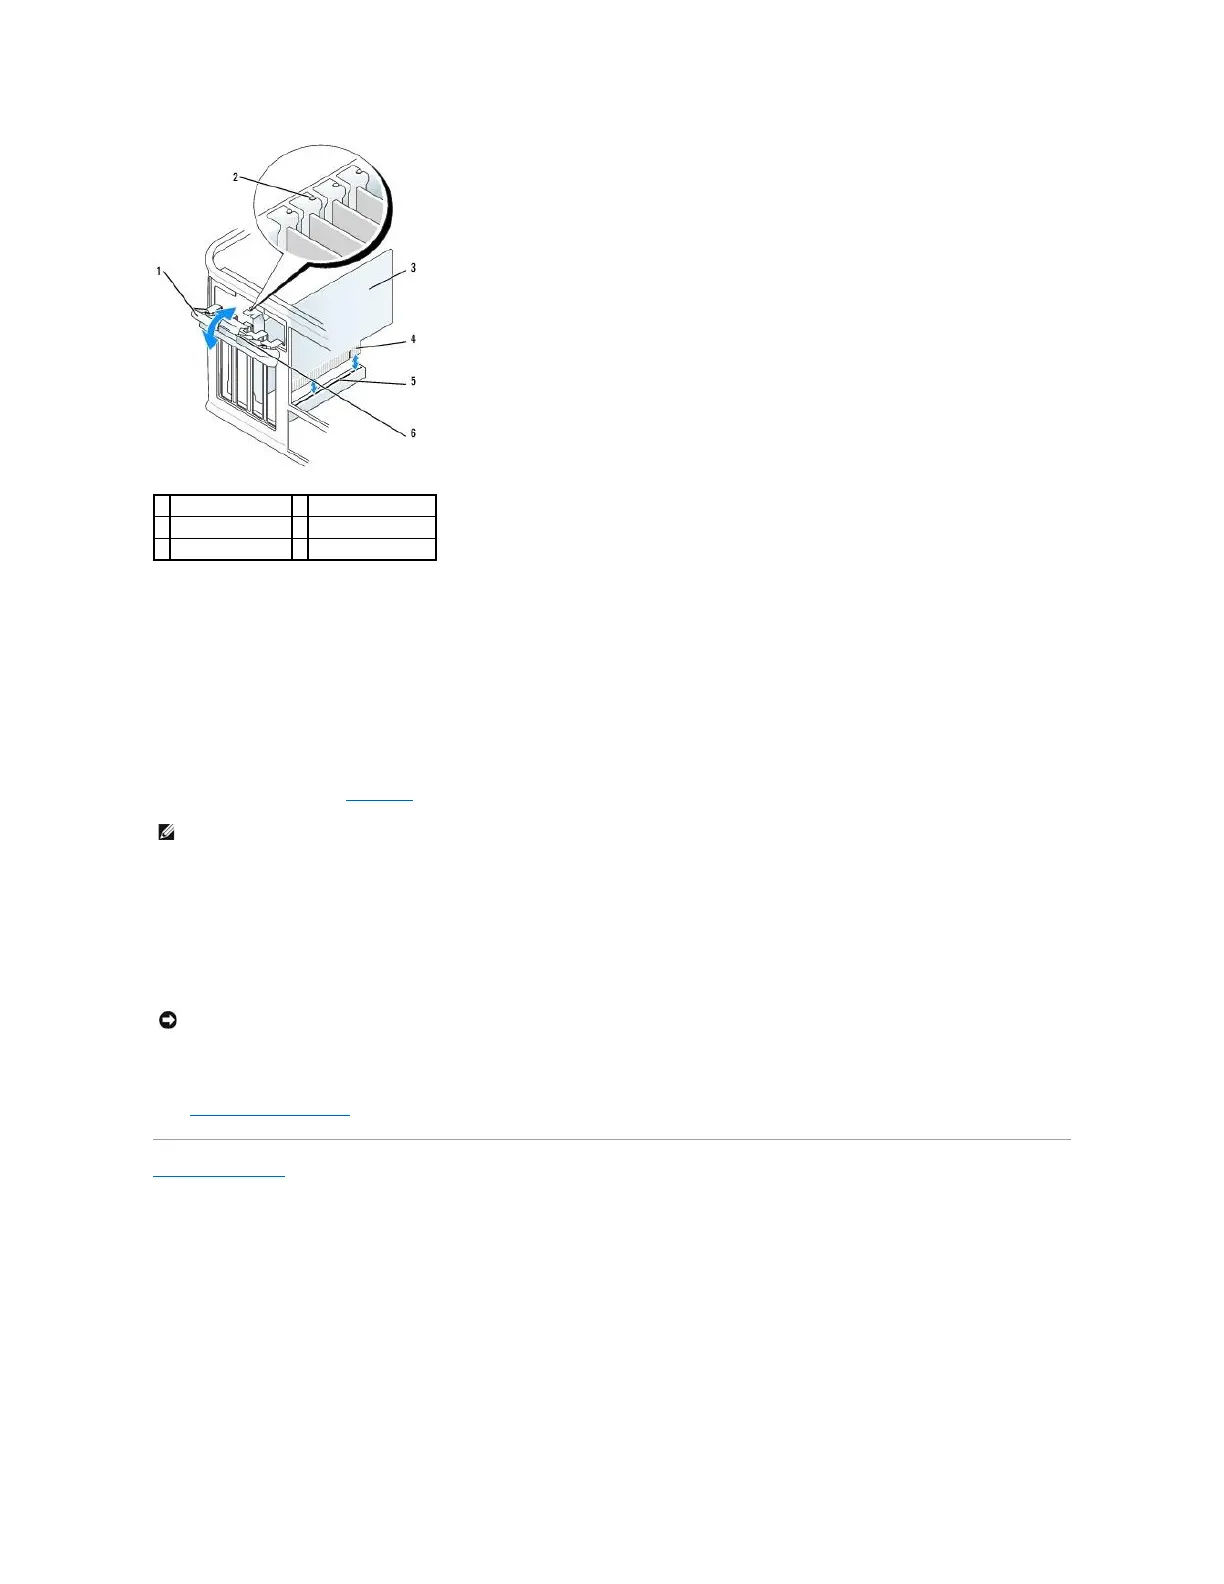
2. Gently push the release tab on the card retention latch from the inside to pivot the latch open. Because the latch is captive, it will remain in the open
position.
3. Open the card retention mechanism that secures the card in place from the top:
a. Place your thumb on the top of the card retention mechanism and grip the bottom of the retention mechanism with your fingers.
b. With your free hand, gently squeeze the sides of the card retention mechanism to release it from the tab slots holding it in place.
c. Pivot the card retention mechanism upward to release it from the two tab slots.
4. If you are removing the card permanently, install a filler bracket in the empty card-slot opening.
If you need a filler bracket, contact Dell.
5. Before you replace and lower the card retention mechanism, ensure that:
l The tops of all cards and filler brackets are flush with the alignment bar.
l The notch in the top of the card or filler bracket fits around the alignment guide.
6. Gently press down on the card retention mechanism to secure the adapter bracket in place.
7. Secure the card(s) by closing the card retention latch and snapping it into place.
8. Replace the computer cover.
Back to Contents Page
NOTE: Installing filler brackets over empty card-slot openings is necessary to maintain FCC certification of the computer. The brackets also keep dust
and dirt out of your computer.