Next steps
1. Install the power-button board.
2. Install the heat sink.
3. Install the left fan.
4. Install the base cover.
5. Follow the procedure in After working inside your computer.
System board
Removing the system board
Prerequisites
1. Follow the procedure in Before working inside your computer.
NOTE: Ensure that your computer is in Service Mode. For more information see, step 6 in Before working inside your
computer.
2. Remove the base cover.
3. Remove the memory module.
4. Remove the M.2 2230 solid-state drive or M.2 2280 solid-state drive, whichever applicable.
5. Remove the wireless card.
6. Remove the heat sink.
7. Remove the right fan.
About this task
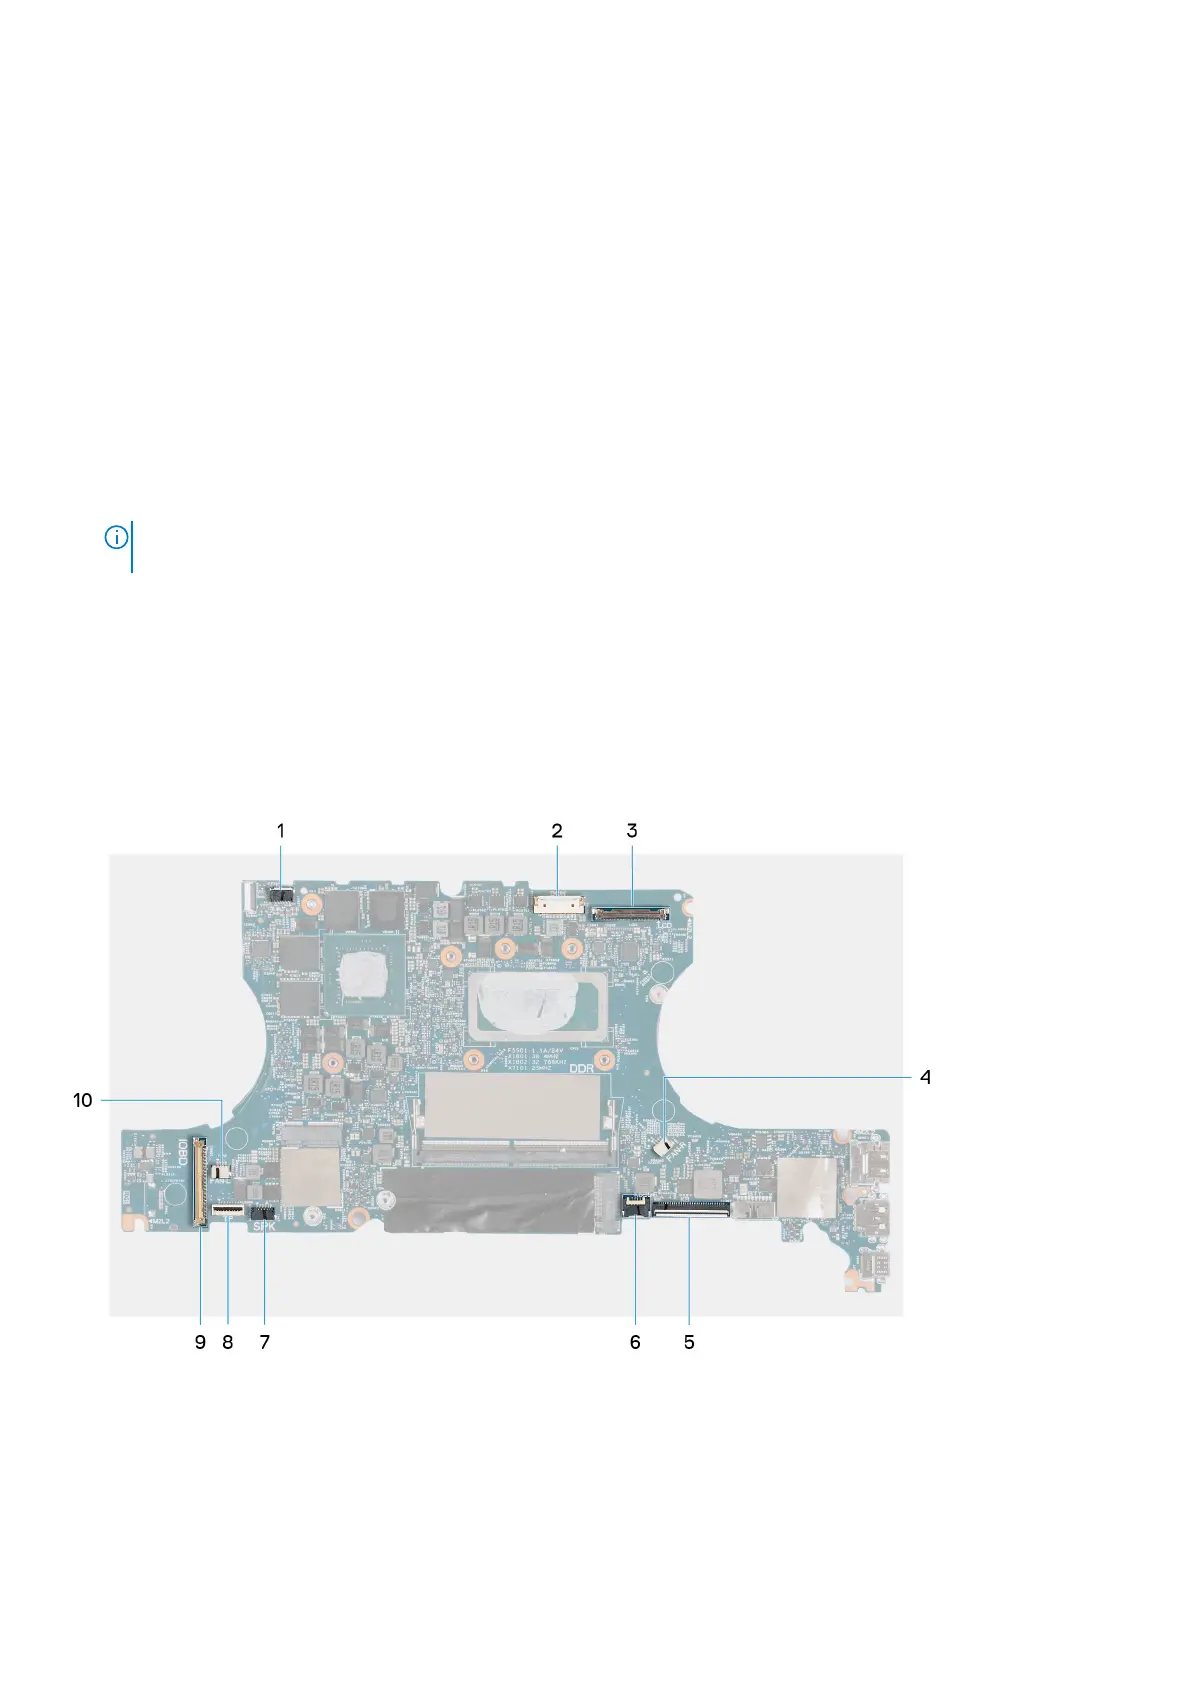
The following image indicates the connectors on your system board.
1. Speaker (tweeters) cable connector
2. Power-cable connector
3. Display-cable connector
4. Right fan cable connector
5. Keyboard-cable connector
6. Keyboard-backlight cable connector
56
Removing and installing components