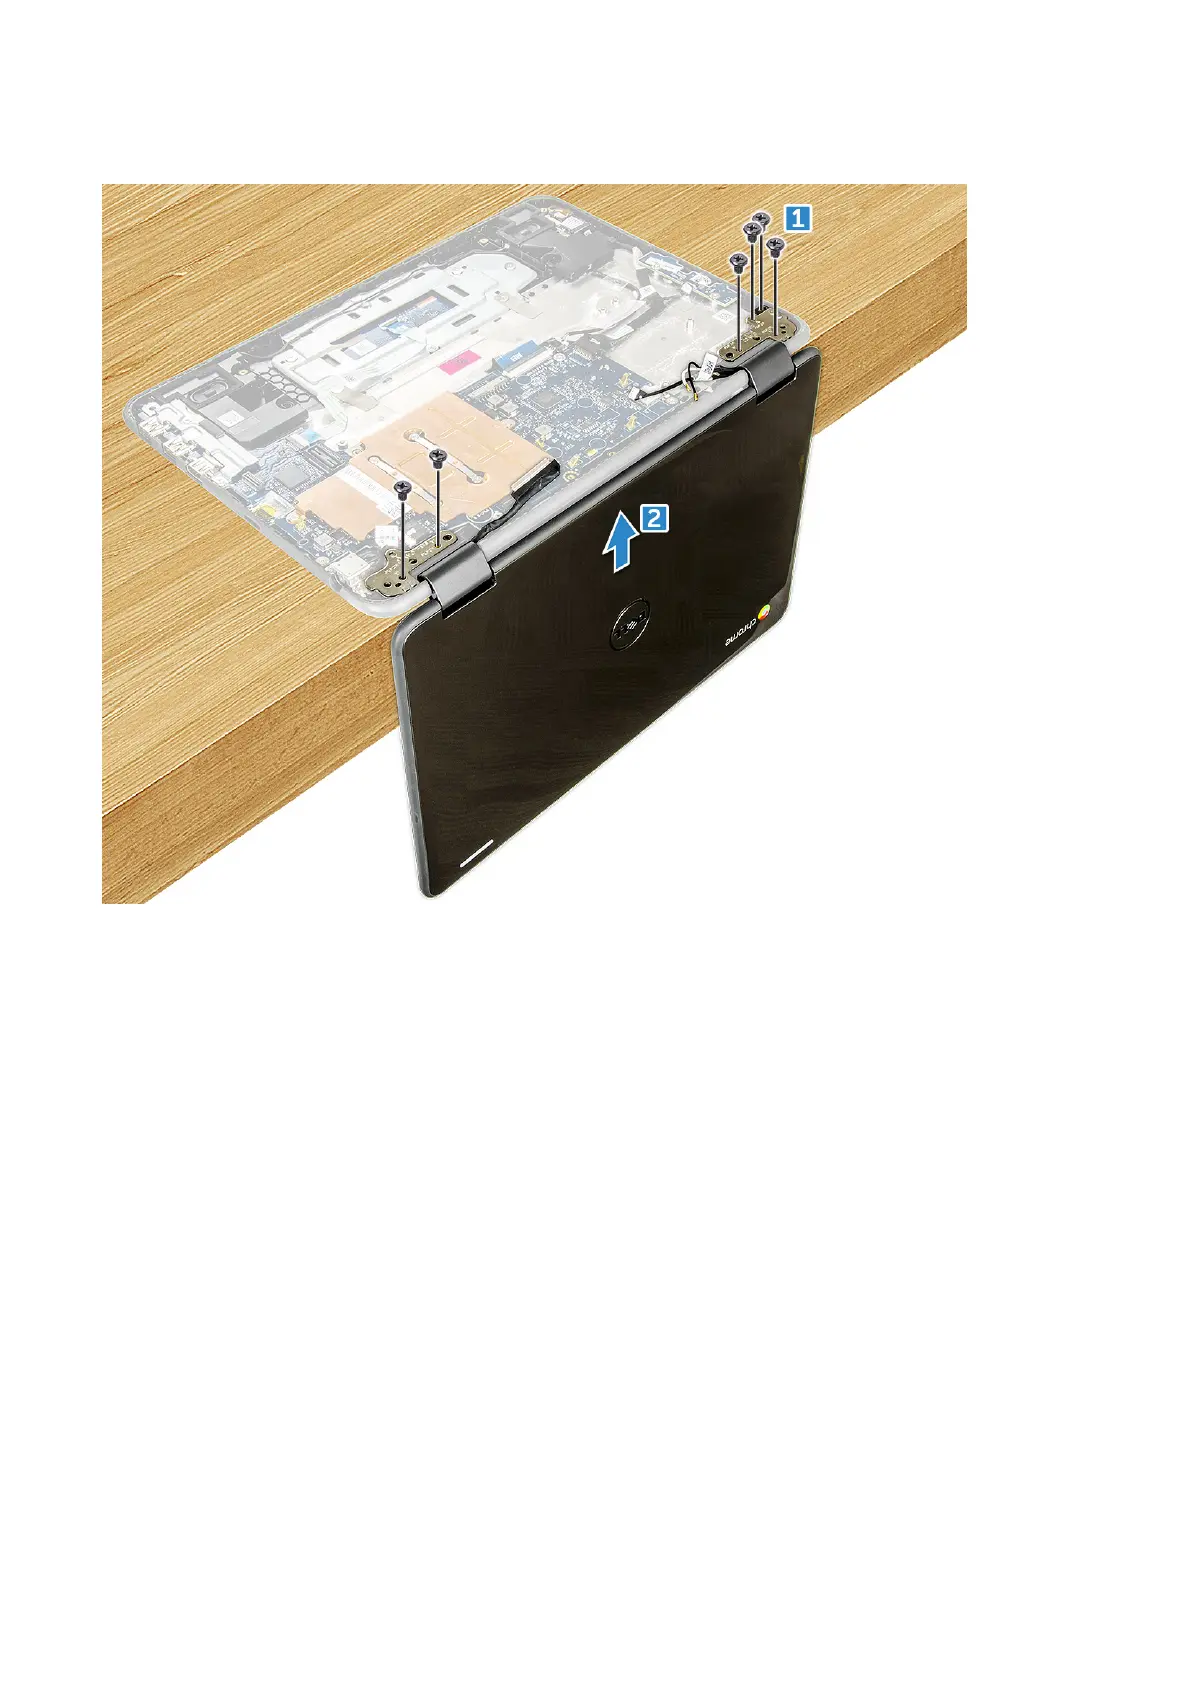
a. Remove the display hinge screws M2.5xM5.0 that secure the display assembly to the computer [1].
b. Lift the display assembly away from the computer [2].
Installing display assembly
1. Place the display assembly to align with the screw holders on the computer.
2. Replace the screws that secure the display hinges to the palm-rest assembly.
3. Flip over the computer and connect the sensor cable on the system board.
4. Connect the display cable to the connector on the system board.
5. Place the metal bracket over the (display cable) connector, and tighten the M2.0x3.0 screws to secure the display cable to
the computer.
6. Connect the WLAN cables.
7. Place the metal bracket, and tighten the M2.0x3.0 screw to the WLAN cable on the system board.
8. Install the:
a. battery
b. base cover
c. microSD card
9. Follow the procedure in After working inside your computer.
20
Disassembly and reassembly
 Loading...