Installing System Components 131
1
Turn off the system, including any attached peripherals, and disconnect
the system from the electrical outlet.
2
Open the system. See "Opening the System" on page 82.
3
Remove the system board shroud. See "Removing the System Board
Shroud" on page 105.
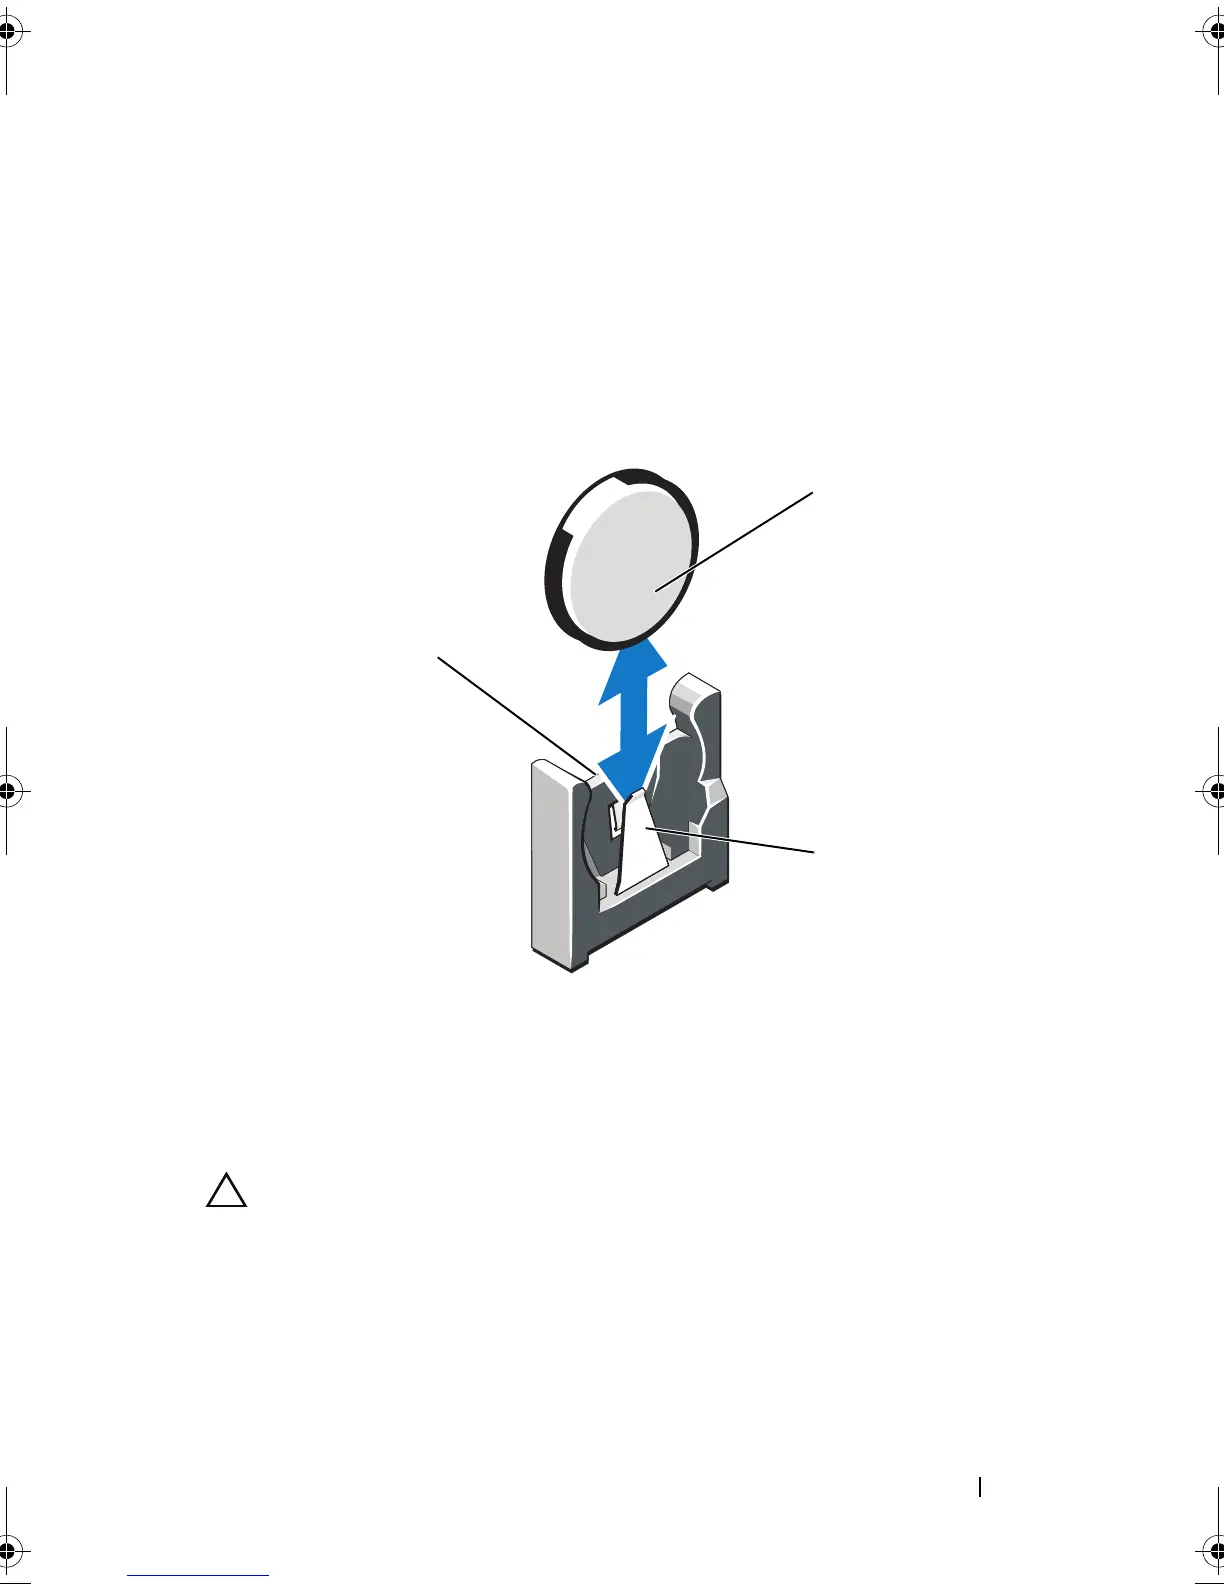
Figure 3-24. Replacing the System Battery
4
Locate the battery socket. See "Jumpers and Connectors" on page 169.
CAUTION: To avoid damage to the battery connector, you must firmly support the
connector while installing or removing a battery.
5
Remove the system battery.
a
Support the battery connector by firmly holding the positive side of
the connector.
b
Press the battery toward the negative side of the connector and lift it
up out of the securing tab at the negative side of the connector.
1 positive side of battery connector 2 system battery
3 negative side of battery connector
2
3
1
book.book Page 131 Tuesday, March 31, 2009 5:26 PM

 Loading...