22 Using Interactive Pen (Only for S560P)
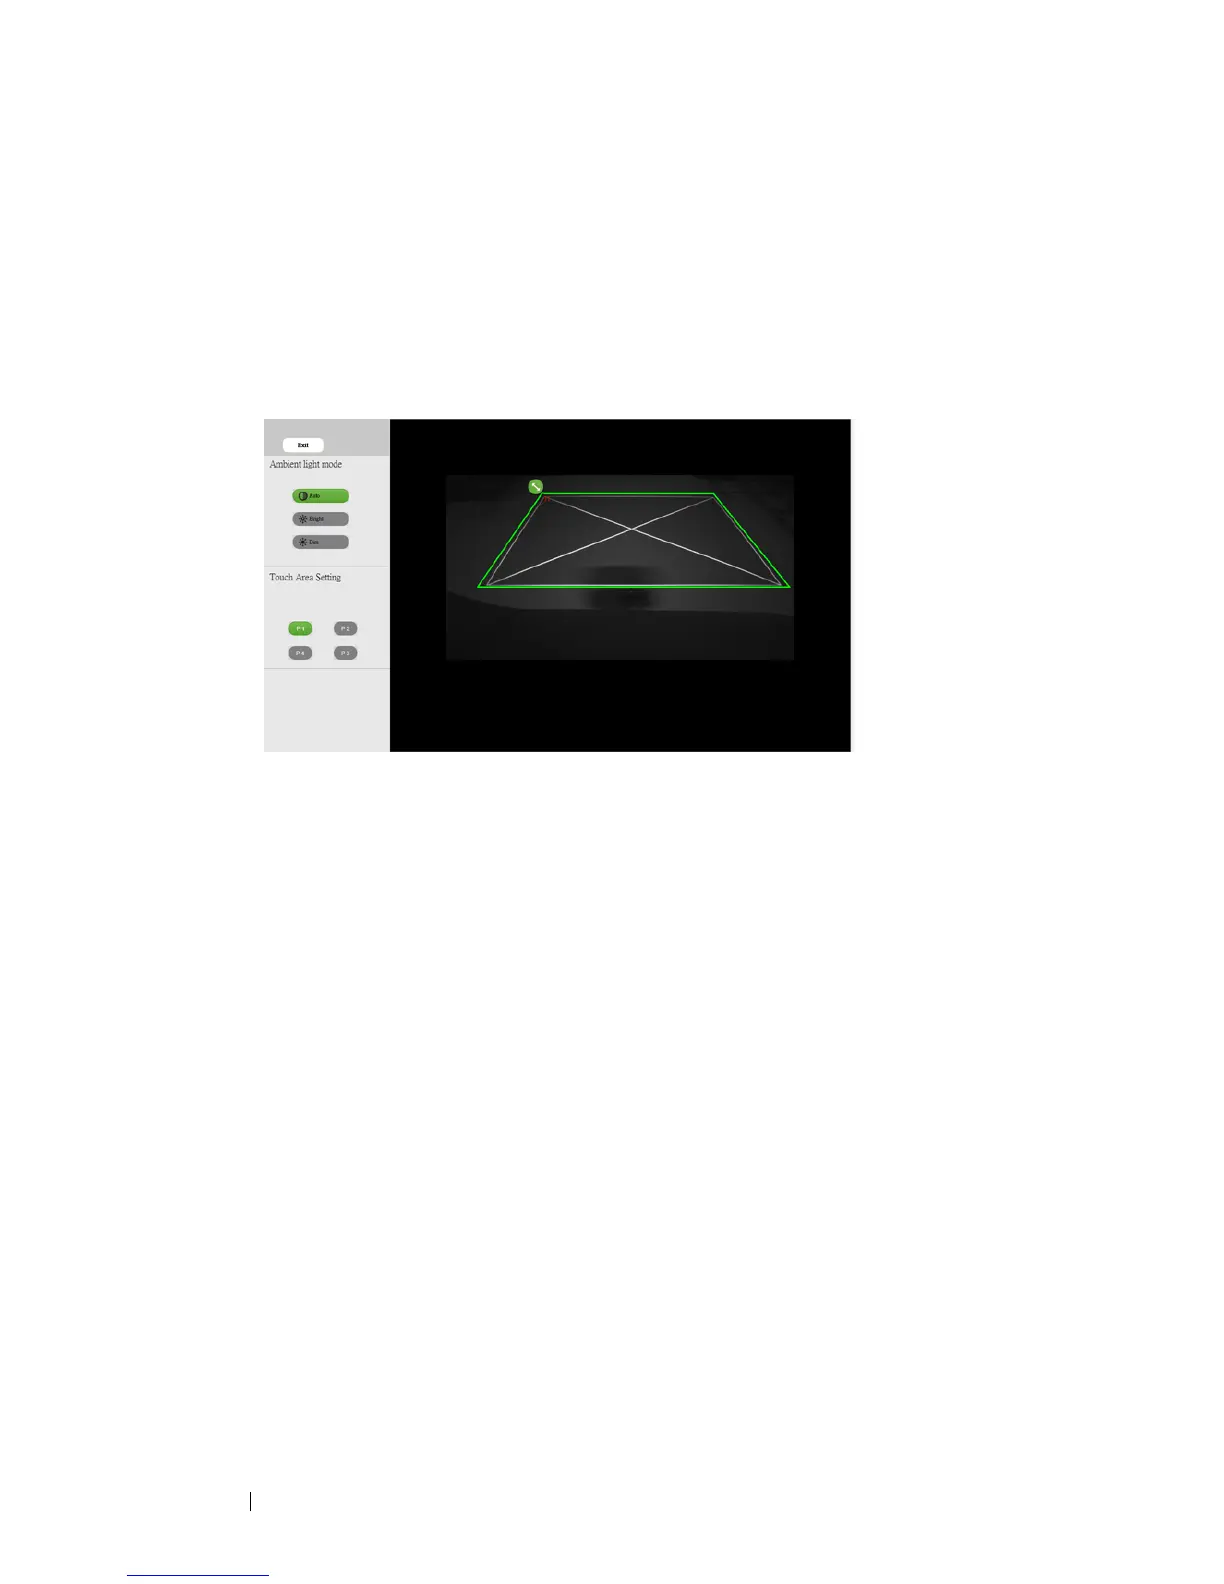
2-1 After the camera captures the projection image, a Touch Area
window will pop up. If the captured image is not clear enough,
please re-select "Ambient light mode selection" from "Auto" to
"Bright" or "Dim" according to actual ambient light condition.
Remark: Captured image shows the actual camera view, which is
reversed from projection image. For example: P1 is lower right
corner, P2 is lower left corner and so on.
2-2 Touch Area Boundary Fine-tuning
Step 1: Click on P1, use mouse to drag P1 to upper left corner. Align
adjustable green zone with projected white frame.
Step 2: Adjust P2 to P4 accordingly; adjustable green zone should
completely overlaps the projected white frame.
Step 3: Finally, check again if the green frame completely overlaps the
projected white frame. If not, fineadjust again.
2-3 When the Touch Area is correctly located then click exit button.