Instructions for use
Readtheseinstructions carefullybeforeusing the appliance.
Failure to respect these instructions may result in personal
injuryordamagetotheappliance.
Themanufacturerisnotliablefordamageasaresultoffailure
tocomplywiththeseuserinstructions.
Please note:
Keeptheseinstructions.Iftheapplianceshouldbetransferred
tootherpersons,theseinstructionsmustaccompanyit.
Checking the appliance
Afterthepackaginghasbeenremoved,checktheintegrityof
theapplianceandthepresenceofallaccessories.Donotuse
the appliance if itis visibly damaged.Contactthe Customer
Experience.
Installing the appliance
Attention!
Thefollowingsafetymeasuresmustbecompliedwithwhen
installing the appliance:
• Theappliancecouldbedamagedbywaterinltration.
Donotpositiontheappliancenearwaterfaucetsorsinks.
• Theappliancecouldbedamagedifthewateritcontains
freezes.
Do not install the appliance in a room where the
temperaturecanfallbelowfreezingpoint.
• Positionthepowersupplycableinawaythatitcannotbe
damagedbysharpedgesorbycontactwithhotsurfaces
(e.g.electricstoves,cookingsurfaces,orgasburners).
Connecting the appliance
Attention!
Make sure that the electric mains voltage corresponds with
thatindicatedonthedataplateonthebaseoftheappliance.
Insertthepowersupplycableconnectorinthesocketonthe
backoftheappliance(g.1);theninsertthepluginthepower
outlet.Checkthatthemainspowersupplyvoltagecorresponds
tothevalueindicatedontheratingplateonthebottomofthe
appliance.Ifthepowersocketdoesnotmatchtheplugonthe
appliance,havethesocketreplacedwithasuitabletypebya
qualiedprofessional.
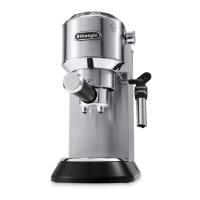
Description of appliance
(page3-A )
A1. Cupholder/Warmingplate
A2. Waterspout/milkcontainercoupling
A3. GeneralON/OFFswitch
A4. Powersupplycablesocket
A5. Boileroutlet/Infusionassembly
A6. Watertankseat
A7. Watertanklid
A8. Watertankwithseatforwaterlter
A9. Waterrellindicator
A10.Driptray
A11.Indicatorfordriptraymaximumwaterlevel
A12.Cuptray
A13.Slidingtrayforlongcoee/lattemacchiatoglass
A14.Cupwarmerbutton
Description of control panel (B)
(page3-B)
B1. ON/Stand-byButton
B2. ON/Stand-byLight
B3. 1cupbutton
B4. 1cup/“temperatureOK”light
B5. 2cupsbutton
B6. 2cups/“temperatureOK”light
B7. Hotwaterbutton
B8. Hotwaterlight
B9. Hotmilk/cappuccinobutton
B10.Hotmilk/cappuccino/“temperatureOK”light
B11.Hotmilk/lattemacchiatobutton
B12.Hotmilk/lattemacchiato/“temperatureOK”light
Milk container description
(page2-C)
C1. Milkfrotherlidwithfrothregulator
C2. CLEANbutton
C3. MilkSpoutTube
C4. Milkintaketube
C5. Milkcontainer
Description of accessories
(page2-D)
D1. Filter-holdercup
D2. 1coeecremalter
D3. 2coeecremalter
D4. ESEpodcremalter
D5. Powersupplycable(removable)
D6. Tamper/dispensermeasure
Description
en
D7. Removablewater/steamspout
D8. Reactivestriptodetectwaterhardness
(Totalhardnesstest)
D9. Descaler
D10.Watersoftenerlter
 Loading...