31
Please note:
• Indicator lights may appear on the control panel (B) during
use. Their meaning is given in section “23. Explanation of
lights”.
• For hotter coee, see section “15.3 Tips for a hotter coee”.
• If the coee is delivered a drop at a time, too weak and not
creamy enough or too cold, read the tips in section “24.
Troubleshooting”.
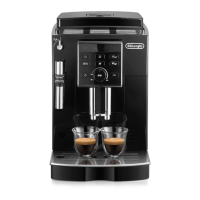
16. MAKING COFFEE USING PREGROUND COFFEE
Important!
• Never place coee beans in the pre-ground coee funnel
as this could damage the appliance.
• Never add pre-ground coee when the machine is o or it
could spread through the inside of the machine and dirty
it. This could damage the machine.
• Never use more than 1 level measure (C2) as it could
soil the inside of the coee machine or block the funnel
(A4). Given the quantity of coee
used, it is not advisable to prepare
“ 2x Espresso” (B3), “
Coee” (B8) or (certain models only)
“ Doppio+” (B9).
Please note:
When using pre-ground coee, only one cup can be made at a
time.
1. Make sure the appliance is on;
2. Turn the coee taste selection dial (B6) anticlockwise as far
as it will go, to the position.
3. Make sure the funnel (A4) is not blocked, then add one
level measure (C2) of pre-ground coee (g. 17).
4. Place a cup under the coee spouts (A11).
5. Press the required 1 cup button .
6.
Preparation begins.
Important! Making “ Long” coee (B9) (certain
models only):
Halfway through preparation, delivery stops, the light
comes on and the light ashes. Add one level measure of
pre-ground coee and press the “ Long” button.
Please note:
If "Energy Saving" mode is active, you may have to wait a few
seconds before the rst coee is delivered.
16.1 Selecting the quantity in the cup
To change the quantity of coee the appliance delivers auto-
matically into the cup, proceed as described below:
1. Place a suciently large cup or glass under the coee
spouts (A11);
2. Press the button corresponding to the quantity to be mod-
ied and hold it down until the light ashes and the appli-
ance starts delivering coee, then release;
3. When the coee in the cup reaches the desired level, press
the same button again to memorise the new amount. (See
the table in section “15.4 Coee delivery”).
The machine is now reprogrammed with the new quantities.
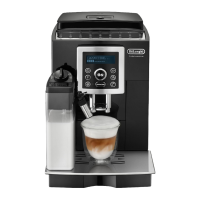
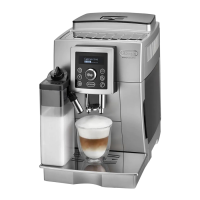
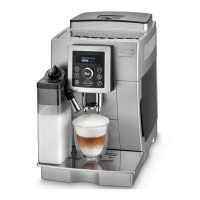
17. MAKING CAPPUCCINO
Danger of burns!
During preparation steam is given o. Take care to avoid scalds.
1. When preparing cappuccino, make the coee in a large
cup;
2. Fill a container (preferably one with a handle to avoid
scalding) with about 100 grams of milk for each cappuc-
cino. When choosing the appropriate size of container, re-
member that the milk doubles or triples in volume;
Please note:
For a richer and denser froth, use skimmed or partially skimmed
milk from the refrigerator (about 5°C). To avoid producing milk
with poor froth or large bubbles, always clean the cappuccino
maker as described in the section “19. Cleaning”.
3. Models with adjustable cappuccino maker only:
Make sure the cappuccino maker selection ring (A20) is po-
sitioned downwards in the "CAPPUCCINO" position (g. 18);
4. The cappuccino maker (A18) can be turned slightly out-
wards to allow containers of any size to be used;
5. Immerse the cappuccino maker in the milk container;
6. Press the button (B4);
7. When the light in the button ashes after a few
seconds, turn the steam dial (A21) to the I position (g.
6). Steam is delivered from the cappuccino maker, giving
the milk a creamy frothy appearance and making it more
voluminous;
8. For a creamier froth, swirl the container slowly, moving it
from the bottom upwards. (Steam should not be generat-
ed by the machine for more than 3 minutes continuously).
9. When you have obtained the required froth, stop steam
delivery by turning the dial to the "0" position.
 Loading...