Figure 49
Figure 48
It is normal the opened gap between the
top edge of the inner glass and the sealed
gasket. This allows the cooling air
circulation.
D
E
F
H
G
A
3. Replace the inner pane:
•Check that the four rubber pads
are in place (D in fig. 43).
•Check that you are holding the
pane the correct way. You should
be able to read the wording on it
as it faces you.
•Insert the pane in the left E and
right F slide guides (fig. 44), and
gently slide it to the retainers H
(Fig. 45).
•Reassemble the seal G in the
correct way (fig. 46) by hooking
the no. 3 fixing hooks in the proper
holes (fig. 47).
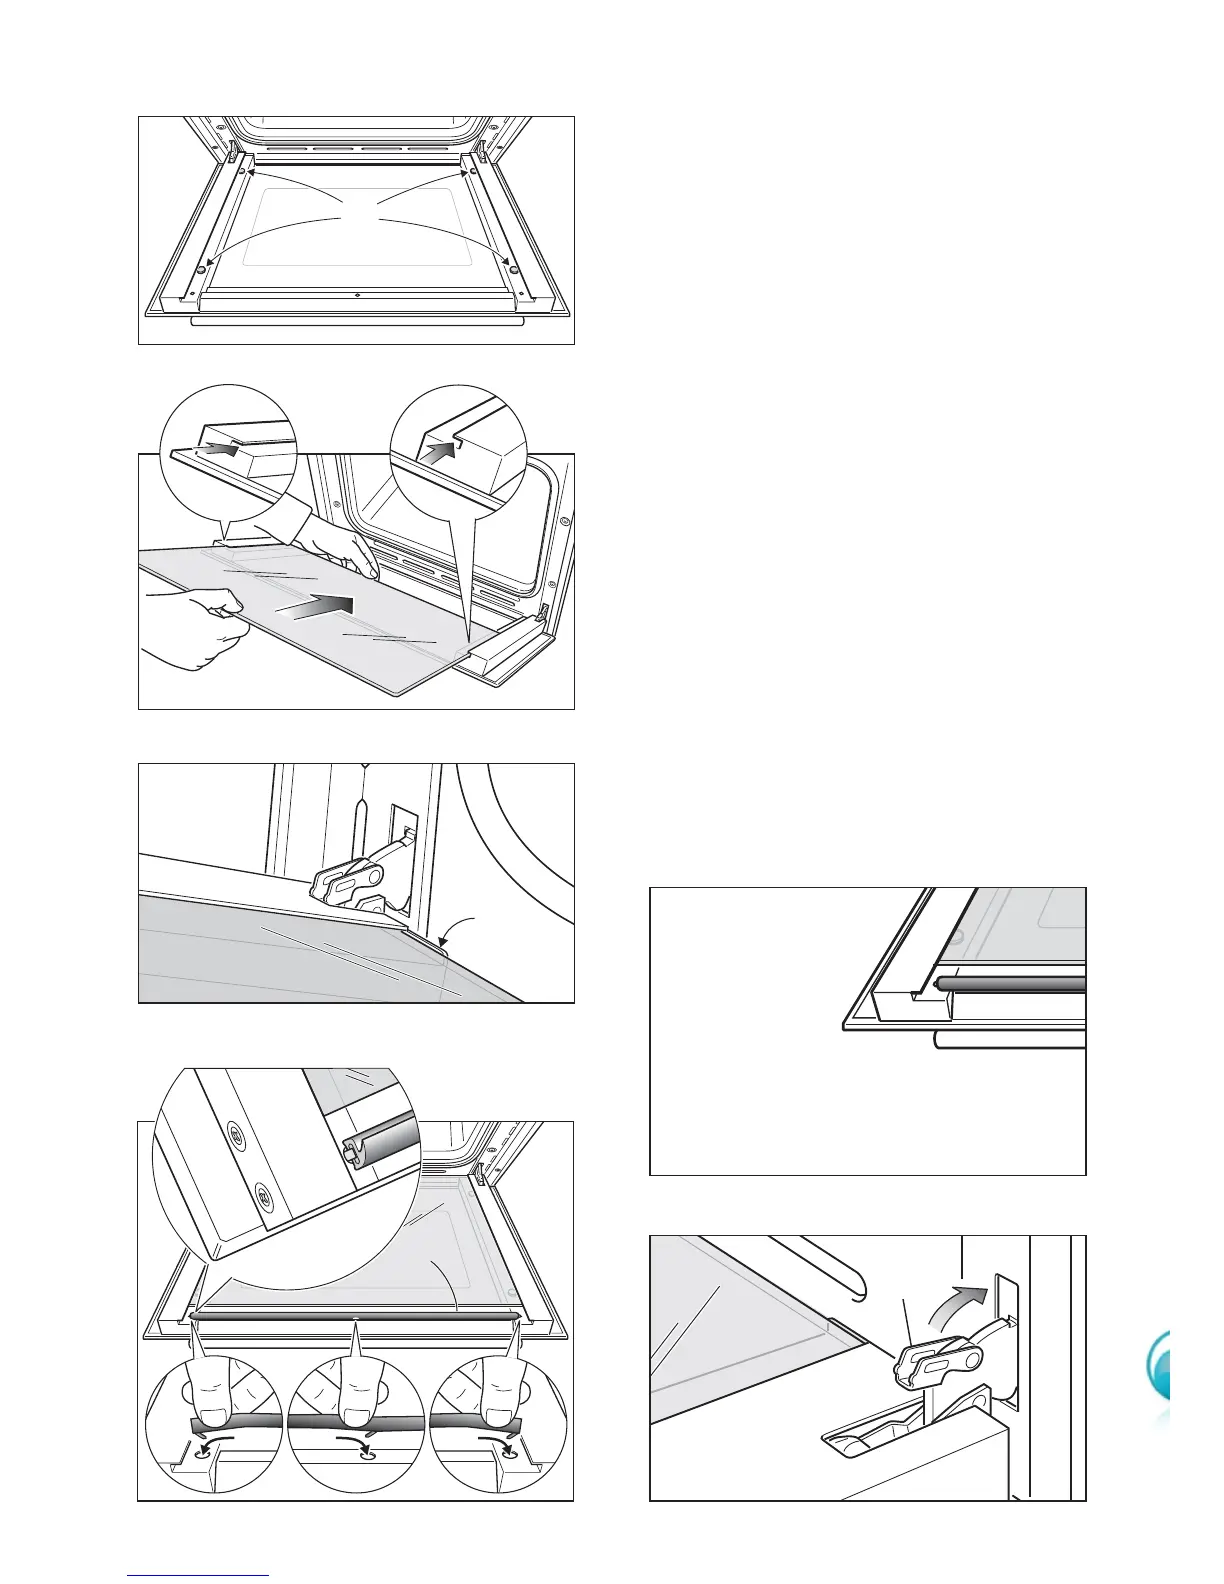
4. Unlock the oven door by opening it
completely and closing the lever A
on the left and right hinges (fig. 49).
 Loading...