Do you have a question about the Delta AS32AM10N-A and is the answer not in the manual?
Details functional specifications for AS300 and AS200 series CPU modules.
Provides electrical specifications for AS300 and AS200 series CPU modules, including inputs and outputs.
Guides on setting up AS04AD-A, AS08AD-B, AS08AD-C, AS04DA-A, AS06XA-A device parameters.
Guides on setting up AS04RTD-A, AS06RTD-A, AS04TC-A, AS08TC-A device parameters.
Guides on setting up AS02PU-A and AS04PU-A positioning module device parameters.
Guides on setting up AS02HC counting module device parameters.
Guides on setting up AS00SCM network module device parameters.
Guides on setting up AS02LC load cell module device parameters.
Covers system requirements and procedures for installing and uninstalling ISPSoft.
Provides step-by-step instructions for installing the ISPSoft software.
Details methods for uninstalling the ISPSoft software from the system.
Covers procedures for installing and uninstalling the COMMGR software.
Provides step-by-step instructions for installing the COMMGR software.
Details methods for uninstalling the COMMGR software from the system.
Covers the general steps for installing modules and terminal blocks onto the DIN rail.
Provides detailed steps for physically installing modules onto the DIN rail.
Provides instructions for wiring power supply modules and I/O modules.
Details how to connect the AC power cable to the power supply module.
Provides a simple example of creating a traditional ladder diagram in ISPSoft.
Outlines the procedure for creating a project, including hardware, network, programming, and testing.
Guides on creating a new project in ISPSoft, including project name and PLC selection.
Explains how to configure hardware settings within the HWCONFIG window.
Guides on setting parameters in the Device Setting dialog box for modules.
Details how to create a ladder diagram, edit, and compile a program in ISPSoft.
Explains how to add a new program organization unit (POU) in ISPSoft.
Guides on creating contacts and coils in a ladder diagram using toolbar or instructions.
Explains how to insert networks and type instructions like LD and OUT.
Details how to insert applied instructions (APIs) using different methods.
Guides on inserting comparison contacts and typing constants in ladder diagrams.
Covers checking syntax and compiling the program in ISPSoft.
Guides on testing and debugging programs, including creating connections and monitoring.
Details steps to connect ISPSoft to the PLC via USB or other methods.
Explains how to download the hardware configuration and program to the PLC.
Covers monitoring modes (device and program) and performing connection tests.
Provides instructions on how to format an SDHC card using FAT32 file system.
Details the process of installing and removing memory cards from the CPU module.
Provides step-by-step instructions on how to correctly insert a memory card.
Introduces the CARD Utility for backing up and restoring module data and ISPSoft projects.
Details the process of backing up projects to an AS Series CPU module or memory card.
Guides on restoring projects from an AS Series CPU module or memory card.
Describes how the system stores CPU error messages and state changes.
Covers installation of EtherNet/IP devices and network cables.
Details the installation and use of EIP Builder software for configuration.
Details EtherNet/IP specifications including topology, connection numbers, and message types.
Introduces EIP Builder software for EtherNet/IP configuration and management.
Guides on how to run EIP Builder from ISPSoft or independently.
Provides steps to run EIP Builder using an EIP Scanner in ISPSoft.
Explains how to set up IP addresses for AS Series modules (BOOTP, DHCP, Static).
Guides on setting a static IP address for AS Series modules in HWCONFIG.
Details steps to set IP addresses using BOOTP/DHCP via IP Manager in EIP Builder.
Guides on scanning the network to discover and add devices in EIP Builder.
Covers setting EIP parameters like Module Name, Version, IP Address, and Connection settings.
Provides an overview of creating data mapping tables to exchange data between devices.
Provides an overview of error codes and troubleshooting for the AS Series.
Lists error codes and their corresponding solutions for configuration and application errors.
Details configuration errors, primarily related to mismatched EDS files.
Provides an overview of connecting to a Delta EtherNet/IP Adapter using Rockwell Studio 5000.
Guides on opening Studio 5000 and creating a new project.
Details steps to create a new Ethernet/IP module in Studio 5000.
Guides on importing an EDS file using the EDS Hardware Installation Tool.
Details steps to create an adapter module in Studio 5000.
Guides on downloading the project to the PLC and going online.
Explains how to map data, including configuration, input, and output parameters.
Guides on accessing and monitoring AS Series PLC via web interface.
Guides on setting up user accounts, passwords, and access types (Admin, Write/Read, Read).
Covers setting up monitoring related configurations and data monitor tables.
Explains how to set up monitoring data pages and items to monitor.
Allows setting diagnostic related configurations, including hardware status.
Covers saving configurations and downloading parameters to the device.
Guides on saving configurations and downloading parameters to the device.
Explains using TAGs for data exchange between AS300 CPU (Master) and OMRON NJ501-1300 (Producer).
Guides on setting up IO Connection from a slave station and master station.
Guides on configuring the AS-FCOPM card using HWCONFIG in ISPSoft.
Guides on editing request message mapping for SDO, NMT, and Emergency messages.
Provides examples of writing and reading servo parameters using SDO via ladder diagram.
Covers troubleshooting for CANopen networks, including node state display and error codes.
Covers basic troubleshooting steps, error causes, and corrective actions.
Provides initial checks for safe environment, power, installations, LEDs, and switches.
Details methods to clear error states, including switching CPU states and using ISPSoft.
Presents a troubleshooting flowchart for diagnosing errors based on LED indicators.
Guides on viewing system logs and error details in ISPSoft for troubleshooting.
Provides troubleshooting steps for CPU modules based on ERROR LED indicators and error codes.
Covers troubleshooting for various I/O modules: Analog, Temperature, Positioning, Counter, Load Cell, Communication.
Explains error codes and LED indicators for CPU modules.
Lists error codes, descriptions, CPU status, and ERROR LED indicator status.
Provides steps to install the USB driver for AS Series CPU on Windows XP with SP3.
Details steps to install the USB driver for AS Series CPU on Windows 7.
Guides on disabling driver signature enforcement in Windows 8 to install the USB driver.
Explains steps to disable driver signature enforcement in Windows 10 for USB driver installation.
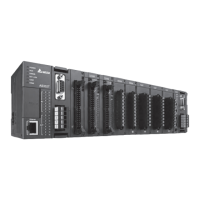
| Model | AS32AM10N-A |
|---|---|
| Series | AS Series |
| Type | Control Unit |
| Digital Input Type | Sink/Source |
| Digital Output Type | Relay |
| Power Supply | 24 VDC |
| Input Voltage | 24 VDC |
| Protection | IP20 |
| Communication Ports | RS-232, RS-485 |
| Data Registers | 10k words |
| Cooling | Natural cooling |