Do you have a question about the Delta breez GreenBuilder GBR80LED and is the answer not in the manual?
Switch off and lock power at the service panel before servicing or cleaning the unit.
Bend housing tabs to 90 degrees and secure housing to joists using screws.
Install optional brackets for flexible positioning and secure them to joists with fasteners.
Insert duct into connector, tape securely, and install with a 1-2 degree gradient to the outside.
Covers defects in material or workmanship for three years from purchase date.
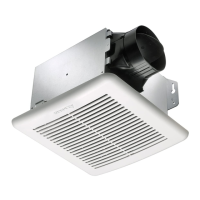
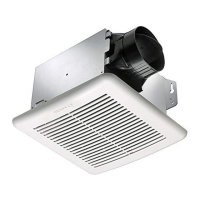
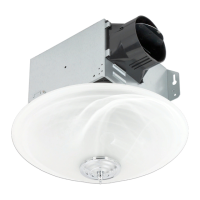
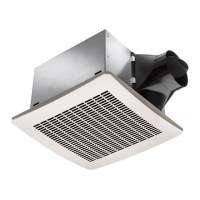
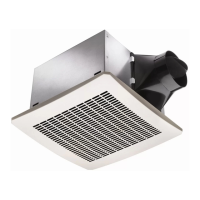
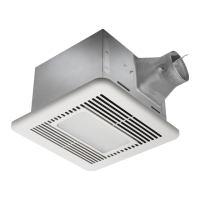
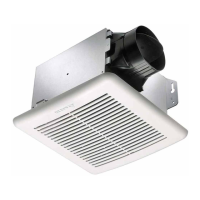
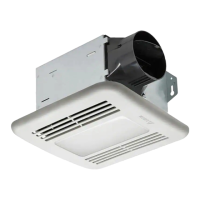
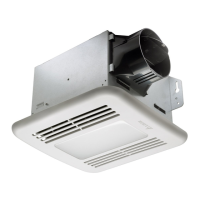
This document outlines the installation, operation, and maintenance of the Delta Breez GreenBuilder Model GBR80LED, a ventilation fan with an integrated LED light designed for residential use.
The Delta Breez GreenBuilder GBR80LED serves as a ventilation fan and LED light combination, primarily intended for general ventilating purposes in residential settings. It is designed to exhaust air from indoor spaces, contributing to improved air quality and moisture control. The integrated LED light provides illumination, making it a dual-purpose fixture suitable for various rooms, including bathrooms. This unit is UL listed for use over a bathtub or shower when installed in a GFCI protected branch circuit, ensuring safety in wet environments. It is crucial to note that this unit is not intended for use in cooking areas or for exhausting hazardous or explosive materials and vapors. Proper ventilation is essential to prevent back drafting of fuel-burning equipment, and users should adhere to manufacturer guidelines and safety standards from organizations like NFPA and ASHRAE.
Installation of the GBR80LED involves several key steps to ensure proper function and safety. The housing can be mounted to joists by bending tabs to 90 degrees and securing them with screws. Alternatively, sliding suspension brackets (sold separately) can be used for flexible positioning between joists, accommodating spans up to 24 inches. These brackets are inserted into channels on the housing, extended to the width of the joists, and fastened with nails or screws. The duct connection requires inserting a duct (not provided) into the duct connector and taping all connections to ensure they are secure and airtight. It is recommended to install the duct with a slight gradient (1-2 degrees) to the outside for effective exhaust. Electrical wiring must comply with local codes and ANSI/NFPA70 standards. The unit requires a 120V, 60Hz AC power supply and must be properly connected to the grounding conductor. Users should never place a switch where it can be reached from a tub or shower. The wiring diagram illustrates connections for both light and fan switches, utilizing wire nuts to connect house power cables to the ventilating fan. A minimum of 14 AWG (2.1 mm²) conductor is required for branch-circuit wiring. Once installed, the LED lighting connector is inserted into the power socket of the main body. A test run should be performed to check for abnormal vibration or sound. Finally, the grille is attached by inserting its mounting springs into the slots of the fan unit. Operation is straightforward: turning on the power switch activates the unit, and a green LED indicator confirms it is on.
Routine maintenance is crucial for the longevity and optimal performance of the Delta Breez GreenBuilder GBR80LED, and it should be performed annually. Before any servicing or cleaning, it is imperative to disconnect the power source at the service panel and lock out the disconnecting means to prevent accidental power-on. This safety measure is emphasized by the recommendation to securely fasten a prominent warning device, such as a tag, to the service panel. Cleaning the unit involves several steps. First, the grille should be removed by pulling down its springs. The grille can then be cleaned using a non-abrasive kitchen detergent and wiped dry with a new cloth. For the ventilating fan itself, a cloth dampened with a non-abrasive kitchen detergent should be used to remove dust and dirt. After cleaning, the grille is replaced by inserting its springs back into the slots. It is important to note several cautions regarding maintenance: never use gasoline, benzene, thinner, or any other harsh chemicals for cleaning the ventilating fan, as these can damage the unit. Additionally, water should not be allowed to enter the motor. Resin parts should not be soaked in water exceeding 60°C. Adhering to these maintenance guidelines will help ensure the fan and light continue to operate efficiently and safely.
| Airflow | 80 CFM |
|---|---|
| Noise Level | 0.3 Sones |
| LED Light | Yes |
| Duct Size | 4 Inches |
| Energy Star Rated | Yes |
| Voltage | 120 Volts |
| Color | White |
| Mounting Type | Ceiling Mount |
| HVI Certified | Yes |
| Energy Efficiency | High |
| Motor Type | DC Motor |