20
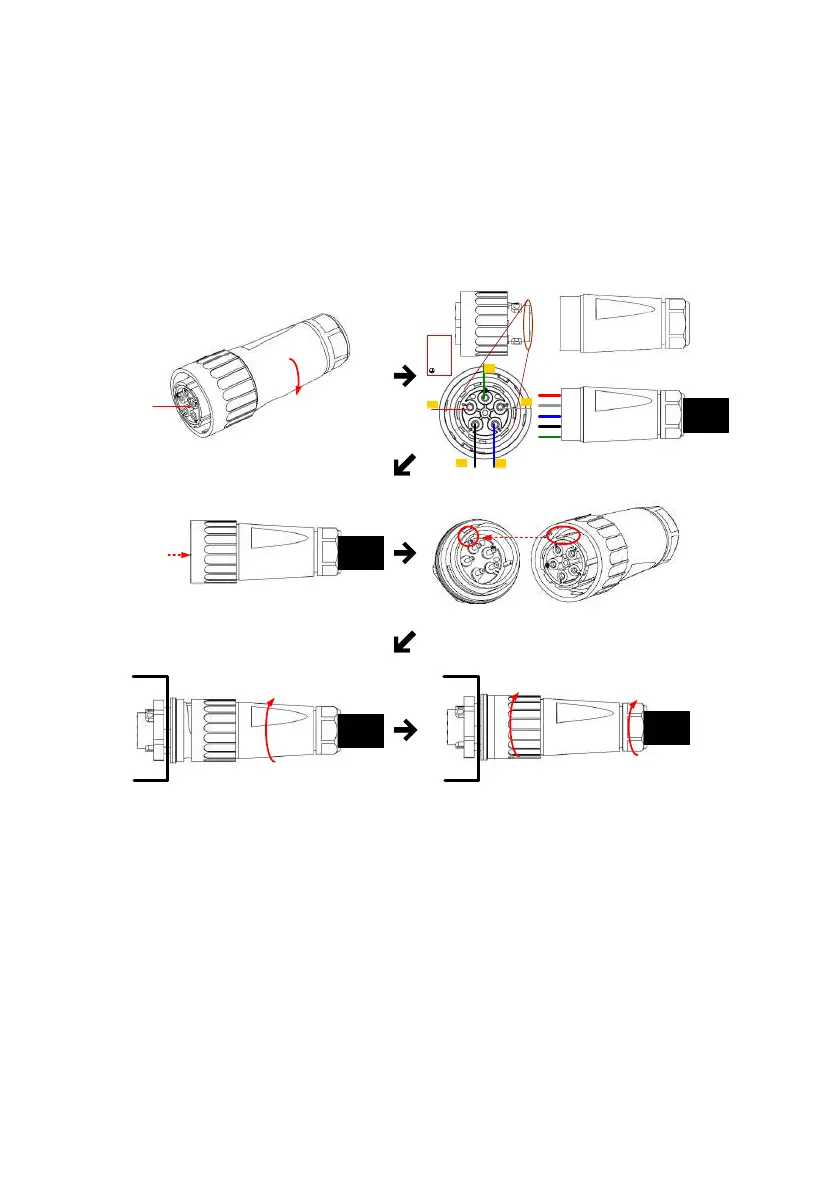
AC’s wiring can be separated into 3-phase and PE (3P3W) or 3-phase, N, and
PE (3P4W). In figure 5-3, the connector has to connect to the inverter’s AC plug.
After de-assembling, please follow the polarity to do the proper wiring. (This
product allows either positive or negative phase sequence. That means the
sequence of L1~ L3 can be adjusted; however, N and PE must be connected
correctly.)
L1
L2
N
PE
L3
Inverter
Fix it
Rotate to loose the AC plug
Inverter
Rotate to tighten the inserter
Rotate to tighten the plug
Rotate gland to
fix cable
Cable
AC Plug
AC plug
1 : L1
2 : L2
3 : L3
4 : N
: PE
Cable
Cable
Cable
L1
L2
L3
N
PE
Socket
Align the biggest latch of the AC plug and the socket
 Loading...