6
INSTALLATION
■ Attaching the mounting brackets for a 19-inch 1U half-sized rack
• The DN-F400 is half the size of 1U. Attach the included rack mounting brackets to the DN-
F400. Then it can be mounted in an EIA 19-inch rack.
• The RC-F400S is of desktop type only.
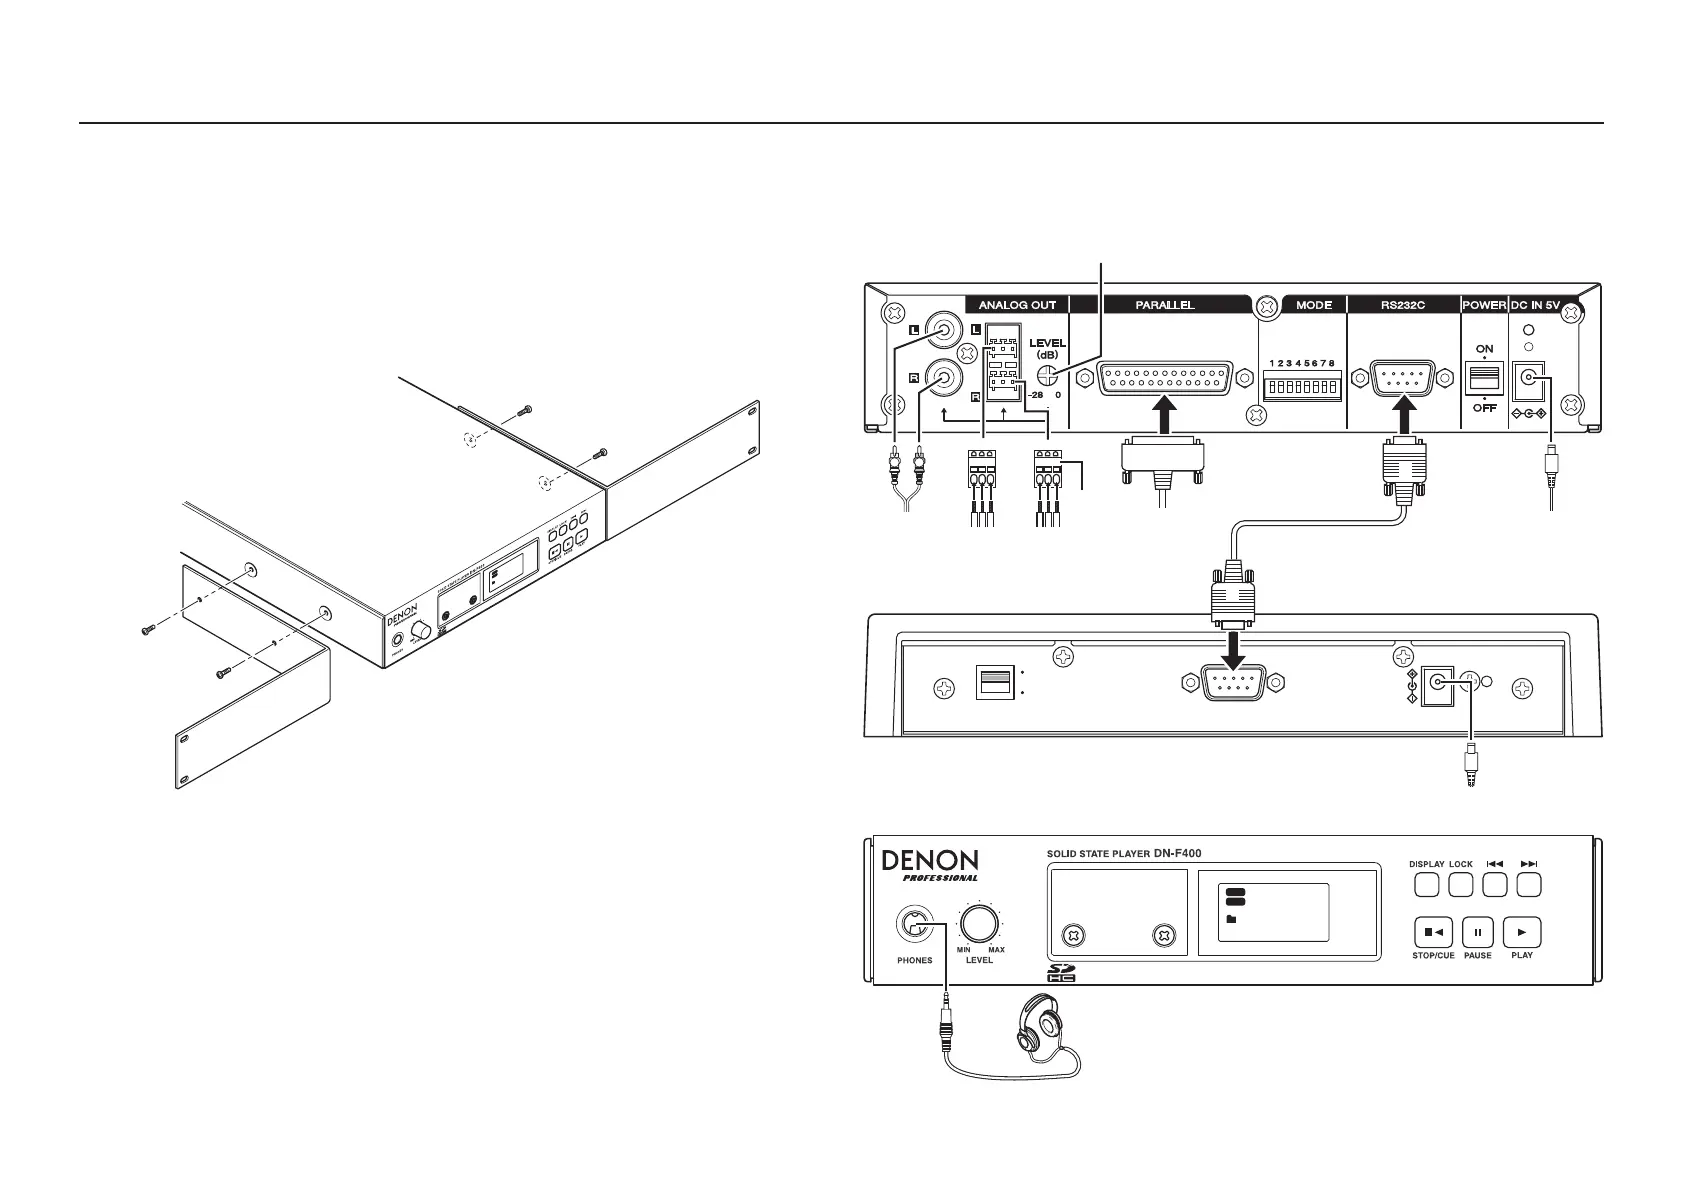
1. Remove two screws on the side panel of the DN-F400.
2. Attach the rack mounting bracket to the DN-F400 with the included two screws.
Attach the bracket on the opposite side.
00:45
PG
M
R
P
T
M
U
S
IC \
Ho
n
e
y
.
M
P3
■ Mounting in a rack
• Do not cover the top of the unit. Remember, heat is dispersed from the DN-F400’s upper
surface.
• Set up the installation environment carefully. For example, take care to protect the DN-
F400 from heat from other devices. If necessary, use forced ventilation. The surrounding
conditions must meet the specifications described in “SPECIFICATIONS” on Page 21.
• If the DN-F400 is placed near an amplifier, tuner or other components, noise (induced hum)
or beat interference may result (especially during AM or FM reception).
If interference occurs, disconnect the DN-F400 or change the installation place.
• If the unit is not to be mounted in a rack, remove the rack mount brackets and attach the
included feet.
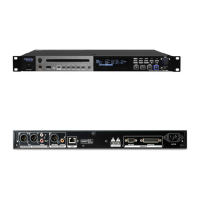
CONNECTIONS
■ Basic connection
1. Rear panel
DC IN 5V
POWER
RS232C
OFF
ON
L
G
GND
HOT
COLD
HC
R
G
GND
HOT
COLD
HC
RC-F400S
DN-F400
RL
Analog audio
cable
Included AC adaptor
(DN-F400)
Parallel
cable
RS-232C straight
cable
Unbalanced
output
Balanced
output
PHOENIX
plug
Included AC adaptor
(RC-F400S)
Adjust, using a Phillips screwdriver.
2. Front panel
00:45
PGM
RPT
\ MUSIC \
Honey.MP3
Headphones
2. PREPARATIONS
 Loading...