Connecting to a wireless LAN
R
L
R
L
L
Connecting the rod
antenna (supplied).
Amplifi er
Connecting the
audio device.
Connecting the
power cord.
ENGLISH
Connecting the DNP-720AE to the network
Basic operation
ENTER
.........................
Enter
ui
.............................
Select
o
..................................
Return
MENU
..........................
Menu
ON/STANDBY
............
Power on
Setting the network standby
Connecting to the access point
Preparation
1
2
3
1
Complete Steps
–
.
2
1
Press ON/STANDBY to turn the power on.
2
Select the menu language.
English
[Select Language] 1/5
:enter
:select
Network First Setup
3
Check the connection to the network
device, and press
ENTER.
Please connect a
[Start First Setup]
:next :cancel
4
Select “Wired”, and press ENTER.
Wired
[Select Connection] 2/2
:enter :return
5
Select “Connection”, and press ENTER.
Connection
[Setup Wired] 3/4
:enter :return
Connecting...
[Connection]
Succeeded
• Connected to the network.
1
Press ON/STANDBY to turn the power on.
2
Select the menu language.
English
[Select Language] 1/5
:enter
:select
Network First Setup
3
Check the connection to the network
device, and press
ENTER.
Please connect a
[Start First Setup]
:next :cancel
4
Select “Wireless”, and press ENTER.
Wireless
[Select Connection] 1/2
:enter :return
5
Select “WPS”, and press ENTER.
WPS (Wi-Fi Protec
[Setup Wireless] 2/4
:enter :return
6
Select “Push Button”, and press ENTER.
Push Button
[Select WPS Setup] 1/3
:enter :return
7
Press the WPS button on the access point.
8
Select “Enter”, and press ENTER.
Enter
[Push WPS Button] 2/2
Please push the WPS button of the
Connecting...
[Connection]
Succeeded
• Connected to the network.
1
Press ON/STANDBY to turn the power on.
2
Select the menu language.
English
[Select Language] 1/5
:enter
:select
Network First Setup
3
Check the connection to the network
device, and press
ENTER.
Please connect a
[Start First Setup]
:next :cancel
4
Select “Wireless”, and press ENTER.
Wireless
[Select Connection] 1/2
:enter :return
5
Select “Search Access Point”, and press
ENTER.
Search Access P
[Setup Wireless] 1/4
:enter :return
Searching
[Search Access Point]
6
Select the access point to connect to, and
press
ENTER.
[Select SSID/Router] 1/3
55%
:enter :return
SSID #1 (WEP)
7
Select “Key”, and press ENTER.
Key
[Setup Wireless] 1/2
:enter :return
8
Input the security key, and press ENTER.
• The types of characters that can be input are as shown
below.
GLower case charactersH
abcdefghijklmnopqrstuvwxyz
GUpper case charactersH
ABCDEFGHIJKLMNOPQRSTUVWXYZ
GSymbolsH
! “ # $ % & ‘ ( )
z
+ , - . / : ; < = > ? @
[ \ ] ^ _ ` { | }
˜
GNumbersH
0123456789 (Space)
[Input Security Key]
: move
ABC
:select
Connecting...
[Connection]
• Connected to the network.
n WPS function compatible access
point
n WPS function not compatible access point (Most users)
3
n Enabling the network standby
Select “On”, and press ENTER.
Reduces the amount of time until the network connection
is complete.
Network On
[Select Standby Mode] 1/2
Network start time is fas
NOTE
The amount of power consumption during standby mode
increases slightly.
n Disabling the network standby
Select “Off”, and press ENTER.
The amount of power consumption during standby mode
is as low as possible.
Network Off
[Select Standby Mode] 2/2
The lowest power consump
This completes the network connections and settings.
The network settings can also be confi gured in the “Network” –
“Connection” menu. See the Owner’s Manual for details on setting
using the “Connection” menu.
www.denon.com
D&M Holdings Inc. Printed in China 5411 10745 00AD
Connecting to a wired LAN
R
L
R
L
L
Connecting to a home
network (LAN).
Amplifi er
Connecting the
audio device.
Connecting the
power cord.
To perform “Network First Setup” again
1
Press MENU.
The menu screen is displayed.
2
Select “Network”, and press ENTER.
Network
[Menu] 1/3
:enter :return
3
Select “Network First Setup”, and press
ENTER.
Network First Setup
[Network] 1/6
:enter :return
or
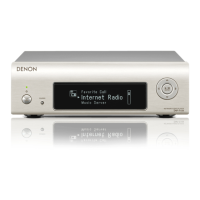
DNP-720AE Network setup guide
Connexion à un réseau local sans fi l
R
L
R
L
L
Connexion de l’antenne
en tige (fournie).
Amplifi cateur
Connexion de
l’appareil audio.
Branchement
du cordon
d’alimentation.
FRANÇAIS
Connexion du DNP-720AE au réseau
Utilisation basique
ENTER
.........................
Entrée
ui
.............................
Sélectionner
o
..................................
Retour
MENU
..........................
Menu
ON/STANDBY
............
Mise sous tension
Réglage de la veille réseau
Connexion au point d’accès
Préparation
1
2
3
1
Effectuez les étapes
–
.
2
1
Appuyez sur ON/STANDBY pour mettre
l’appareil sous tension.
2
Sélectionnez la langue du menu.
English
[Select Language] 1/5
:enter
:select
1ére connexion
3
Vérifi ez la connexion à l’appareil en
réseau et appuyez sur
ENTER.
Veuillez connect
[1ére mise en route]
:Suivant :Annulez
4
Sélectionnez “fi laire” et appuyez sur
ENTER.
laire
[Sélec.. connexion] 2/2
:
Entrez
:retour
5
Sélectionnez “Connexion” et appuyez sur
ENTER.
Connexion
[Régl. Filaire Lan] 3/4
:Entrez :retour
En connexion...
[Connexion]
Succès
• Connecté au réseau.
1
Appuyez sur ON/STANDBY pour mettre
l’appareil sous tension.
2
Sélectionnez la langue du menu.
English
[Select Language] 1/5
:enter
:select
1ére connexion
3
Vérifi ez la connexion à l’appareil en
réseau et appuyez sur
ENTER.
Veuillez connect
[1ére mise en route]
:Suivant :Annulez
4
Sélectionnez “Sans Fil Wifi ” et appuyez
sur
ENTER.
Sans Fil Wi
[Sélec.. connexion] 1/2
:Entrez :retour
5
Sélectionnez “WPS” et appuyez sur
ENTER.
WPS (Wi-fi prot
[Réglage via Wifi] 2/4
:Entrez :retour
6
Sélectionnez “App. sur le bouton” et
appuyez sur
ENTER.
App. sur le bouton
[Sélect. Régl. WPS] 1/3
:Entrez :retour
7
Appuyez sur le touche WPS sur le point
d’accès.
8
Sélectionnez “Entrez” et appuyez sur ENTER.
Entrez
[Appuyez touche WPS] 2/2
Veuillez appuyer sur le bouton WPS
En connexion...
[Connexion]
Succès
• Connecté au réseau.
1
Appuyez sur ON/STANDBY pour mettre
l’appareil sous tension.
2
Sélectionnez la langue du menu.
English
[Select Language] 1/5
:enter
:select
1ére connexion
3
Vérifi ez la connexion à l’appareil en
réseau et appuyez sur
ENTER.
Veuillez connect
[1ére mise en route]
:Suivant :Annulez
4
Sélectionnez “Sans Fil Wifi ” et appuyez
sur
ENTER.
Sans Fil Wi
[Sélec.. connexion] 1/2
:Entrez :retour
5
Sélectionnez “Recherche un point
d’accès” et appuyez sur
ENTER.
Recherche un po
[Réglage via Wifi] 1/4
:Entrez :retour
En recherche
[Recherche Point d’accès]
6
Sélectionnez le point d’accès auquel
l’appareil doit se connecter, puis appuyez
sur
ENTER.
[Sél. SSID/Routeur] 1/3
55%
:Entrez :retour
SSID #1 (WEP)
7
Sélectionnez “Clé” et appuyez sur
ENTER.
Clé
[Réglage via Wifi] 1/2
:Entrez :retour
8
Saisissez la clé de sécurité, puis appuyez
sur
ENTER.
• Les types de caractères qui peuvent être saisis sont
indiqués ci-dessous.
GMinusculesH
abcdefghijklmnopqrstuvwxyz
G MajusculesH
ABCDEFGHIJKLMNOPQRSTUVWXYZ
GSymbolesH
! “ # $ % & ‘ ( )
z
+ , - . / : ; < = > ? @
[ \ ] ^ _ ` { | }
˜
GChiffresH
0123456789 (espace)
[Entrez clé de sécurité]
: Déplacez
:Sélectionnez
ABC
En connexion...
[Connexion]
• Connecté au réseau.
n Point d’accès compatible avec la
fonction WPS
n Point d’accès non compatible avec la fonction WPS (La plupart des utilisateurs)
3
n Activation de la veille réseau
Sélectionnez “Allumez ” et appuyez sur ENTER.
Réduit le temps nécessaire à l’établissement de la
connexion réseau.
Réseau actif en
[Sélect. Mode veille] 1/2
L'accès aux réseaux est plus rapide
REMARQUE
La consommation électrique en mode veille augmente
légèrement.
n Désactivation de la veille réseau
Sélectionnez “Eteint” et appuyez sur ENTER.
La consommation électrique en mode veille est réduite au
strict minimum.
Réseau éteint e
[Sélect. Mode veille] 2/2
Le mode de consommation électriq
Ceci met fi n à la procédure de connexion au réseau et aux réglages.
Il est également possible de confi gurer les paramètres réseau dans le
menu “Réseau” – “Connexion”. Consultez le manuel de l’utilisateur
pour les détails de la confi guration à l’aide du menu “Connexion”.
Connexion à un réseau local fi laire
R
L
R
L
L
Connexion à un réseau
domestique (LAN).
Amplifi cateur
Connexion de
l’appareil audio.
Branchement du
cordon d’alimentation.
Pour effectuer à nouveau la “1ére connexion”
1
Appuyez sur MENU.
L’écran du menu s’affiche.
2
Sélectionnez “Réseau” et appuyez sur
ENTER.
Réseau
[Menu] 1/3
:Entrez :retour
3
Sélectionnez “1ére connexion” et appuyez
sur
ENTER.
1ére connexion
[Réseau] 1/6
:Entrez :retour
ou
DNP-720AE Guide de confi guration réseau
DNP-720AEE2_NSG_ALL_Final_0727.indd 1 2011/07/27 17:25:08