EasyManuals Logo

Denon DP-59L Service Manual

Denon DP-59L
18 pages
To Next Page IconTo Next Page
To Previous Page IconTo Previous Page
Page #10 background imageLoading...
Page #10 background image
ADJUSTMENT
METHOD
3.
1)
e
Adjusting
the
phonomotor
section
Prepare
a
two-channel
oscilloscope
for
the
measuring
I!nstru-
ment;
make
the
adjustments
in
the
following
order.
CH-1
Probe
connect
to
test
point
TP1
of
the
motor
contro!
circuit
board,
and
CH-2
Probe
connect
to
test
point
TP’2.
Both
probe
ground
terminal
connect
to
G.
KU-5601/5602
Te
124
1)
G23
(0)
(O
VR1
VR2
VR4
TP
Erecg
2)
2.
1)
2)
1.
Adjusting
the
head
gap
3.
Make
sure
the
detection
head
is
Perpendicular
to
the
mag-
1)
netic
coating
surface
of
the
turntable.
The
gap
of
the
detection
head
should
be
adjusted
to
0.18mm.
Be
careful
2)
the
head
is
not
tilted
to
the
left
or
the
right.
3)
Note:
If
a
gap
is
greater
than
the
value,
turntable
will
not
stop
promplty,
and
if
a
gap
is
lesser,
turntable
may
revolute
reversely
after
it
stoped.
2.
Lock
adjustments
for
45
rpm
1)
Fix
the
arm
to
the
armrest.
2)
After
pressing
the
start
button,
set
the
speed
selector
switch
to
45
rpm.
Note:
Make
sure
that
the
speed
indication
shows
0.0%.
3)
Adjust
VR2
so
that
the
positions
of
the
triangular
wave
form
and
the
pulse
form
TP2
are
as
shown
in
the
diagram
below.
TP2
Triangular
wave
form
'
'
'
0.7V
{ \
'
.
S35
us
TP1
'
Pulse
form
BB
i
:
|
‘a
t
-
f
t
0
slow.1
ont
t
\
fast
50
~
55%
i
100%
=
19
Lock
adjustments
for
33
rpm
Set
the
speed
selector
switch
to
33
rpm
and
proceed
to
adjust
VR1,
just
as
in
the
adjustments
for
45
rpm.
e
Adjusting
the
arm
control
section
Horizontal
Amp
Off-set
Voltage
Adjustment
Fix
the
tonearm
to
the
arm
rest.
Connect
the
high
input
resistance
DC
voltmeter
(tester)
between
TP3
and
TP4.
Adjust
the
voltage
to
0
+
0.01V
with
VR3.
Lifter
Amp
Off-set
Voltage
Adjustment
Connect
.the
DC
voltmeter
(tester)
to
TP303
and
TP304
while-short
circuiting
the
test
points
TP302
and
TP304.
Adjust
the
voltage
to0
+
0.1V
with
VR4.
End
Detecting
Position
Adjustment
Fix
the
stylus
point
at
a
position
60
mm
from
the
center
spindle
by
using
the
straight
arm.
Connect
the
DC
voltmeter
(tester)
to
the
test
points
TP301
and
TP304.
Adjust
the
voltage
to
1.55
+
0.05V
by
adjusting
the
cam
with
a
flat
headed
screwdriver.
The
cam
adjust-
ment
hole
is
located
at
the
back
of
the
arm
base.
Adjustment
hole

Questions and Answers:

Question and Answer IconNeed help?

Do you have a question about the Denon DP-59L and is the answer not in the manual?
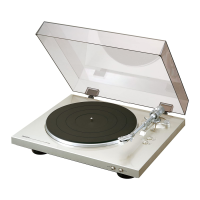
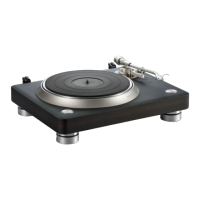
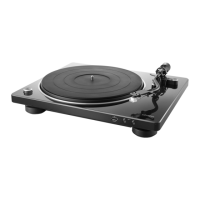
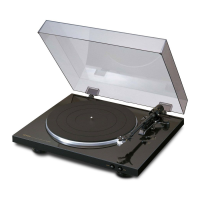
Denon DP-59L Specifications

General IconGeneral
Drive SystemDirect Drive
MotorAC Servo Motor
Wow and Flutter0.008% WRMS
Platter Size300 mm
Effective Tonearm Length244 mm
Speed33 1/3, 45 rpm
PlatterDie-cast aluminum
Tonearm TypeStatic balance type (interchangeable)

Related product manuals