EasyManua.ls Logo

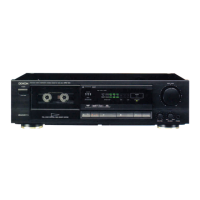
Denon DRM-400 - Product Features; Key Features Overview; Connection and Setup

Denon DRM-400
32 pages
To Next Page IconTo Next Page
To Previous Page IconTo Previous Page
Loading...
TABLE
OF
CONTENTS
SAFETY
INSTRUCTIONS
FOR
AUDIO
Sele
wedieeadee
ee
wees
2
FEATURES
........
abe
cee
eee
eee
eee
e
elec
teens
CONNECTION
....
2.2...
e
cece
ccc
ee
cect
cece
ee
cee
ed
eceee
NAMES
AND
FUNCTIONS
OF
PARTS
Thank
you
very..much
for
purchasing
the
DENON
component
DRM-400.
THE
DENON
DRM-400
is
a
top-line
stereo
cassette
tape
deck,
capable
6f
outstanding
jperformance
in
combination
with
high
grade
hi-fi
systems.
DENON
proudly
presents
this
advanced
tape
deck
to
audiophiles
and
music
lovers
as
a
further
proof
of
CASSETTE
TAPE.......:.:0ee.ce08
iS
Sandie
ie
aOR
ete
Ts
ane
a
5
.
DENON’s
;non-compromising
pursuit
of
the.
ultimate
in
AUTO
TAPE
SELECT
FEATURE...
;
:
5
sound
qu
ality.
The
high
quality
performance
and
easy
PLAYBACK
..-cie.ccccceceececseucies
6
operation:are
certain
to
provide
you
with
many
hours
ie
i
of
outstanding
listening
pleasure.
RECORDING
ee
PROPER
RECORDING
LEVEL
.....-....2...-.0
eect
eee
eed
7
;
RECORDING
BIAS
ADJUSTMENT
.....0....0.0.
sh
acsites
7
FEATURES
REC/REC:MUTE
REC
PAUSE
BUTTON...........-......5-
8
.™
Computer
controlled
mechanism
TAPE
COUNTER
AND
MEMORY
lo
wasios
esedlie
braiere
dress
8
‘a!
Non:
slip
reel
drive
for
stabilizing
xe
tension
MUSIC
SEARCH:
SYSTEM
1...
chase.
Gh
as
cae
ieceeceedceees
9
Dual
power
supply
DOLBY
Cc
NOISE
REDUCTION
SySTEM:;
dedvesiiaus
cae’
9
MHigh
Performance
R/P
head
MAINTENANCE
:;
bese
"se
Uiaivciee
wd
ot
oes
ee
Gee
Sa
euiee
me
amaeN
VES
10
WDolby
B
&
C
noise
reduction
systems
SYMPTOMS
OFTEN
MISTAKEN
AS
BR
KDOWNS
.....:.11
°°
lf
Manual
bias
adjustment
control
:
SPECIFICATIONS
<.01.)..2.22eceeceeese
Saiiad
se
deme
eaee
11
:
B
Mechanical
tape
counter
with
3-digit
réadout
and
memory
stop
zi
M@
Music
‘séarch
system
CONNECTION
@Leave
your
entire
system
Cineluding?
this
cassette
deck)
turned
off
‘until
all
connections
between
the
deck
and
other
components
have been
made.
m
Connecting
the
deck
to
an
amplifier
af
tie
e
Before
connecting
the
deck
to
-your
:amplifier;-it
is
a:
good
practice
to
review
your
amplifier’s
instruction
manual.’
eUse
the
white
plugs
for
the
left
channel,
and
the
red
plugs
for
the
right
channel.
artigo
ott
Pan
aesk?
sage,
bat
M@Tape
dubbing
a
or
od
eMany
stereo
amplifiers
and
receivers‘
have
tape
dubbing
circuitry
so
that
tape
duplication
can
be
performed’
‘between
two
-or
more
tape
decks.
Review
your
ampUsler
$
instruction
manual
for
a
full
explanation
of
this
mode
of
Operation.
oe,
seme
?
Receiver
or
amplifier
Connecting
Headhones
Epuire?
2h
Eire?
fos
Cassette
Deck”
This
jack
is
for
the
remote
contro!
function
only.
Do
not
plug
in
micro-
phones,
headphones
nor
other
plugs.
Power
supply
:
outlet.
To
listen
through
headphones,
plug
your
headphones
into
the
PHONES
jack.
Minstallation
Precautions
If
the
deck
is
placed
on
or
too
near
an
amplifier
or
tuner,
noise
(induced
hum)
or
beat
interference
may
result
(especially
during
FM
+
AM
reception).
@
Systems
remote
control
If
this
occurs,
separate
the
deck
from
other
components
or
reorient
its
position.
If
you
connect
the
remote
control
jacks
of
this
cassette
deck
and
a
DENON’s
separately
available
receiver
onal
(DRA
series
receiver
for
IS)
which
has
the
remote
control
provision
with
a
mini-plug
cable,
each
of
“PLAY,
FF,
REW,
STOP,
“REC/REC
MUTE
and
REC
PAUSE”
functions
can
be
remote
controlled
with
the
wireless
handset
of
the
receiver.
eUse
the
attached
mini-plug
cable.
3

Related product manuals