4
4DRR-M31
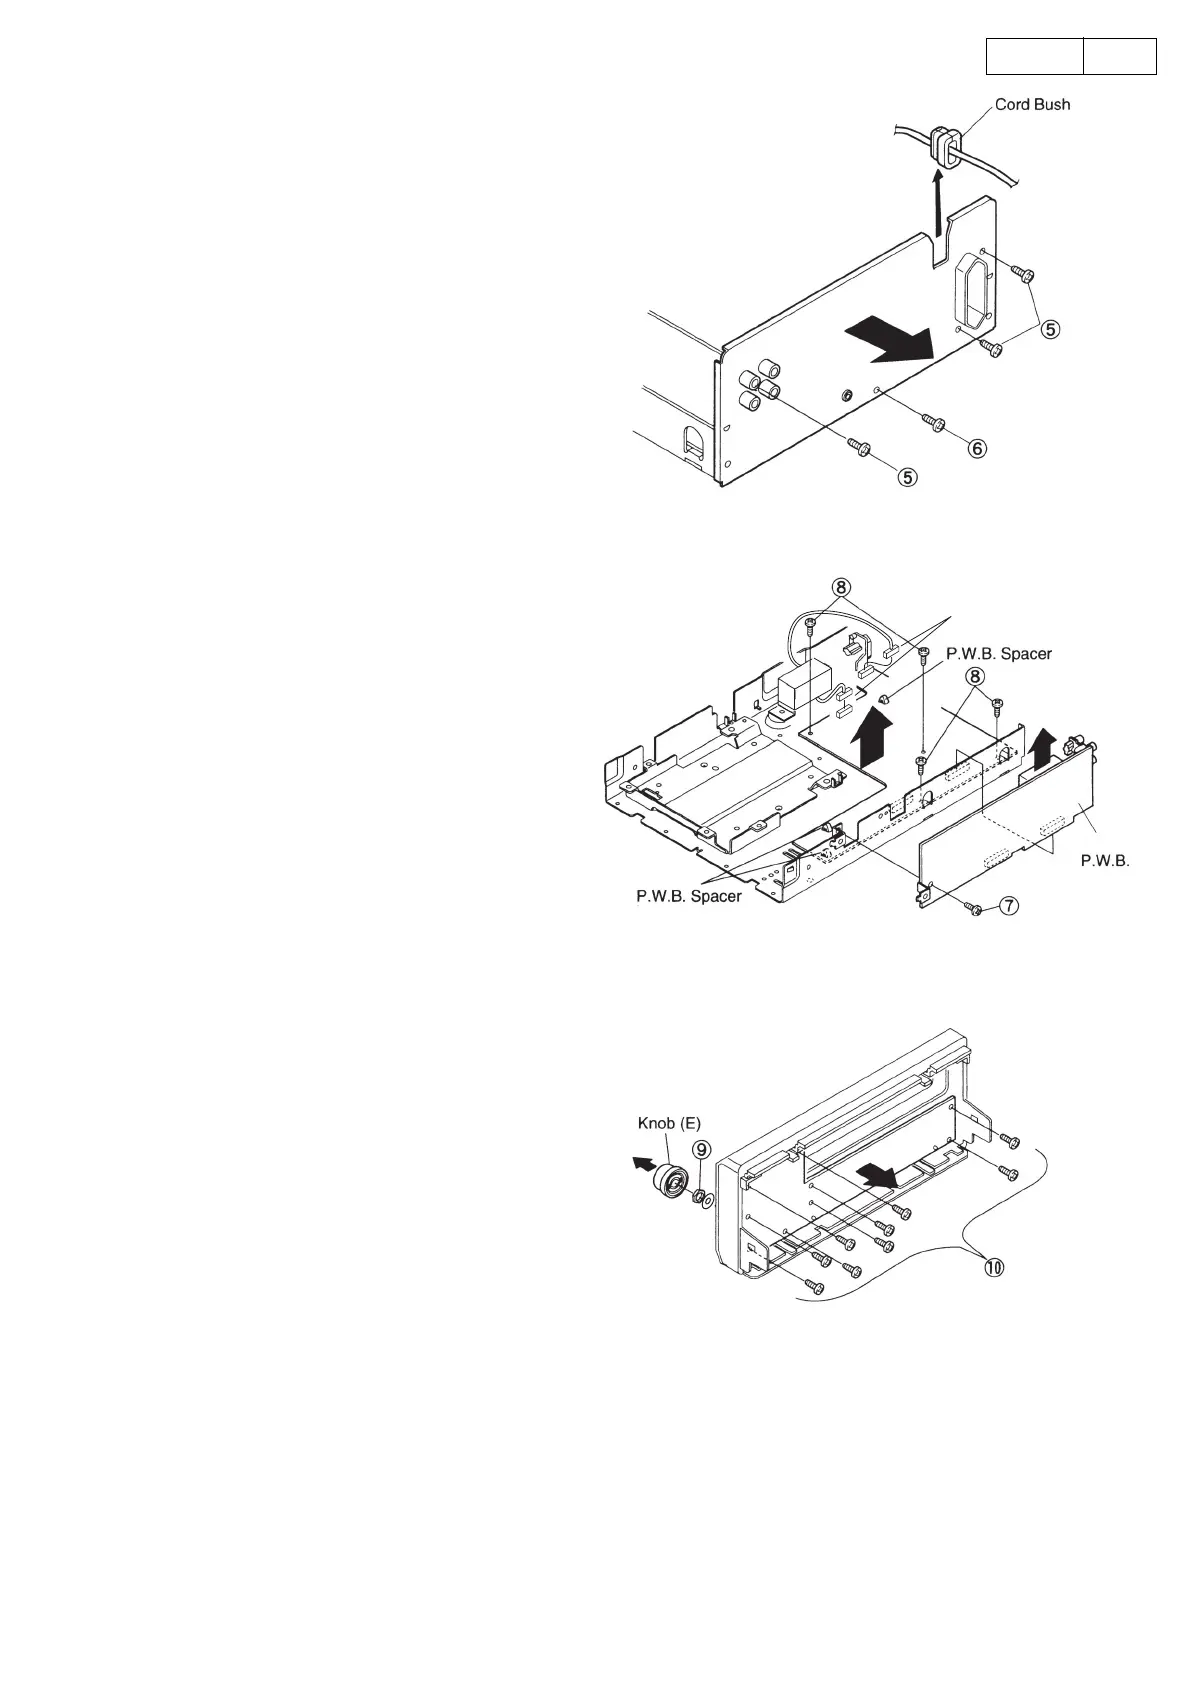
4. REAR PLATE
(1) Pull up the Power Cord together with the cord
bush to disengage from the Rear Plate.
(2) Remove 3 screws ⑤ fixing the 4P pin jack and
AC outlet respectively.
(3) Remove 1 screw ⑥ , and detach the Rear Plate.
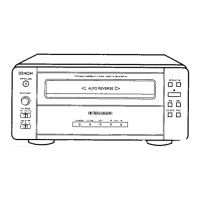
5. MAIN P.W.B.
(1) Remove 1 screw ⑦ fixing the AMP P.W.B.
(2) Pull up the AMP P.W.B. as shown in the arrow
direction, and disconnect 2 connectors.
(3) Remove 4 screws ⑧ fixing the Main P.W.B.
(4) Release 3 pieces of P.W.B. spacers.
(5) Disconnect the connector from the Trans Unit.
(6) Take off the Main P.W.B.
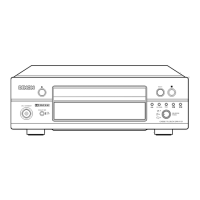
6. DISPLAY P.W.B.
(1) Pull out the knob (E).
(2) Remove the nut and washer ⑨ for the rotary
switch.
(3) Remove 9 screws ⑩ .
(4) Take off the Display P.W.B.
Connector
AMP


 To Next Page