4
Example 2
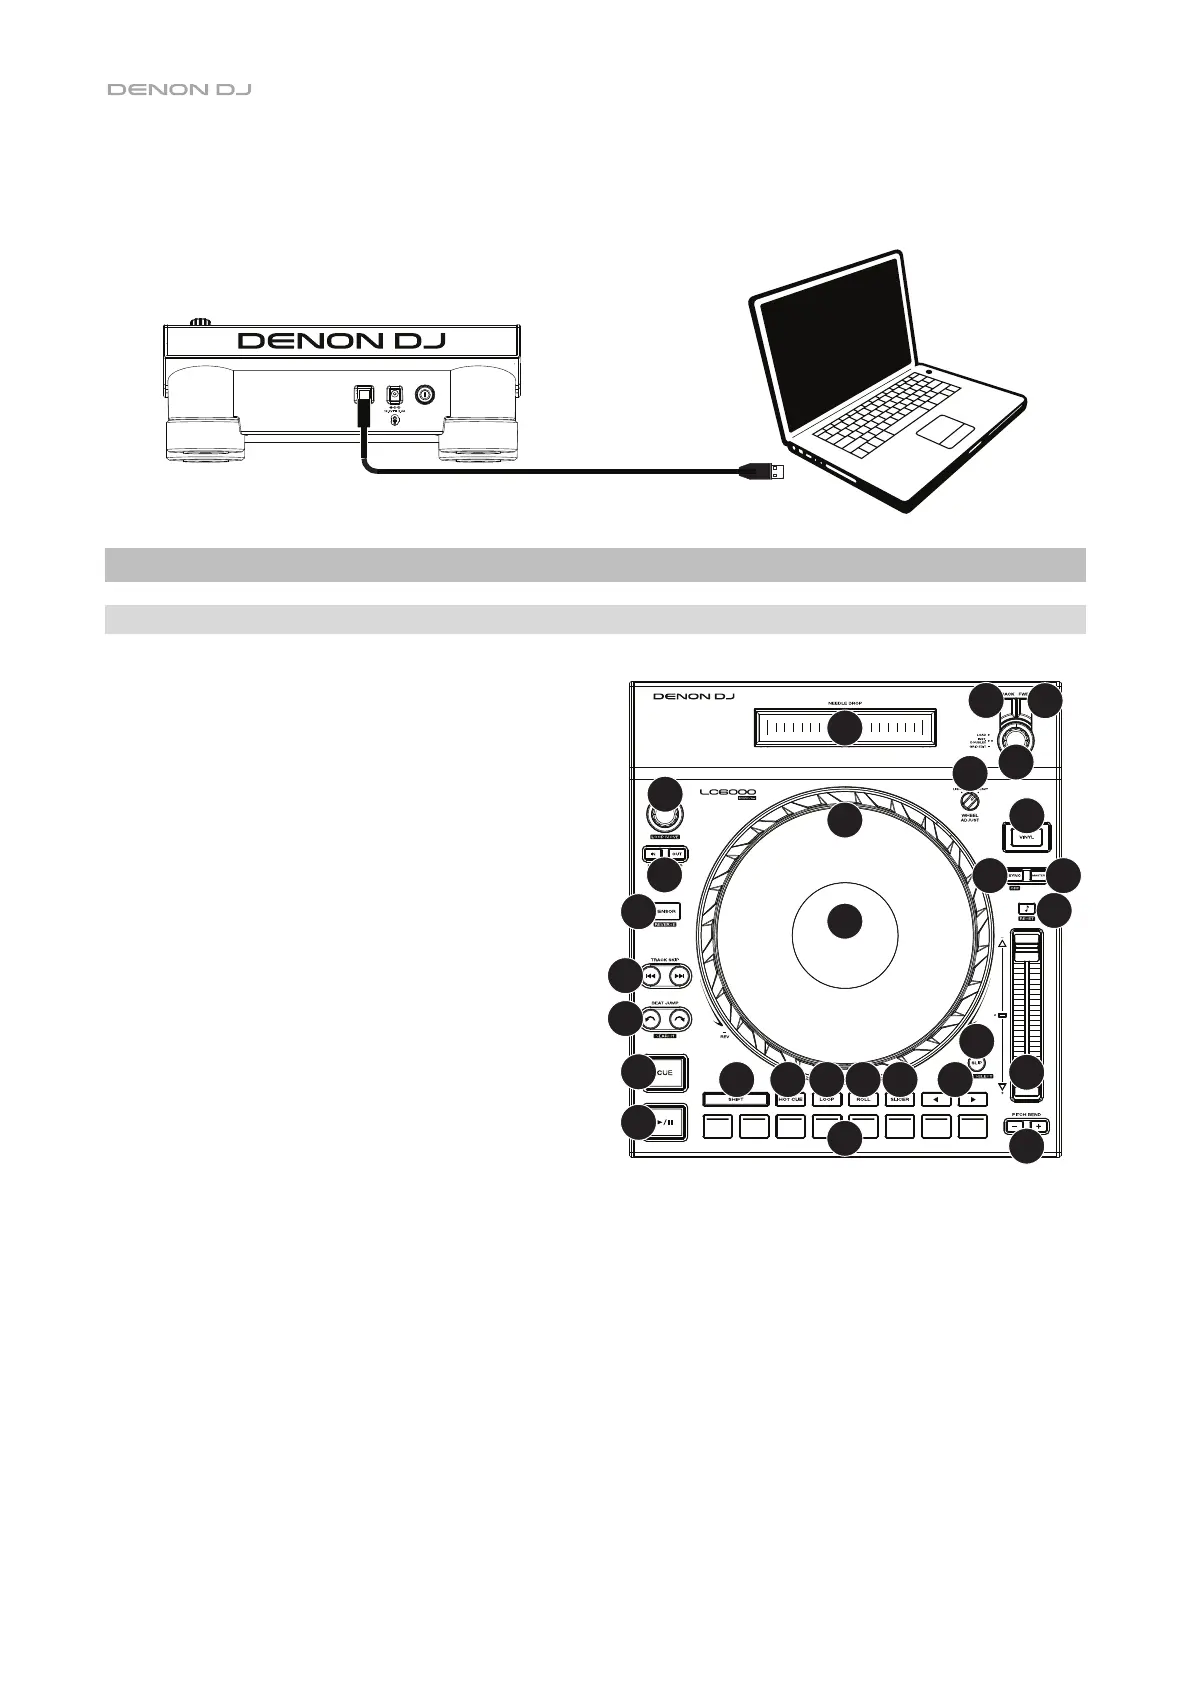
This example shows a LC6000 PRIME unit connected to a computer for software control.
Features
Top Panel
Media Selection & Browsing
1. Needle Drop Strip: The length of this strip represents
the length of the entire track. Place your finger on a
point along this sensor to jump to that point in the track.
2. Back: While in Browse View on the connected media
player, press this button to move to the previous
window. While in Performance View on the connected
media player, press this button to enter Browse View.
3. Forward: While in Browse View on the connected
media player, press this button to move to the next
window. While in Performance View on the connected
media player, press this button to enter Browse View.
4. Select/Zoom: While in Browse View on the connected
media player, turn this knob to scroll through a list, and
press the knob to select an item or load a track to the
layer in focus. Double-press the knob to load a track to
both layers (“instant doubles”).
While in Performance View on the connected media
player, turn this knob to zoom in and out of a track’s
waveform. Press and hold the knob to adjust the beat
grid (see your media player's User Guide for more
details on adjusting the beat grid).
Playback & Transport Controls
5. Platter: This capacitive, touch-sensitive platter controls the audio playhead when the wheel is touched and moved.
When the Vinyl button is on, move the platter to “scratch” the track as you would with a vinyl record. When the
Vinyl button is off (or if you are touching only the side of the platter), move the platter to temporarily adjust the
track’s speed.
6. Platter Display: This display shows information relevant to the performance, including the current playhead position
and auto loop size, as well as album artwork. See Platter Display Overview for more information.
7. Wheel Adjust: Turn this knob to set how resistant the platter is to adjustments. This knob applies a brake to the
platter to prevent unintentional drifting due to environmental vibrations from bass frequencies, surface instability, etc.
8. Vinyl: Press this button to activate/deactivate a “vinyl mode” for the platter. When activated, you can use the platter
to “scratch” the track as you would with a vinyl record.
9. Play/Pause (/): This button pauses or resumes playback.
Press and hold Shift and then press this button to “stutter-play” the track from the initial cue point.
1
2
3
4
5
6
7
8
9
10
12
13
14
15
16
17
18
19
20
21 22 23 24 25
26
27
28
11
LC6000 PRIME
(rear panel)
Computer
 Loading...