Do you have a question about the Denon engine dj SC LIVE 4 and is the answer not in the manual?
Full-color, multi-touch display showing SC LIVE 4 operation and interface controls.
Navigates lists, loads tracks to decks, and adds tracks to the Prepare list with Shift.
Buttons for cycling views, navigating windows, and accessing control center or lighting.
Adjusts pre-fader, pre-EQ audio signal level and displays signal strength.
Adjusts channel EQ frequencies and master volume levels via faders.
Mixes between decks using the crossfader and controls main output volume.
Controls internal speakers, booth output, and microphone/auxiliary inputs.
Manages headphone mix, cue blend, and various Sweep FX and BPM FX parameters.
Touch-sensitive platter for playhead control and display showing performance information.
Selects active decks and allows skipping to previous/next tracks.
Controls track cue points, playback, vinyl mode, and sync/key sync features.
Adjusts track speed (pitch) using the fader and pitch bend buttons.
Enables Slip Mode for uninterrupted playback during actions or beat grid editing.
Activates track reversal for effects or censorship during playback.
Accesses Hot Cue, Loop, Roll, and Slicer modes via dedicated buttons.
Controls auto loops, manual loop points, and beat jump parameters.
Connects headphones for cueing and mix monitoring via 1/4" or 1/8" jacks.
Provides power input, USB-B for computer connection, and USB-A for drives.
Features SD card slot, RCA/XLR main outputs, and 1/4" booth outputs.
Connects microphones via XLR or 1/4" jacks and auxiliary audio sources via RCA.
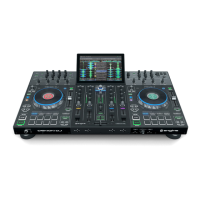
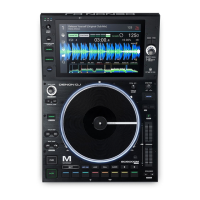
The Denon SC LIVE 4 is a comprehensive DJ controller designed for professional and enthusiast DJs, featuring a multi-touch display, extensive hardware controls, and various input/output options. It integrates seamlessly with the Engine DJ software, offering a robust platform for mixing and performance.
This full-color, multi-touch display serves as the central interface for the SC LIVE 4, providing real-time information on tracks, waveforms, and various settings. Users can interact directly with the screen to navigate menus, select tracks, and control software features. The touchscreen allows for intuitive control over the SC LIVE 4 interface, with detailed information available in the "Touchscreen Overview" section of the manual.
The Browse Knob is used for navigating through lists and selecting tracks on the touchscreen. Pressing the knob moves forward in the touchscreen interface or loads a selected song onto either deck. Holding Shift and pressing the Browse knob adds a track to the Prepare list, facilitating pre-performance organization.
The Back button allows users to return to the previous window in Library View or enter Library View from Performance View. The Forward (FWD) button moves to the next window in Library View or enters Library View from Performance View. Holding Shift and pressing FWD toggles Quantize on/off, a feature that aligns musical events to a grid.
These buttons are used to load the selected track onto Deck 1 or Deck 2. A quick double-press of either button instantly doubles the track currently playing from one deck to the other, enabling quick transitions or layering.
The View button cycles between Library View (for track selection and management) and Performance View (for mixing and performance). Holding Shift and pressing the View button switches between horizontal and vertical waveform views in Performance View, offering flexible visual feedback during a set.
Pressing and holding the Menu button opens the Control Center, which provides quick access to various settings and menus, including Source, Record, User Profile, Wi-Fi, and general Settings. This central hub allows for comprehensive device configuration.
The Lighting button enters the Engine Lighting view, providing control over integrated lighting effects and synchronization with the music.
These knobs adjust the level of the pre-fader, pre-EQ audio signal for each channel, allowing for precise gain staging before the signal reaches the faders and EQ.
These LEDs display the audio signal level for each channel, providing visual feedback to prevent clipping and ensure optimal sound quality.
These knobs allow users to boost or cut the low, mid-range, and high frequencies for each channel, enabling sound sculpting and mixing adjustments.
Pressing this button sends the channel's pre-fader signal to the headphones' cue channel, allowing DJs to preview tracks without affecting the main mix.
These faders adjust the volume level of each channel, providing dynamic control over the mix.
This feature routes the audio playing on the corresponding channel to either side of the crossfader (A or B) or bypasses the crossfader entirely, sending the audio directly to the program mix (center, Thru). This offers flexibility in how channels are mixed.
The crossfader is used to mix between Deck A and Deck B, allowing for smooth transitions and scratching techniques.
This knob adjusts the overall volume level of the Main Outputs, controlling the master output of the SC LIVE 4.
These LEDs display the audio signal level of the overall mix sent out of the Main Outputs, providing a visual representation of the master volume.
This button mutes or unmutes the internal speakers of the SC LIVE 4.
This knob adjusts the volume of both the internal speakers and the Booth Output, allowing DJs to control their monitoring levels independently.
Pressing this button toggles the talkover function on or off. When active, it automatically reduces the volume level of the master mix when a microphone signal is detected, making announcements clearer.
These knobs adjust the volume level for Microphone 1-2 and Aux inputs. The Peak light indicates the current signal level (green for low, amber for normal/optimal, red for maximum/peak). Additional microphone and aux settings can be adjusted in the Settings menu.
This knob adjusts the blend of the pre-fader and main mix in the headphones, allowing DJs to balance their monitoring of the incoming track and the live mix.
This knob adjusts the overall volume of the cue level in the headphones.
When this switch is On, the headphone audio is "split" such that all channels sent to the cue channel are summed to mono and sent to the left headphone channel, and the master mix is summed to mono and sent to the right channel. When Off, the cue channel and main mix are "blended." The left/right position of these channels can be swapped in the Settings menu.
These buttons select the active Sweep FX. Available effects include:
These knobs control the active Sweep FX A or FX B, allowing for real-time manipulation of the selected effects.
This knob selects the active effect for FX 1 and FX 2, offering a range of beat-synchronized effects.
This switch assigns effect routing from Deck 1, Deck 2, Deck 3, Deck 4, or the Main Outputs, providing flexibility in applying effects to specific channels or the master mix.
This knob decreases or increases the rate of time-based effects. Pressing the knob toggles between FX Time and FX Parameter control, allowing for adjustment of various effect parameters.
This knob adjusts the wet/dry mix of the effects, controlling the intensity of the applied BPM FX.
This button enables or disables the selected effect.
This capacitive, touch-sensitive platter controls the audio playhead. When touched and moved, it allows for scratching, nudging, and other vinyl-like manipulations of the track.
This display shows critical performance information, including the current playhead position, active deck, and track BPM. It also indicates the Playhead Position, Selected Deck, BPM, and Track Time (elapsed or remaining).
This button selects which deck in the software is controlled by the hardware deck. The left deck can control Deck 1 or 3, and the right deck can control Deck 2 or 4. Holding Shift and pressing the Deck 3 or Deck 4 buttons switches between four-deck and two-deck operation.
These buttons skip to the previous or next track. When pressed in the middle of a paused track, they return to the beginning of the track or advance to the next track, respectively. Holding Shift and pressing these buttons allows for searching backward or forward through the track.
These buttons skip backward or forward through the track by a specified beat jump size. Holding Shift and pressing these buttons increases or decreases the beat jump size.
During playback, this button returns the track to the initial cue point and stops playback. To move the initial cue point, pause the track, move the platter to the desired location, and then press this button. If the deck is paused, holding this button temporarily plays the track from the initial cue point. Releasing the button returns the track to the initial cue point and pauses it. To continue playback without returning to the initial cue point, press and hold this button and then press and hold the Play button, then release both buttons. During playback, holding Shift and pressing this button sets the initial cue point at the current playhead position.
This button pauses or resumes playback. Holding Shift and pressing this button enables "stutter-play" of the track from the initial cue point.
This button activates/deactivates "vinyl mode" for the platter. In vinyl mode, the platter can be used to scratch the track like a vinyl record. When deactivated (or if only the side of the platter is touched), moving the platter temporarily adjusts the track's speed.
This button activates sync, which automatically matches the BPM of tracks. When Key Lock is activated, the track's key remains the same even if its speed is adjusted. Holding Shift and pressing this button turns off key lock.
When a track is playing, holding this button activates key sync to that track, matching its key to the master deck. Holding Shift and pressing this button resets the track to its original key.
This fader adjusts the speed (pitch) of the track, allowing for manual BPM matching and creative pitch shifts.
Holding one of these buttons momentarily reduces or increases the speed of the track. Holding Shift and pressing one of these buttons sets the range of the pitch fader.
This button enables or disables Slip Mode. In Slip Mode, actions like jumping to cue points or triggering loop rolls occur while the track's timeline continues underneath. When the action stops, playback resumes from where it would have been if no interruption occurred. Holding Shift and pressing this button enables beat grid editing. Holding Shift and pressing this button while beat grid editing is enabled resets the beat grid. Holding Shift and pressing this button while beat grid editing is disabled allows manual adjustment of cue/loop point locations using the touchscreen.
This button activates/deactivates the Censor feature, which reverses playback. When released, normal playback resumes from where it would have been. Holding Shift and pressing this button reverses playback of the track normally.
This button is held to access secondary functions of other controls, expanding the functionality of the SC LIVE 4.
These pads have different functions depending on the current pad mode (Hot Cue, Loop, Roll, Slicer), offering dynamic control over various performance features.
This button enters Hot Cue Mode, allowing users to trigger pre-set cue points.
Pressing this button once enters Manual Loop Mode, and pressing it again enters Auto Loop mode.
This button enters Roll Mode, enabling short, repeating loops that play while the track continues underneath.
Pressing this button once enters Slicer Mode, and pressing it again enters Slicer Loop Mode, which chops a section of the track into segments that can be re-triggered.
These buttons are used for various functions in each Pad Mode, allowing for adjustment of effect parameters or other settings.
This knob sets the size of an automatic loop. Pressing the knob activates or deactivates an automatic loop at the current track location. Holding Shift and turning this knob shifts the active loop left or right.
These buttons create Loop In or Loop Out points at the current location. Their placement is affected by Quantize and Smart Loops settings. Holding Shift and pressing either button manually adjusts the loop in and out points.
Connect 1/4" (6.35 mm) or 1/8" (3.5 mm) headphones for cueing and mix monitoring. The headphone volume is controlled by the Headphones Level knob.
Press to power SC LIVE 4 on/off. Power on after connecting all input devices and before amplifiers/loudspeakers. Power off amplifiers/loudspeakers before powering off SC LIVE 4.
Connect the included power adapter.
Wrap the power cable here for added support.
Connect a standard USB cable (included) to an available USB port on a computer.
Connect standard USB drives. When selected as a source, tracks can be loaded from the USB drive.
Insert a standard SD card. When selected as a source, tracks can be loaded from the SD card.
Connect standard 1/4" cables to booth monitors or an amplifier system. Volume controlled by the Speaker/Booth Level knob.
Connect standard RCA cables to loudspeakers or an amplifier system. Volume controlled by the Main Volume knob.
Connect standard XLR cables to loudspeakers or an amplifier system. Volume controlled by the Main Volume knob.
Connect standard RCA cables to an external audio source. Set the Mic 2/Aux switch to Aux and use the Aux/Mic 2 Level knob.
Selects whether the Mic 2 Input or Aux Input is active.
Connect a standard XLR cable (not included) for a dynamic microphone. Volume controlled by the Mic 1 Level knob.
Connect a standard 1/4" (6.35 mm) cable (not included) for a dynamic microphone. Set the Mic 2/Aux switch to Mic 2 and use the Aux/Mic 2 Level knob.
| Brand | Denon |
|---|---|
| Model | engine dj SC LIVE 4 |
| Category | DJ Equipment |
| Language | English |