Do you have a question about the Denver Instrument TB Series and is the answer not in the manual?
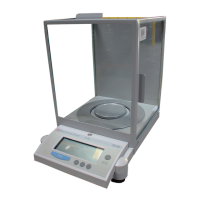
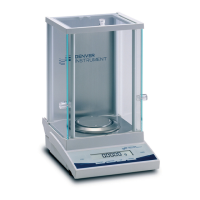
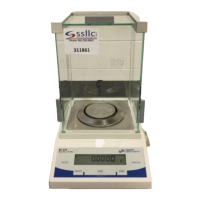
The sample pan for placing items to be weighed.
Disk used for shielding the weighing pan from drafts.
Label indicating approval for use as legal measuring instruments.
Switch to control access to balance menu settings.
Adjustable feet for stabilizing and leveling the balance.
Key for activating functions and application programs.
Key to zero the weight display before weighing.
Key to turn the balance on or enter standby mode.
Key for printing data or transferring it to a computer.
Key used for calibration or clear function.
The main screen showing measured weight and status.
Connection point for the AC power adapter.
Label with metrological data for verified balances.
Label with manufacturer info and CE mark.
Port for connecting printers or computers.
Visual indicator to check balance leveling.
Point for attaching an antitheft security cable.
Details on the balance's warranty period and service contacts.
Recommended temperature range for storing and shipping the balance.
Instructions for safely unpacking and inspecting the balance for damage.
Guidelines for placing the balance in suitable environmental conditions.
Procedure for acclimating the balance to new ambient temperatures.
Information and warnings regarding potential radio frequency interference.
Requirement to calibrate the balance before use as a legal measuring instrument.
Restrictions on using the balance for weighing goods for direct sale to the public.
Recommendations for monitoring ambient conditions with a thermometer and barometer.
Requirement for the balance to warm up for at least 24 hours after connection.
Manufacturer's compliance with EC Directive 90/384/EEC and quality accreditation.
Instructions for connecting the TB-215D balance to the electronic box.
Procedure for preparing balances with a draft shield chamber.
Steps to prepare the TB-413A balance with a round glass draft shield.
Instructions for installing a pan draft shield on Model TB-4102A.
Procedure for preparing balances with a rectangular weighing pan.
How to connect the AC adapter to the balance and power outlet.
Using the level indicator and feet to ensure the balance is level, including auxiliary feet.
The balance must warm up for at least 30 minutes before use.
How to turn the balance display on or off using the ON/OFF key.
Automatic self-test performed by the balance upon startup.
Information regarding display formatting for verified balances.
Explanation of special codes and symbols displayed by the balance.
How to zero the weight display to exclude container weight.
Steps for performing a basic weighing operation.
Definitions of calibration (determining difference) and adjustment (correcting difference).
Recommendations for calibrating the balance after setup and daily.
Procedure for internal calibration using the built-in weight.
How to handle 'Err 02' during calibration.
How to block calibration functions using menu code 197.
Procedure for external calibration using external calibration weights.
Using the balance's internal calibration weight for testing and calibration.
How to connect a Denver printer to the balance's interface port.
Restrictions on connecting peripheral devices when used as legal instruments.
How to print data or output it to a computer screen using the PRINT key.
Location and access to the port for below-balance weighing on the balance bottom.
Restriction on using the below-balance port with legal measuring instruments.
Necessity of installing a shield to protect against drafts when using the port.
Common applications for below-balance weighing like density determination.
How to fasten an antitheft locking device using the rear panel lug.
Troubleshooting steps when no segments appear on the weight display.
Solutions for specific display error messages like 'H', 'L', 'Err 54', 'Err 02'.
Troubleshooting steps for a constantly changing weight readout.
Steps to take when the weight readout is obviously wrong.
Information on Denver's service contracts for regular maintenance.
Procedures for inspecting the balance for safe operation, especially the AC adapter.
Explanation of factory settings identified by an asterisk (*) in the manual.
Restrictions on changing menu codes for balances used as legal instruments.
Three steps to change balance menu codes: access, set, confirm.
Step-by-step guide to navigating and accessing the balance operating menu.
How to confirm and store a new menu code setting.
How to undo all menu code changes and restore factory settings.
Settings for adapting the balance to different ambient conditions.
Options for standard weighing mode and manual filling mode.
Adjusting the stability range for weighing accuracy.
Options for when the tare function is applied (at any time or not until stable).
Settings to enable or disable the automatic zero tracking function.
Menu codes for various calibration and linearization functions.
Various weight units available for selection and their conversion factors.
Settings for display modes like accuracy and rounding factor.
Configuring the communication speed for the data interface.
Configuring parity settings for data transmission.
Setting the number of stop bits for data transmission.
Configuring handshake modes for data communication.
Settings for controlling data output, such as print on request or auto print.
Configuring automatic printing behavior.
Setting data output frequency based on display updates.
Options for automatic taring after data output.
Enabling or disabling automatic output of application parameters.
Options for including or excluding data ID codes.
Settings for automatic output of tare memory data.
Defining the function of the menu access switch (accessible or locked).
Configuring key functions for the menu access switch.
Using an external switch for remote control of balance functions.
Configuring the balance's power-on behavior (off, standby, automatic).
How to select application programs or specific functions using menu codes.
Availability of application programs in verified balances and non-metric symbols.
Symbols used to identify non-metric weight values in application programs.
Using the FUNCTION key to store the tare weight for auto-taring.
Menu codes and example for obtaining printouts of tare, net, and gross weights.
Alternative output parameter to print only the net value.
Example demonstrating simple compounding and formulating with net total calculation.
Example for determining the dry weight of a sample using percent calculation.
Example demonstrating counting bulk quantities of items with the same weight.
Example of automatic weighing of animals using 20 subweighing operations.
How to change the reference percentage for weighing in percent calculations.
Settings for storing the reference weight value with full accuracy or display accuracy.
Settings for the number of decimal places in percent readouts.
How to change the reference sample quantity for piece counting.
Settings for storing the reference sample weight accuracy.
Selecting between manual or automatic start for averaging operations.
Configuring delayed start based on subweight differences for active subjects.
How to set the number of subweighing operations for averaging.
Setting a minimum load threshold for reliable automatic start.
Setting the balance operating menu to enable GLP/GMP printouts.
Menu code settings required for a GLP/GMP-compliant printout.
Connecting and using a printer for GLP/GMP-compliant printouts.
Details of the printout content for calibration and linearization functions.
Steps to print data records, including headings and additional data.
Enabling automatic output of reference data (parameters) during recording.
Model and type designation of the balance.
The accuracy class of the balance.
Maximum capacity, scale intervals (d and e), and minimum capacity.
The subtractive tare range of the balance.
The average response time of the balance.
Adaptation to ambient conditions and application requirements.
The allowable ambient and operating temperature ranges.
Dimensions of the weighing pan and weighing chamber.
The approximate net weight and selectable weight units.
List of selectable application programs supported by the balance.
Details on the automatic zero tracking function.
Information on power requirements, frequency, and consumption.
Specifications of the built-in interface port.
List of standard features and supplied equipment.
Comparison of models TB-224A, TB-124A, and TB-413A.
Comparison of accuracy classes for different models.
Comparison of weighing capacities and scale intervals across models.
Comparison of average response times for different models.
Comparison of allowable ambient and operating temperature ranges.
Comparison of pan sizes for different balance models.
Comparison of power requirements across models.
Comparison of models TB-4102A, TB-2202A, and TB-6201A.
Comparison of accuracy classes for these models.
Comparison of capacities and scale intervals for these models.
Comparison of average response times for these models.
Comparison of operating temperature ranges for these models.
Comparison of pan sizes for these balance models.
Comparison of power requirements for these models.
List of EU directives and European standards the balance meets.
Note on operator responsibility for modifications and connections.
Compliance with electrical equipment standards for voltage limits.
Information on Directive 90/384/EEC for non-automatic weighing instruments.
Information on verification validity and local regulations.
Information on the EC type-approval certificate number and models.
How balance models correspond to type-approval certificates and directives.
Copyright notice and conditions for reprinting or translating the publication.
Manual's status date and Denver Instrument's right to make changes.
Contact details for Denver Instrument GmbH in Europe, Asia, and Australia.
| Display | LCD |
|---|---|
| Tare Range | Full Capacity |
| Platform Size | See Pan Size |
| Units of Measurement | g, kg, oz, lb, ct, ozt, dwt, tlH, tlT |
| Interface | RS232 |
| Power | AC Adapter |
| Stabilization Time | Approximately 2 seconds |
| Operating Temperature | 10°C to 40°C |
| Calibration | External or internal (depending on model) |