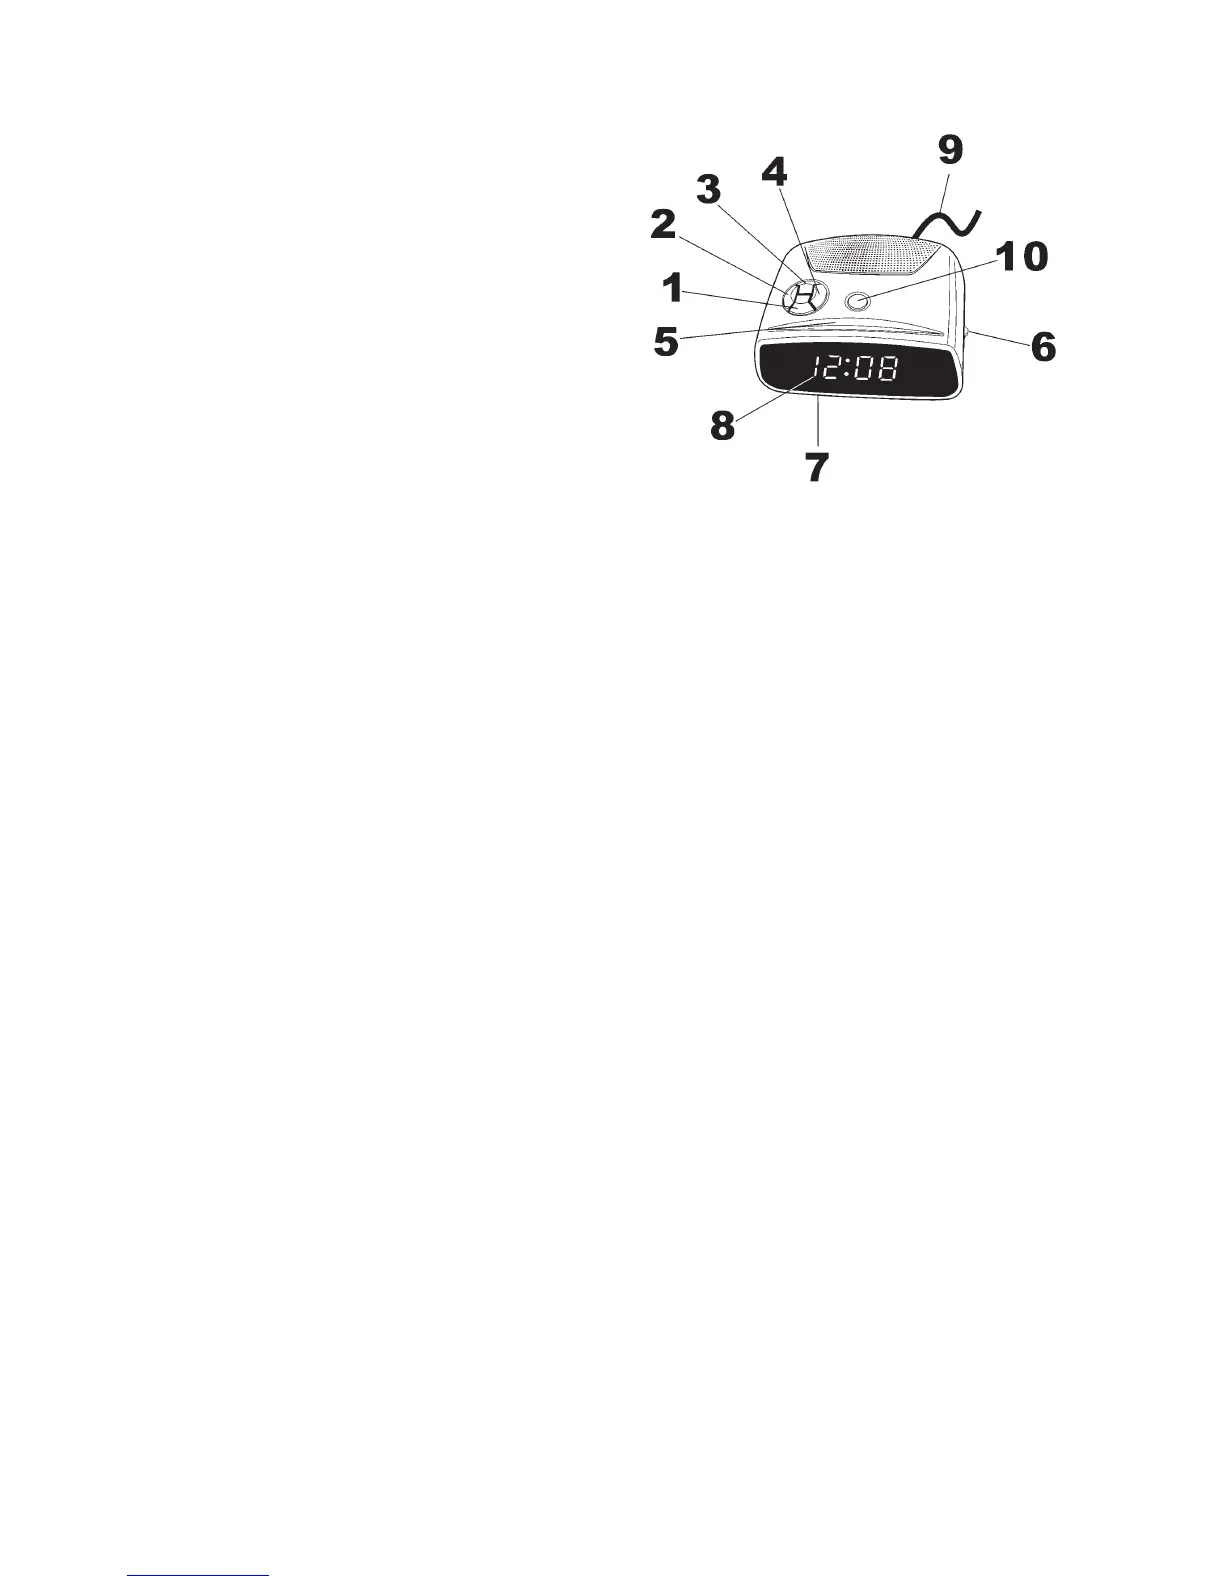
1. MINUTE SET BUTTON
2. TIME SET BUTTON
3. HOUR SET BUTTON
4. ALARM SET/ BUTTON
5. SNOOZE BUTTON
6. ALARM ON/ OFF SWITCH
7. BATTERY COMPARTMENT
8. LED DISPLAY
9.
10.
AC POWER Cord
ALARM OFF BUTTON
1. CONNECTING THE POWER
Insert correctly wired plug into a power outlet. The clock display will
blink showing that the time is not correct. It will also blink if there has
been a power cut and no back up battery is fitted.
2. TO SET THE TIME
2.1 Press and hold the Time Set Button(2).
2.2 Press the Minute Set Button(1) or Hour Set Button(3) to set the clock
display to the correct time.
2.3 Release the Time Set Button(2).
3. TO SET THE ALARM TIME
3.1 Press and hold the ALARM SET (4) button.
3.2 While holding the ALARM SET (4) button press the HOUR SET (3)
Button and MINUTE SET buttons (1) to advance the time until the
desired alarm time is shown on the display.
NOTE: To check up the wake-up time, press the Alarm Set Button(4).
The clock display will show the preset alarm time.
4. WAKE TO BUZZER ALARM
4.1
4.2 Press the Alarm Off button (10) to turn off the buzzer, the alarm
will be activated again after 24 hours.
4.3 Slide the Alarm On/Off Switch (6) to deactivate the alarm function
completely.
Set the Alarm ON/ OFF Switch(6) to ON Position. The respective
AUTO indicator will light on. The buzzer will now be switched on
automatically at the selected alarm time for one hour and 59 minutes
ENGLISH