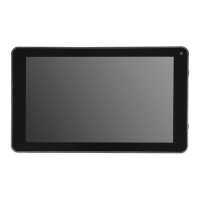
This document describes the DENVER TAQ-70302 tablet PC, providing essential information for its operation, maintenance, and safe use.
Function Description
The DENVER TAQ-70302 is a tablet PC designed for various applications, including web browsing, email, multimedia playback, and running additional applications. It features a touchscreen interface for intuitive navigation and control. The device is equipped with a power button, volume controls, a headphone jack, a USB port for data transfer, and a microSD card slot for expandable storage. A reset button is also provided for troubleshooting purposes.
Usage Features
Power Management:
To turn the tablet on, press and hold the Power key until the LCD screen illuminates and the Home screen appears. To turn the tablet off, press and hold the Power key until the power off menu is displayed, then select "Power off." For standby mode, a single press of the Power key will turn the screen off to conserve battery power, and another press will turn it back on. The screen timeout can be adjusted in the Display menu, with options ranging from 15 seconds to 30 minutes, to further conserve battery life when the tablet is idle.
Screen Unlocking:
When the screen is off, you will need to unlock it to resume use. To do this, drag the lock icon across the screen towards the slide lock icon, which is typically located towards the top of the screen where an unlock icon is shown. This action will unlock the tablet and display the home screen.
Applications:
Applications can be accessed from the home screen by tapping their respective icons or by navigating to the Launcher screen, which can be accessed by tapping the ":::" icon on the home screen. The tablet comes with several preinstalled applications for convenience, including:
- Browser: For browsing the internet.
- Calculator: For performing mathematical operations.
- Camera: For taking pictures and videos using the front-facing camera.
- Email: For checking and managing email accounts.
- Music: For playing audio files.
- Settings: For adjusting various tablet options and configurations.
Additional applications can be downloaded and installed from the device's applications marketplace, through the web browser, or from other sources. To install applications from non-Market sources, the "Unknown sources" option must be enabled in the Application settings menu.
Connecting to the Internet (Wi-Fi):
To connect the tablet to a wireless internet network:
- Press the Settings icon.
- Locate the Wi-Fi setting and slide it to the "On" position.
- Select a network from the list of available networks. If the desired network is not visible, press the refresh button to update the list. Networks can also be added manually by selecting the "Add Network" button.
- Once a network is selected, choose "Connect" from the pop-up menu.
- If the network is secured, enter the password to continue.
After successful connection, the display will show "Connected" under the network name. To conserve battery life, it is recommended to turn off Wi-Fi when not in use.
Email Setup:
To set up an email account:
- Tap the Email icon in the App menu.
- Enter your email address and password, then press "Next."
If automatic setup fails, manual configuration may be required. It is advisable to consult an IT professional or your email provider's website for detailed server information (POP3, IMAP, or Exchange). The manual setup involves entering incoming and outgoing server settings, which will be tested by the app. Wi-Fi must be active for the settings to be tested successfully.
Transferring Files:
To transfer files between the tablet and a computer:
- Connect one end of the included Mini-USB to USB cord to the tablet and the other end to a USB port on your computer.
Once connected, you will be able to transfer files to and from your computer.
Maintenance Features
Troubleshooting:
The manual provides solutions for common issues:
- Wi-Fi Connection Issues: Ensure the wireless network is functional, the tablet is within range of the router, and the security password is correct. Walls and other obstructions can reduce signal strength.
- Device Not Turning On: If the battery charge is critically low, charge the battery. If the issue persists, use a needle or paper clip to press the reset button on the back of the device. Verify that the charger is connected correctly.
- Heat Issues: It is normal for the device to become warm when running multiple applications, using the screen at its brightest setting, or while charging. This should not cause inconvenience.
- System Anomalies/Malfunctions: If the system is not operating correctly, often due to third-party applications, press the RESET button and perform a system reset.
- Email Account/Registration Issues: Ensure the tablet is connected to a Wi-Fi network with internet access. Verify that email settings are entered correctly and that system time and local time are accurate.
- Recording Issues: If the record function is not working, use a needle or paper clip to reset the unit and re-test.
- Short Stand-by Time: Battery duration varies with environmental temperature and service conditions. Use the device at normal temperatures. High volume, Wi-Fi, and frequent use can drain the battery faster.
- No Sound via Earphone: Check if the volume setting is at 0. Test with another audio file to confirm if the original file is broken, which can cause noise or static.
- Color Distortion (Video/Picture): Use a needle or paper clip to reset the unit.
- File Copying Issues: Ensure the device is correctly connected to the computer, check if memory space is full, and verify that the USB cable is not broken.
- Other Troubles: For other issues, first try resetting the device with a needle or paper clip. If that doesn't work, upgrade the firmware from a PC, restart the device, and then check the function again.
Factory Reset:
Performing a factory reset on Android 6.0 units can take up to 10 minutes. During this process, the screen will continuously display "Android" while the firmware reloads. It is crucial not to turn off the tablet during this state. The tablet will automatically restart once the firmware reloading is complete.