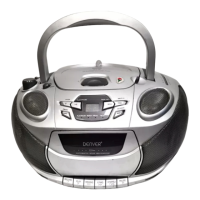
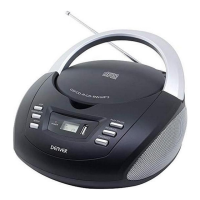
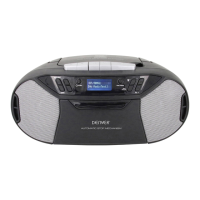
This document describes the Denver TCD-52, a portable audio system that combines a CD player, cassette recorder, and radio.
Function Description
The TCD-52 serves as a versatile audio entertainment device, allowing users to play compact discs, listen to radio broadcasts, and record and play back cassette tapes. It features a function switch to select between Tape, Radio, and CD modes, and a band switch for radio frequency selection. The unit is designed for both AC and battery operation, providing flexibility for use at home or on the go.
Important Technical Specifications
While specific technical specifications like frequency ranges or power output are not detailed in this excerpt, the manual indicates compatibility with CD-R/RW discs for playback. The unit operates on either AC power (requiring a standard AC outlet) or eight UM-2/ "C" size batteries (not supplied). It includes a stereo headphone jack for private listening, which automatically disconnects the speakers when in use. The cassette deck features an Automatic Level Control (ALC) for optimal recording quality from the radio or CD player, ensuring consistent sound levels without manual adjustment.
Usage Features
Powering the Device:
- AC Operation: Connect the AC Line Cord to the AC socket on the unit and a standard AC outlet. Ensure the voltage matches your local area.
- Battery Operation: Disconnect the AC cord. Open the battery compartment door and insert eight UM-2/ "C" size batteries, observing the correct polarity.
Radio Operation:
- Slide the FUNCTION switch to "RADIO".
- Slide the BAND switch to the desired waveband (e.g., FM, AM).
- Turn the TUNING KNOB to find your desired radio station.
- Adjust the VOLUME CONTROL KNOB for the desired sound level.
- To turn off the radio, slide the FUNCTION SWITCH to "TAPE".
- FM Stereo Indicator: An "FM ST." LED lights up when tuned to an FM stereo broadcast. If the signal is weak, switch to "FM" position to reduce background noise.
- Antennas: For FM, fully extend the FM antenna. For AM, the unit has a built-in antenna; rotate the unit for best reception.
- Bass Boost: Push the BASS BOOST BUTTON to "ON" to enhance low frequencies for an emphasized bass sound. Push it again to release the super bass.
Cassette Operation:
- Tape Playback:
- Depress the STOP/EJECT BUTTON to open the cassette door.
- Insert a cassette tape into the CASSETTE COMPARTMENT and close the door.
- Slide the FUNCTION SWITCH to "TAPE".
- Depress the PLAY BUTTON.
- Adjust the VOLUME CONTROL KNOB.
- To stop, depress the STOP/EJECT BUTTON.
- Fast Forward and Rewind: Depress the FAST FORWARD BUTTON or REWIND BUTTON.
- Pause Function: During playback or recording, depress the PAUSE BUTTON to temporarily stop. Press it again to resume.
- Auto Stop System: Cassette operation stops automatically when the tape reaches its end.
- Caution: Always depress the STOP/EJECT Button between operations to prevent damage to the mechanism or tapes.
- Recording from Radio:
- Tune to a desired radio program.
- Insert a blank cassette tape.
- Press the PAUSE BUTTON.
- Press the RECORD BUTTON (PLAY BUTTON engages simultaneously). The built-in ALC automatically adjusts recording quality, so volume level changes won't affect recording.
- Release the PAUSE BUTTON to start recording.
- To temporarily stop, press PAUSE. Press again to resume.
- Press STOP/EJECT BUTTON to stop recording.
- Recording from CD Player:
- Slide the FUNCTION SWITCH to "CD".
- Insert a CD with the label side upward.
- Insert a cassette into the CASSETTE COMPARTMENT and press PAUSE BUTTON on the cassette deck.
- Press RECORD BUTTON and PLAY BUTTON simultaneously for recording stand-by. ALC automatically adjusts recording quality.
- Activate the CD player to play the desired track.
- Release the PAUSE BUTTON on the cassette deck to start recording.
- To temporarily stop, press PAUSE. Press again to resume.
- Press STOP/EJECT BUTTON on the cassette deck to stop recording. Then press CD STOP BUTTON on the CD player.
CD Operation (CD-R/RW Playback Compatible):
- Getting Started:
- Open the CD DOOR by pulling it up.
- Place a CD into the CD COMPARTMENT and close the door.
- Set the FUNCTION SWITCH to "CD".
- The CD LED DISPLAY will show the total number of tracks and then go to "STOP" mode. If no disc or the door is open, it will show "0 0".
- Note: If tracks skip, try turning the volume down. Do not open the CD door while a CD is playing.
- Play/Pause Mode:
- In "STOP" mode, press PLAY/PAUSE BUTTON to play the first track. The PLAY/PAUSE LED INDICATOR will light, and the CD LED DISPLAY will show the track number.
- To interrupt playback, press PLAY/PAUSE BUTTON once. The LED will flash. The disc continues to spin.
- To resume, press PLAY/PAUSE BUTTON again. Playback resumes from the interrupted position.
- To stop, press CD STOP BUTTON.
- Repeat Mode:
- REPEAT 1: Press REPEAT BUTTON once. The REPEAT LED INDICATOR lights and flashes, repeating the current track.
- REPEAT ALL: Press REPEAT BUTTON twice. The REPEAT LED INDICATOR stays lit, repeating the entire disc.
- Cancel Repeat: Press REPEAT BUTTON until the LED indicator turns off.
- Skip and Search Mode:
- Skip: During play or pause, press CD SKIP FORWARD ">>" or CD SKIP BACKWARD "<<" once to go to the next track or the beginning of the current track.
- Search: During play, press and hold CD SKIP FORWARD ">>" or CD SKIP BACKWARD "<<" to search the track with audible high-speed playback.
- Program Mode:
- In CD "STOP" mode, press PROGRAM BUTTON once. The PROGRAM LED INDICATOR will light and blink, and the LED DISPLAY will show "01" (first program number) and blink.
- Use CD SKIP FORWARD ">>" or CD SKIP BACKWARD "<<" to select the desired track. The CD LED DISPLAY will show the track number.
- Press PROGRAM BUTTON to store the track in memory.
- Repeat steps 2-3 to program up to 20 tracks. After programming, the LED DISPLAY will show "01" and flash.
- To start programmed playback, press CD PLAY/PAUSE BUTTON.
- To check the stored program, press PROGRAM BUTTON once.
- Note: Do not press CD STOP BUTTON while the PROGRAM LED INDICATOR is flashing, as this will cancel all programmed memory.
- To cancel programmed play mode, open the CD DOOR or press CD STOP BUTTON.
Maintenance Features
- Cleaning Tape Heads: Regularly clean the tape heads to remove dust and tape residue. Dirt on the heads can impair sound quality during recording and playback.
Safety Warnings
- Fire/Shock Hazard: Do not expose the appliance to rain or moisture. Do not remove the cover. There are no user-serviceable parts inside. Refer servicing to qualified personnel.
- Ventilation: Ensure the product's normal ventilation is not impeded.
- Dripping/Splashing: The product should not be exposed to dripping or splashing liquids. Do not place objects filled with liquids (e.g., vases) on the product.