109891-01B
4
For more information, visit www.desatech.com
For more information, visit www.desatech.com
Figure 2 - Cross Section Operational View
THEORY OF OPERATION
ASSEMBLY
ASSEMBLY
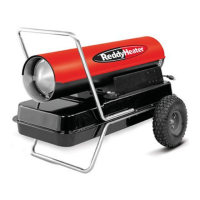
These models are furnished with wheels and a rear handle. Wheels,
handle, and the mounting hardware are found in the shipping carton.
Tools Needed
• Medium Phillips Screwdriver
• Rubber Mallet/Hammer
• Flat Blade Screwdriver
1. Apply a couple drops of oil in shroud axle holes. Slide axle
through shroud with a twisting motion. Install washers and
wheels on axle as shown in Figure 3.
IMPORTANT:
When installing wheels, point extended hub of
wheels toward shroud (see Figure 3).
2. Place cap nuts on axle ends. Gently tap with hammer to secure.
3. Install extension cord wraps into handle.
4. Slide handle onto shroud leaving a one inch gap between parts.
5. Place washers onto screws and insert screws into holes in
handles.
6. Visually confirm that all six screws are threaded into nuts in
the shroud. Push the handle completely into the shroud.
7. Tighten all scews.
THEORY OF OPERATION
The Fuel System: The air pump forces air through the air line. The
air is then pushed through the nozzle. This air causes fuel to be lifted
from the tank. A fine mist of fuel is sprayed into the combustion
chamber.
The Air System: The motor turns the fan. The fan pushes air into
and around the combustion chamber. This air is heated and provides
a stream of clean, hot air.
The Ignition System: The ignition control assembly provides
power to the ignitor. This ignites the fuel/air mixture in the combus-
tion chamber.
The Flame-Out Control System: This system causes the heater to
shut down if the flame goes out.
Clean
Heated
Air Out
Fuel
Filter
Air Line
To Burner
Air
Output
Filter
Air Pump
Air Intake
Filter
Cool
Air In
Fan
Combustion Chamber
Ignitor
Motor
Ignition
Control
Assembly
Air For Fuel System
Air For Combustion
And Heating
Fuel
Fuel
Tank
Nozzle
Figure 3 - Wheel and Handle Assembly
Axle
Extension
Cord Wrap
Air Inlet
Rear Panel
Hot Air Outlet
Wheel
Handle
Screw
Washer
Extended Hub
Washer
Shroud
Cap Nut
Shroud
Axle Hole