www.desatech.com
111986-01F 27
FIREPLACE INSTALLATION
Continued
1. Remove packaging from three pieces of
trim.
2. Locate the two adjusting plates with set
screws and two shims in the hardware
packet.
If any of these pieces are missing or
damaged, contact the dealer where you
purchased this kit or DESA heating, LLC
at 1-866-672-6040 for referral information.
You can also visit DESA Heating, LLC's
web site at
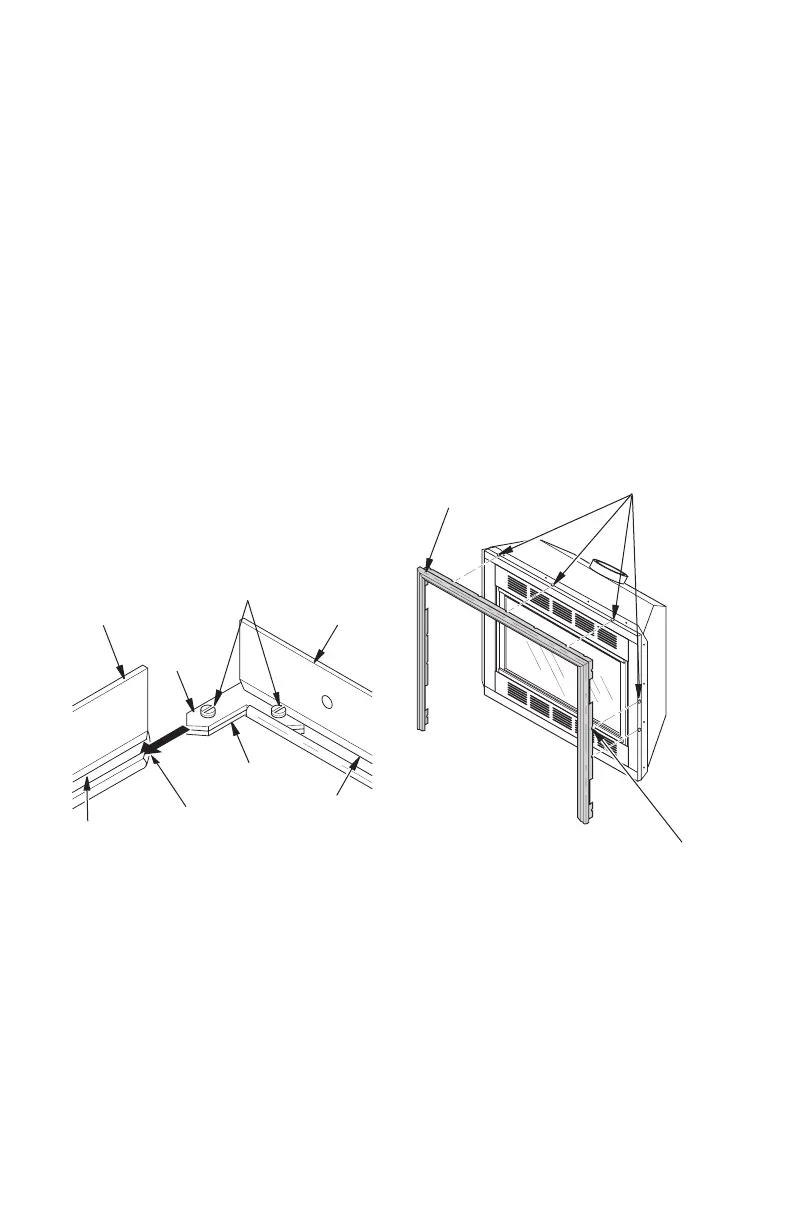
3. Align shim under adjusting plate as shown
in Figure 50.
4. Slide one end of adjusting plate/shim
in slot on mitered edge of top trim (see
Figure 50).
5. Slide other end of adjusting plate/shim
in slot on mitered edge of side trim (see
Figure 50).
Side Trim
Mitered Edge
Shim
Adjusting
Plate
Set Screws
Top Trim
Slot
Slot
Figure 50 - Assembling Trim
Figure 51 - Attaching Trim to Firebox
6. While rmly holding edges of trim together,
tighten both screws on the adjusting plate
using a slotted screwdriver.
7. Repeat steps 2 through 6 for other side.
8. Place the assembled trim onto rebox
cabinet. Align hanging notches on trim
with trim hanging shoulder screws (see
Figure 51). Tap trim rmly into place with
palm of hand or rubber mallet by engag-
ing hanging notches around shoulder
screws. Start at one end of the trim and
work around rebox until all notches are
fully engaged.
Assembled Trim
Trim Hanging
Shoulder Screw
Locations
Hanging
Notches
on Trim