EasyManua.ls Logo

Despatch LBB 1-23 - User Manual

Despatch LBB 1-23
65 pages
Print Icon
To Next Page IconTo Next Page
Loading...
LBB Series Oven Owners Manual PREFACE
Version 20
LBB SERIES OVEN
OWNER’S MANUAL
C-188
PN 336979
VERSION 20
4/2018

Table of Contents

Questions and Answers

  • O
    Oscar SnyderAug 18, 2025
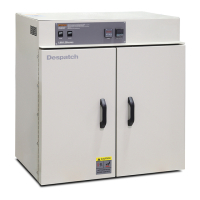
    Why is my Despatch Oven not heating up properly?
    • J
      Jason DoyleAug 18, 2025
      If your Despatch Oven fails to heat or only reaches 30–50 °C, there are several potential causes. First, check the power source, oven, and wall fuses. A burned-out heater element could also be the reason, in which case it should be replaced. A Control Instrument malfunction could be the problem; check the control parameters and replace the controller if the OUT LED does not turn on. Lastly, inspect for loose wire connections behind the control panel after disconnecting the power.
  • A
    Ashley HoffmanAug 21, 2025
    Why does my Despatch Oven heat up so slowly?
    • A
      Amy McmillanAug 21, 2025
      Several factors can cause a Despatch Oven to heat up slowly. An improperly loaded workload, low line voltage, one or two burned-out heating elements, a wide-open vent, or fan motor failure. To address this, reduce the load or redistribute it within the chamber. Ensure sufficient power and proper connections, checking for circuit overload. Verify heater amperage and replace any burned-out elements. Close the vent. Finally, consider replacing the fan motor.
  • B
    Brooke YoderAug 23, 2025
    What causes frequent heater element burnout in my Despatch Oven?
    • E
      Eduardo FloresAug 23, 2025
      Frequent heater element burnout in a Despatch Oven can stem from several causes. Harmful fumes generated by the load, spillage on heater elements, overheating, or fan motor failure. Increase the vent opening or discontinue the process if fumes are the issue. Disconnect power and clean the oven chamber and elements if there's spillage. Check the Control and High Limit instruments if the oven is overheating. Replacing the fan motor might be necessary.
  • A
    alicia05Aug 26, 2025
    What to do if Despatch Oven will not control at Setpoint?
    • D
      Dr. Anthony TranAug 26, 2025
      If your Despatch Oven isn't controlling at the setpoint, it could be due to a High Limit instrument set too low, a Control instrument malfunction, or air friction from the recirculation fan. Try setting the High Limit higher. Check control parameters before replacing the Control instrument. Also, open the exhaust air vent, as the unit won't control at the minimum operating temperature with the vent closed.
  • E
    Eric ZimmermanAug 28, 2025
    How to fix inaccurate temperature in Despatch Oven?
    • H
      Heather NewmanAug 28, 2025
      An inaccurate temperature in your Despatch Oven is likely due to control instrument miscalibration. Check the control parameters and recalibrate the Control instrument.
  • J
    Joanna GilbertAug 30, 2025
    Why is the temperature in my Despatch Oven so erratic?
    • T
      Terry LeonardAug 30, 2025
      Erratic temperature in your Despatch Oven is caused by control instrument malfunction. Check control parameters before replacing the Control instrument.
  • J
    John BartlettSep 1, 2025
    What to do if heater in Despatch Oven doesn't shut down until temp. reaches the High Limit setting?
    • P
      Pedro RogersSep 1, 2025
      If the heater in your Despatch Oven doesn't shut down until the temperature reaches the High Limit setting, it could be due to a Control instrument malfunction or an SSR Relay malfunction. Verify the control parameters and replace the control instrument if no output exists. If control output exists, replace the relay.
  • A
    Andrea BenitezSep 3, 2025
    Why is the surface or door temperature of my Despatch Oven excessively high?
    • H
      Heather HerreraSep 4, 2025
      Excessive surface or door temperature in a Despatch Oven can be caused by door seal deterioration or the door being closed into only the top or bottom latch. Replace the door seal. Ensure that the latch strike is contacting center of latch. Adjust mounting angle as required. Adjust door for even top and bottom latch tension by turning screws on ends of latch. Clockwise increases tension on latch. Counterclockwise decreases tension.
  • R
    ruizwayneSep 6, 2025
    How to fix improper airflow in Despatch Oven?
    • R
      Rachel OwenSep 6, 2025
      Improper airflow in a Despatch Oven can result from fan motor failure or an unbalanced fan wheel. Replace the fan motor. Reposition the fan wheel within 3/10” from the top of the housing or replace the fan wheel.
  • T
    Tyler RichardsonSep 8, 2025
    What causes excessive vibration in my Despatch Oven?
    • C
      chadsharpSep 8, 2025
      Excessive vibration in a Despatch Oven can be attributed to a dirty or unbalanced fan wheel. Clean the fan. Replace the fan wheel.

Summary

About This Manual

Important User Information

General information and copyright details for the manual.

About This Manual

Manufacturer & Manual Organization

Contact information for Despatch and description of the manual's structure.

About This Manual

Conventions

Explanation of symbols, warnings, and formatting used throughout the manual.

Specifications

Dimensions

Detailed physical dimensions of the LBB Series ovens.

Specifications

Capacities

Load capacity, shelf load, and exhaust capacity for LBB Series ovens.

Specifications

Power

Electrical power requirements, voltage, amperage, and cord specifications.

Specifications

Temperature & Operating Conditions

Temperature performance data and environmental conditions for optimal operation.

Safety

Safety Information and Lockout Procedures

General safety guidelines, lockout requirements, and lockout procedures for safe operation.

Safety

Lifting, Maintenance, and Electrical Safety

Safety for lifting, qualified maintenance, and electrical power precautions.

Safety

Operational Safety, Fire Prevention, and Lockout

Key safety practices, fire prevention, and mandatory lockout procedures.

Safety

Emergency Stop and Disconnecting Devices

Procedures for emergency stopping and disconnecting power, including hard-wired units.

Safety

Disconnecting Units

Instructions for disconnecting corded units and units with an optional disconnect switch.

Theory of Operation

The LBB Series Oven

Explains the LBB Series oven's design, airflow, and primary operational characteristics.

Theory of Operation

Oven Theory and Primary Control Instrument

Details the oven's forced convection heating principle and the primary digital control instrument.

Theory of Operation

Control Instrument Explanations

Details the functions and operation of the primary control instrument's display and keys.

High Limit Instrument

Introduces the High Limit instrument, its purpose, and setup recommendations.

Theory of Operation

High Limit Instrument Setup and Protocol 3 Controller

Explains high limit settings and introduces the optional Protocol 3 controller.

Assembly & Setup

Unpack & Inspect the LBB Series Oven

Provides steps for unpacking and inspecting the oven for shipping damage and completeness.

If Damaged During Shipping

Instructions on what to do if the oven is found to be damaged during shipment.

Assembly & Setup

Oven Location, Setup Procedure, and Wiring

Guidelines for oven placement, setup steps, and power connection procedures.

Assembly & Setup

Wiring and Nameplate Information

Information from the nameplate and steps for wiring hardwired units, including diagrams.

Assembly & Setup

Connecting the Oven Wiring

Illustrates running wires through the oven and connecting them to the connector block.

Operation

General Operating Guidelines and Safety

User compliance, environmental warnings, and responsibility for product processing.

Operation

Loading the Oven and Pre-Startup Checklist

Guidance on loading the oven correctly and a checklist for pre-startup checks.

Operation

Operating Procedure and Starting the Oven

Step-by-step guide for operating the oven and starting it up using the standard control.

Operation

Control Panel and Damper Adjustment

Illustrates the control panel and explains how to adjust the exhaust vent damper.

Working with the Control Instrument

Change Setpoint

Instructions on how to change the operating temperature setpoint on the control instrument.

Working with the Control Instrument

Control Instrument Parameter Programming Mode

Guide to entering the parameter programming mode and understanding its parameters.

Control Instrument Setup Parameters

Details the various setup parameters for the control instrument and their functions.

Working with the Control Instrument

Control Instrument Configuration Parameters

Explains additional configuration parameters for the control instrument, including input type and key lock.

Control Instrument Operating Mode Notes

Provides notes on operating modes, factory settings, and how to adjust access levels.

Working with the Control Instrument

Change Control Instrument Display Units

Step-by-step guide to changing the display units between Celsius and Fahrenheit.

Working with the Control Instrument

Oven Zone Calibration

Instructions for recalibrating the control instrument for specific operating conditions.

Working with the Control Instrument

Set the High Limit

Guidance on setting the High Limit instrument's temperature setpoint.

Change the High Limit Instrument Setpoint

Detailed steps to change the High Limit instrument setpoint, including warnings.

Working with the Control Instrument

High Limit Instrument Parameter Setup Mode

Explains how to access and change parameters for the High Limit instrument.

High Limit Instrument Setup Parameters

Details the setup parameters for the High Limit instrument, including input type and resolution.

Working with the Control Instrument

High Limit Instrument Display Unit Conversion

Instructions to change the High Limit instrument's display units between Celsius and Fahrenheit.

Working with Optional Protocol 3 Controller Operating Modes

Refers to the Protocol 3 Controller Owner's Manual for operating modes.

Maintenance

General Maintenance Checklist and Precautions

Covers essential maintenance tasks, cleaning, protecting controls, and establishing schedules.

Maintenance

Lubrication and Cleaning Procedures

Details lubrication for moving parts and procedures for cleaning the oven interior and surfaces.

Maintenance

Decontaminating the Oven and Routine Tests

Procedures for decontaminating the oven and performing routine functional tests.

Maintenance

Testing Control and High Limit Instruments

Steps to test the control instrument's functionality and the High Limit instrument's trip point.

Replacement Parts

Ordering and Returning Parts

Information on how to order replacement parts and the process for returning parts.

Replacement Parts

Replace the Control Instrument

Step-by-step guide and tools needed for replacing the control instrument.

Replacement Parts

Accessing and Removing Control Instrument

Instructions on how to slide the panel forward and remove wires from the old control instrument.

Replacement Parts

Replacing the Control Instrument Connections

Steps for installing the new instrument and reattaching wires correctly.

Replacement Parts

Replace High Limit Instrument

Tools needed and steps for disconnecting the High Limit instrument from the control board.

Replacement Parts

Connecting High Limit Instrument and Reinstalling Panel

Instructions for connecting the new High Limit instrument and reinstalling the control panel.

Replacement Parts

Replace (Optional) Protocol 3 Controller

Refers to the Protocol 3 Controller Owner's Manual for replacement instructions.

Replace Heater Unit

Tools needed and steps for removing shelves, ducts, heater cover, and heater leads.

Replacement Parts

Heater Element Connections

Diagrams showing heater element connections and installation requirements.

Replacement Parts

Replace Fan Motor

Tools needed and steps for removing shelves, ducts, heater cover, and fan wheel setscrews.

Replacement Parts

Removing and Replacing Fan Motor

Detailed steps for removing the fan motor, its mount, and installing the new motor.

Replacement Parts

Fan Motor Assembly Details

Diagram illustrating the fan motor, mount, clips, and shaft sleeve for assembly.

Troubleshooting

Common Technical Issues and Remedies

Table listing common technical issues, their probable causes, and suggested remedies or next steps.

Troubleshooting

DES2000 Control Parameters Check

Guide to checking the OUT LED and verifying control parameters for the DES2000 controller.

Troubleshooting

DES2000 Control Parameter Verification

Detailed steps for checking and adjusting DES2000 control parameters like CtL, LOC, and Input Type.

Troubleshooting

Hi Limit L91 Hi-Limit Reset

Procedure for checking the OP1 LED and resetting or verifying parameters for the Hi Limit L91.

Appendices

Standard Products Warranty

Details the Despatch standard product warranty, including coverage, exclusions, and terms.

Appendices

Optional Equipment and Oven Stand Assembly

Information on optional equipment and steps for assembling the oven stand.

Appendices

End of Cycle (EOC) Timer Option

Explains the End of Cycle (EOC) Timer option and its displays and switches.

Appendices

Operating the Timer

Instructions for setting and operating the timer in various output modes.

Appendices

Timer Settings and Key Lock

Details timer range specifications, UP/DOWN progress, output contact settings, and key lock selection.

Appendices

Parameter Default Settings and Timer Alarm Options

Lists timer default settings and describes audible/visual alarm features for timer and high limit.

Appendices

Part Lists, Mechanical Drawing, and Schematics

Information on finding part lists, mechanical drawings, and electrical schematics.

Despatch LBB 1-23 Specifications

General IconGeneral
BrandDespatch
ModelLBB 1-23
CategoryOven
LanguageEnglish

Related product manuals