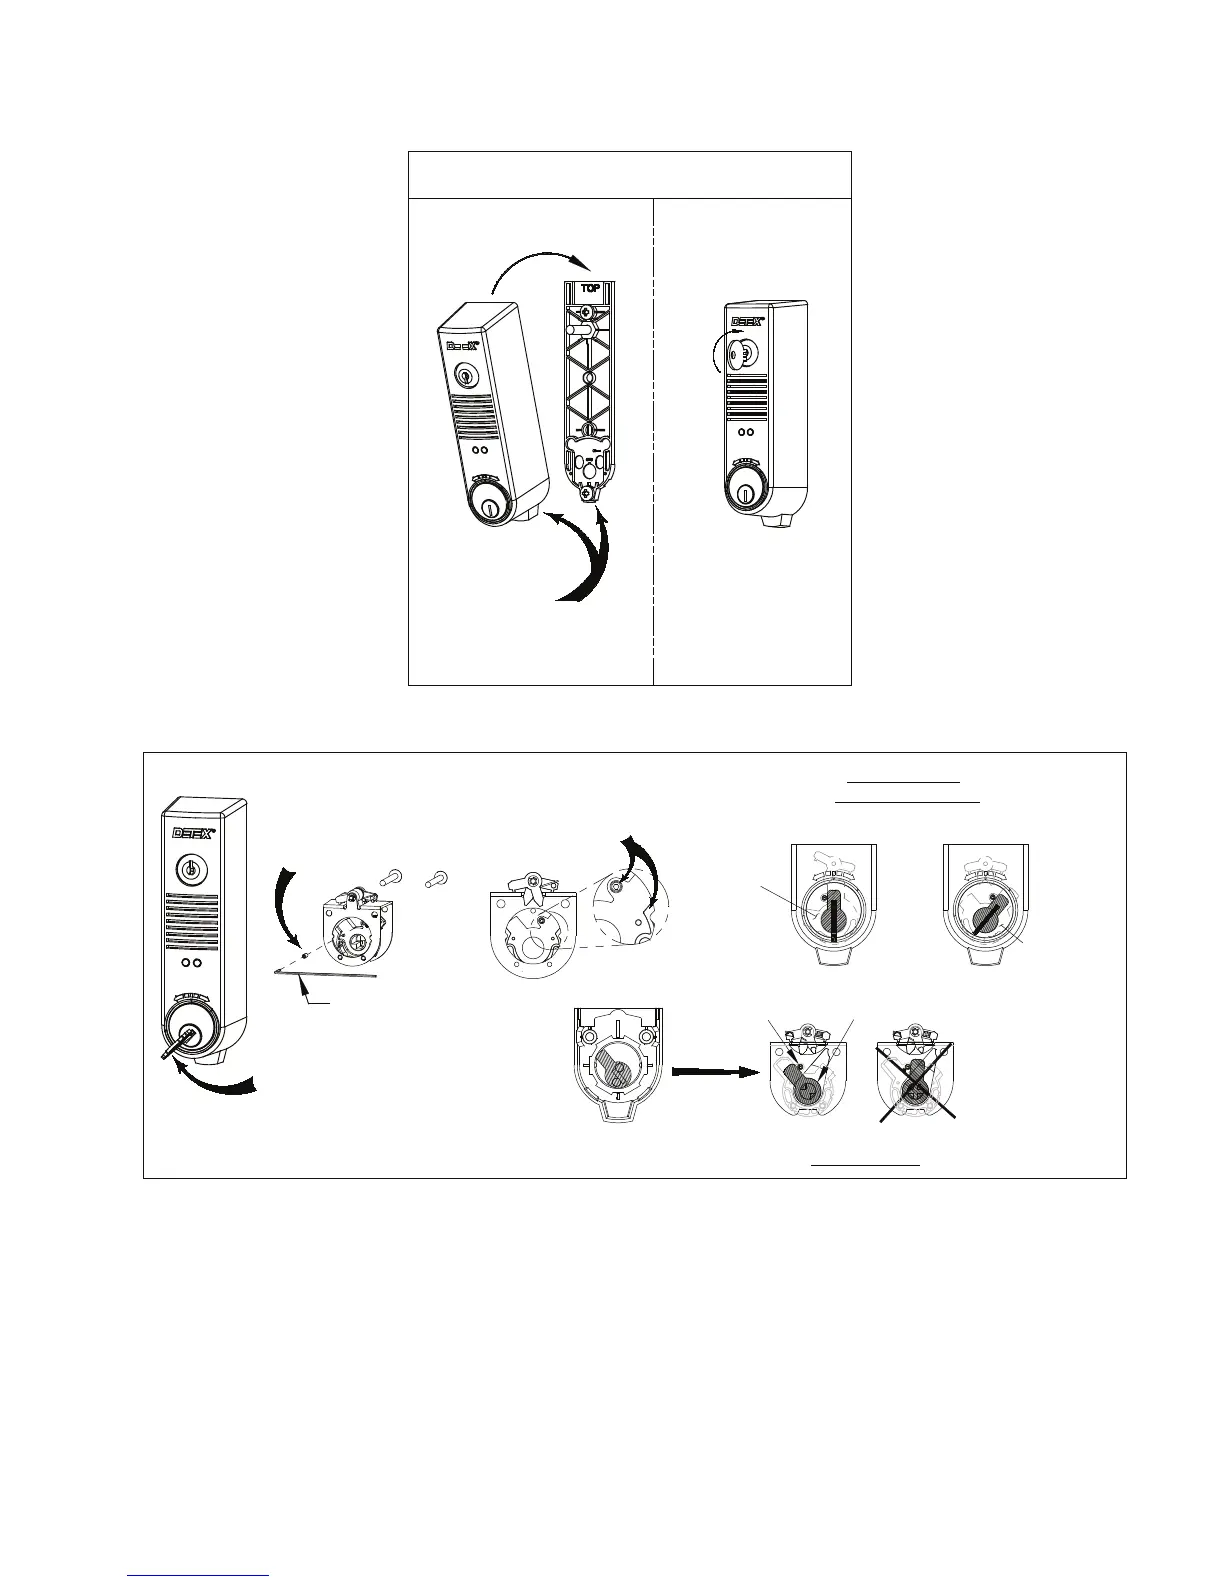
CORRECT
"ON" position
(Key can be removed)
"OFF" position
(Key cannot be removed)
.050" Hex Wrench
(NOT PROVIDED)
Rotate key to this
position before reinstalling
cam assembly
Mortise cam orientation
as shown
Key stop
installed
WRONG
Back View
Front View
KEY STOP POSITIONS
STEP 9:
KEY STOP INSTALLATION (Key stop included in hardware kit)
Top surface of Key Stop should
NOT protrude beyond highest
point on plastic cam
Install key stop
P/N: 102688
Cam orientation
for Key Stop option
Key and cams
shown in "OFF"
position
Key and cams
shown in 90°
stop "ON"
position
STEP 8: INSTALL DEVICE
Install device onto backplate
Turn key CW
to lock cover
Hook at bottom, then tilt
cover over backplate
ON
OFF
ON
OFF
ON
OFF
ON
OFF
ON
OFF
101321 Page 5
 Loading...