E-4
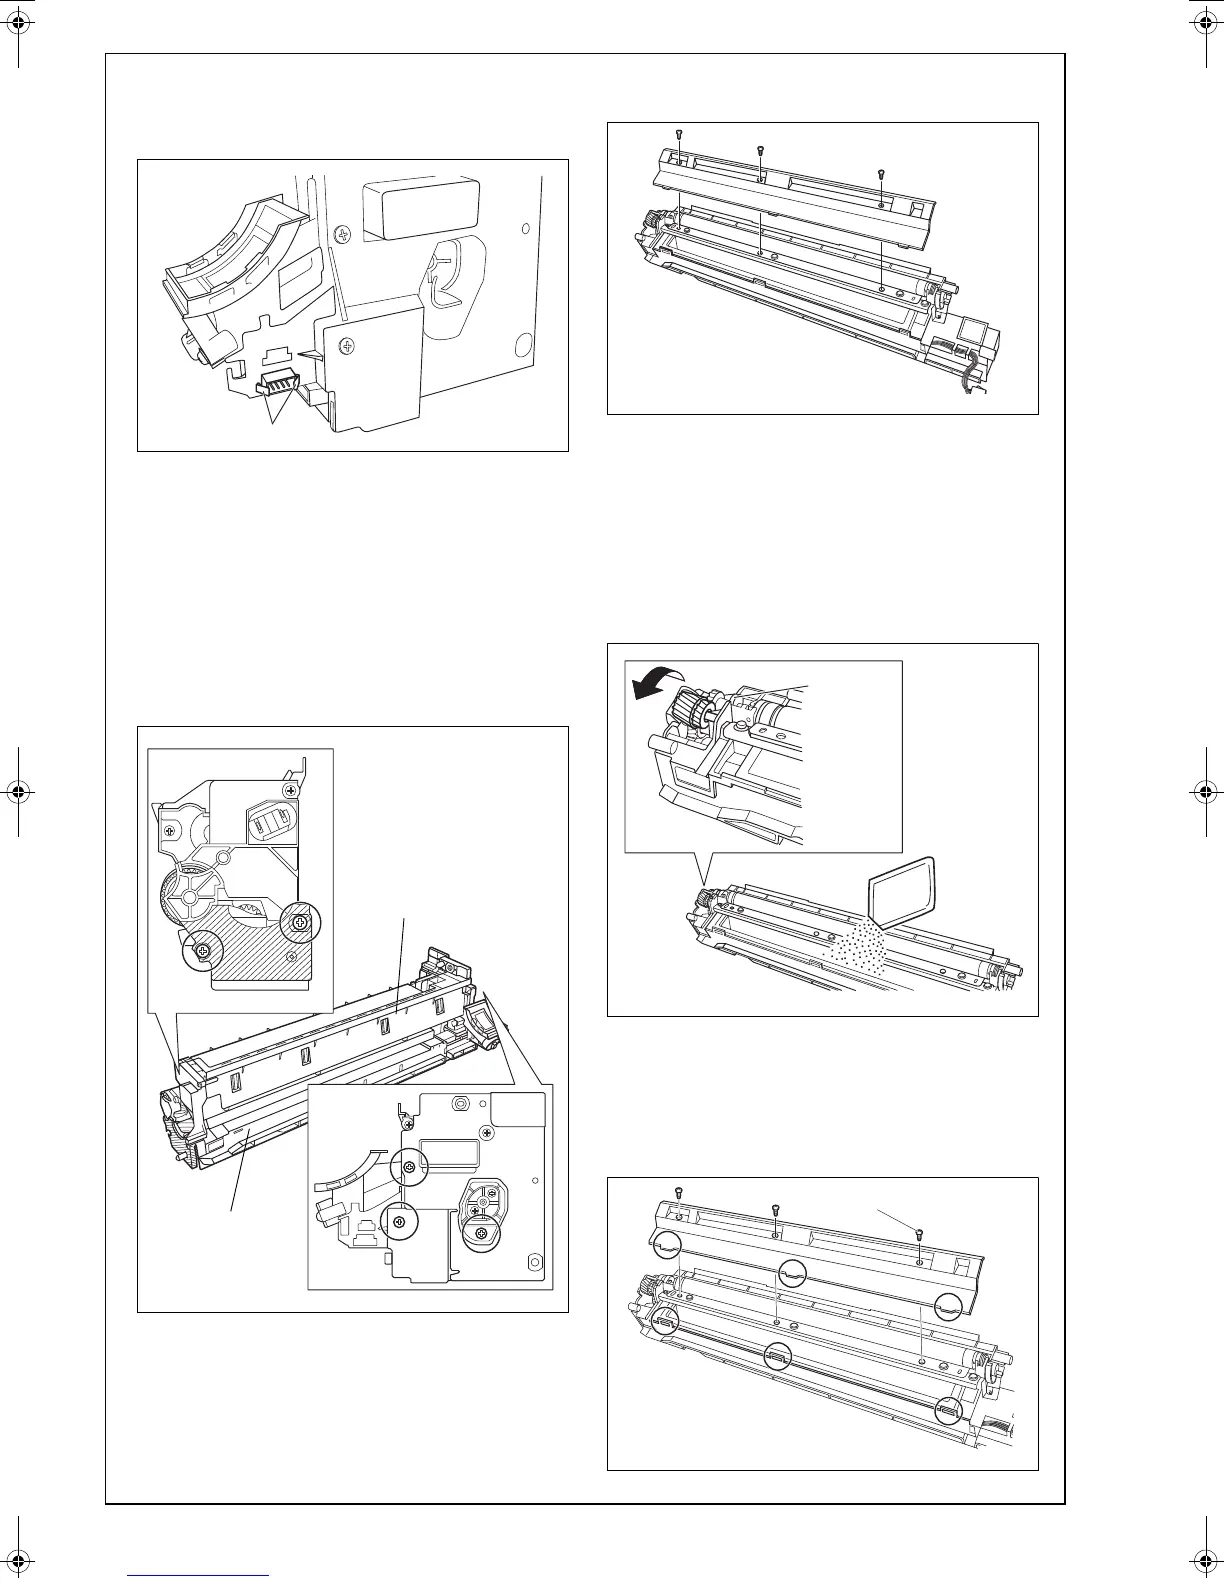
VII. Loading the Starter
1. While pressing the connector tabs, push out the
connector from the imaging unit.
2. Unscrew the screws that secure the PC drum
unit, and then take out the PC drum unit by
slightly opening the lower part (the shadowed
area) of the PC drum unit (five screws).
Note:
• Do not open the lower part wide, otherwise the
charger may drop.
• Do not touch or scratch the PC drum.
• Cover the PC drum unit, which has been
removed, with a protective cloth or similar mate-
rial.
3. Remove
the developing unit cover (three
screws).
4. Ready a packet of the starter and cut off one cor-
ner of the aluminum packet with scissors.
5. While turning the gear in the direction of the
arrow, pour the starter evenly into the developer
chamber.
Note:
• Turn the magnet roller in the direction of its nor-
mal rotation, and not the backward.
• Be sure not to let the starter get inside the collar.
6. Reinstall the developing unit cover, ensuring that
its tabs are fitted properly into the slits (three
screws).
Note:
Do not tilt the developing unit or imaging unit after
the starter is poured.
A0XXIXC013MA
PC drum unit
Developing unit
A11UIXC016MA
Temporarily tighten the screw first.