EN
SB-2-179-G (8/2015) 1 / 8
SERVICE MANUAL
GFG
TM
GRAVITY PRO
TM
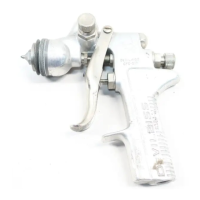
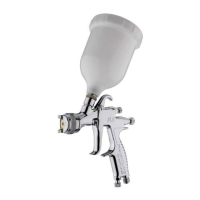
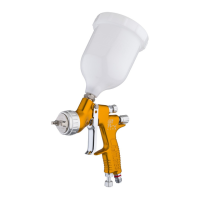
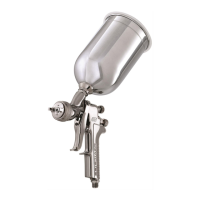
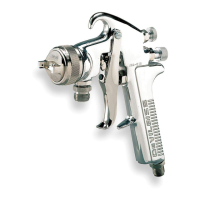
MODEL GFG-517
CONVENTIONAL SPRAY GUN
DESCRIPTION
The GFG-517 is a general purpose, heavy
duty, high production spray gun suitable for
use with most types of materials. The fluid
tip and needle and internal fluid passages
are stainless steel.
Note
This gun includes 300 series
stainless steel fluid passages and
400/300 S.S. series tip and needle.
Guns may be used with chlorinated
solvent materials. The gravity cup
must also be compatible for use
with chlorinated solvent materials
(GFC-501 Acetal).
IMPORTANT: This gun is designed for use
with mildly corrosive and non-abrasive
materials. If used with other high corrosive
or abrasive materials, it must be expected
that frequent and thorough cleaning will be
required and the necessity for replacement
of parts will be increased.
Note
The GFC gravity feed cups are
included with the gun as part of
the GFG-618 gun and cup kits. See
Accessories on page 6 for more
information.
INSTALLATION
1. Attach the air supply line to the air
inlet (18). An air transformer installed
as close as possible to the gun will
provide filtered and regulated air.
Note
When larger diameter air hoses
are used, it is advisable to use an
8' or 10' "whip end" or a smaller di-
ameter hose at the gun for greater
flexibility or movement.
2. Attach the gravity feed cup to the
material inlet.
Note
Protective coating and rust inhibi-
tors have been used to keep the
gun in good condition prior to
shipment. Before using the gun,
flush it with solvents so that these
materials will be removed from
fluid passages.
OPERATION
Mix, prepare and strain the material to be
sprayed according to the paint manufac-
turer's instructions.
Strain material through a 60 or 90 mesh
screen.
1. Fill the gravity feed cup with the ma-
terial. Do not overfill. Make sure that
the cup lid vent hole is clear.
2. Turn on the air at the source of supply.
Adjust the atomization air pressure to
35 psi.
3. Open the spreader adjustment valve
(19) (Fan) by turning the valve stem
counter-clockwise.
4. Close the fluid needle adjusting screw
(25) by turning clockwise.
5. Spray a test area by turning the fluid
needle adjusting screw (25) counter-
clockwise until a full coat is obtained.
If the finish is too sandy and dry, the mate-
rial flow may be too low for the atomization
air pressure being used.
If the finish sags, there is too much material
flowing for the atomization air pressure
being used.
Both of the above can be corrected by in-
creasing or decreasing the atomization air
pressure or the material flow. Pattern width
can be altered by turning the spreader
adjustment valve (19), either clockwise to
decrease the width or counter-clockwise
to increase the width.
IMPORTANT: Before using this
equipment, read all safety precautions
and instructions. Keep for future use.
PREVENTIVE MAINTENANCE
To clean air cap and fluid tip, brush exterior
with a stiff bristle brush. If necessary to clean
cap holes, use a broom straw or toothpick.
Never use a wire or hard instrument. This
may scratch or burr holes causing a dis-
torted spray pattern.
To clean fluid passages, remove excess
material from cup, then flush with a suitable
solvent. Wipe gun exterior with a solvent
dampened cloth. Never completely im-
merse in solvent as this is detrimental to
the lubricants and packings.
Note
When replacing the fluid tip or fluid
needle, replace both at the same
time. Using worn parts can cause
fluid leakage. Tip and needle sets
are available. See Chart 2. Also,
replace the needle packing at this
time. Lightly lubricate the threads
of the fluid tip before reassembling.
Torque to 12-15 ft. lbs. Do not
overtighten the fluid tip.
To prevent damage to the fluid tip (2)
or fluid needle (2), be sure to either
1) pull the trigger and hold while
tightening or loosening the fluid tip
or 2) remove fluid needle adjusting
screw (25) to relieve spring pressure
against needle collar.
SPRAY GUN LUBRICATION
Daily, apply a drop of SSL-10* spray gun
lube at trigger bearing stud (15) and the
stem of the air valve (10) where it enters
the air valve assembly (13). The shank of
the fluid needle (2) where it enters the pack-
ing nut (6) should also be oiled. The fluid
needle packing (5) should be lubricated
periodically. Make sure the baffle (4) and
retaining ring (1) threads are clean and
free of foreign matter. Before assembling
retaining ring to baffle, clean the threads
thoroughly, then add two drops of SSL-10
spray gun lube to threads. The fluid needle
spring (22) and air valve spring (11) should
be coated with a very light grease, making
(Continued on page 3)