EasyManua.ls Logo

DeVilbiss JGA-510 - User Manual

DeVilbiss JGA-510
8 pages
Print Icon
To Next Page IconTo Next Page
Loading...
SB-2-252-P (12/2017) 1 / 8 www.carlisleft.com
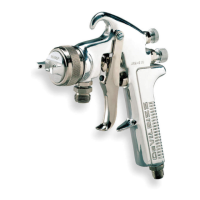
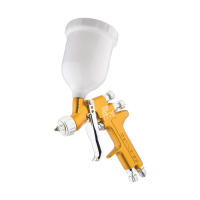
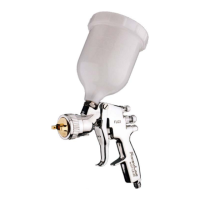
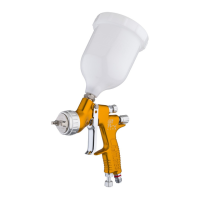
JGA-510 CONVENTIONAL SPRAY GUN
Major Repair Kit KK-4987-2
IMPORTANT: Before using this equipment,
read all safety precautions and instructions.
Keep for future use.
Strain material thru 60 or 90 mesh screen.
Adjust fluid pressure to deliver the desired
paint volume. Adjust air pressure and
flow to provide a uniform dispersion of
atomized paint throughout the pattern.
Keep air pressure as low as possible to
minimize bounce - back and overspray.
Excessive fluid flow will result in heavy
center spray patterns. Inadequate flows
may cause the pattern to split. See
“Troubleshooting”, Page 6, if any problems
occur.
PREVENTIVE MAINTENANCE
To clean air cap and fluid tip, brush exterior
with a stiff bristle brush. If necessary
to clean cap holes, use a broom straw
or toothpick. Never use a wire or hard
instrument. This may scratch or burr holes
causing a distorted spray pattern.
To clean fluid passages, remove excess
material at source, then flush with a
suitable solvent using a device such as the
SolventSaver™ (see Accessories). Wipe
gun exterior with a solvent dampened
cloth. Never completely immerse in
solvent as this is detrimental to the
lubricants and packings.
Note
When replacing the fluid tip or fluid
needle, replace both at the same
time. Using worn parts can cause
fluid leakage. Also, replace the
needle packing at this time. Lightly
lubricate the threads of the fluid
tip before reassembling. Torque
to 20-25 ft. lbs. Do not overtighten
the fluid tip.
To prevent damage to the fluid tip
(4) or fluid needle (33), be sure to
either 1) pull the trigger and hold
while tightening or loosening the
fluid tip or 2) remove fluid needle
adjusting screw (28) to relieve
spring pressure against needle
collar.
DESCRIPTION
The JGA-510 can be utilized with the wide
range of air caps and needles. It is a general
purpose, heavy duty, high production
spray gun suitable for use with most
types of materials. The fluid tip and needle
and internal fluid passages are stainless
steel.
Conversion to HVLP - The JGA-510, plus
JGA-503 models, can be converted to
HVLP if desired. Contact DeVilbiss for
information.
Note
This gun includes 300 series stainless
steel fluid passages and 300/400
series tip and needle. Guns may
be used with chlorinated solvent
materials, but see page 2 for
additional warnings.
Important: This gun may be used with
most common coating and finishing
materials. It is designed for use with mildly
corrosive and non-abrasive materials. If
used with other high corrosive or abrasive
materials, it must be expected that
frequent and thorough cleaning will be
required and the necessity for replacement
of parts will be increased.
OPERATION
Note
Protective coating and rust inhibitors
have been used to keep the gun in
good condition prior to shipment.
Before using the gun, flush it with
solvent so that these materials will be
removed from fluid passages.
A
C
D
B
E
Government NSN No. 4940-01-046-9919 =
KK-4987-2.
EN
SERVICE MANUAL
IMPORTANT! DO NOT DESTROY
It is the Customer's responsibility to have all operators and service personnel read and understand this manual.
Contact your local DeVilbiss representative for additional copies of this manual.
READ ALL INSTRUCTIONS BEFORE OPERATING THIS DEVILBISS PRODUCT.
FLUID INLET GASKET (7) REPLACEMENT
INSTRUCTIONS
1. Remove fluid inlet adapter with ap-
propriate wrench.
2. Clean Loctite from gun body inlet
threads and seal area.
3. Place gasket (7) squarely onto the fluid
inlet adapter and push it down until it
is flat against the boss.
4. Place a couple of drops of medium
strength blue No. 242 Loctite on
threads before installing fluid inlet
adapter.
5. Torque fluid inlet adapter to 20-25 ft.
lbs., and tighten locknut.
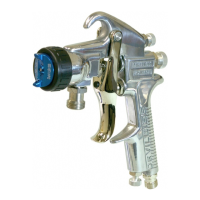
SPRAY GUN LUBRICATION
Daily, apply a drop of SSL-10 spray gun
lube at trigger bearing stud (21) and the
stem of the air valve (13) where it enters
the air valve assembly (17). The shank of
the fluid needle (33) where it enters the
packing nut (19) should also be oiled. The
fluid needle packing (18) should be lubri-
cated periodically. Make sure the baffle
(6) and retaining ring (1 or 2 ) threads are
clean and free of foreign matter. Before
assembling retaining ring to baffle, clean
the threads thoroughly, then add two
drops of SSL-10 spray gun lube to
threads. The fluid needle spring (30) and
air valve spring (12) should be coated
with a very light grease, making sure that
any excess grease will not clog the air
passages. For best results, lubricate the
points indicated, daily.
A. Trigger Points
B. Packing
C. Adjusting Valves
D. Baffle Threads
E. Air Valve Cartridge

Other manuals for DeVilbiss JGA-510

Questions and Answers

  • D
    douglas81Jul 26, 2025
    What to do if my DeVilbiss JGA-510 runs and sags?
    • T
      Theresa RossJul 26, 2025
      If your DeVilbiss Paint Sprayer's paint job runs and sags, it could be due to too much material flow, material being too thin, the gun being tilted at an angle, or the gun motion being too slow. Adjust the gun or reduce fluid pressure. Ensure you mix the material properly or apply light coats. Hold the gun at a right angle to the work surface and adapt a proper gun technique.
  • G
    Gloria MckayJul 31, 2025
    How to fix thin, sandy coarse finish with DeVilbiss JGA-510 Paint Sprayer?
    • C
      Catherine BrownJul 31, 2025
      A thin, sandy, coarse finish that dries before flowing out when using your DeVilbiss Paint Sprayer can be caused by the gun being too far from the surface, too much air pressure, or using an improper thinner. Check the distance (normally approximately 8"), reduce air pressure and check the spray pattern. Follow the paint manufacturer's mixing instructions.
  • C
    Calvin RuizAug 5, 2025
    What to do if my DeVilbiss JGA-510 produces a thin, sandy, coarse finish?
    • E
      Erin JohnsonAug 5, 2025
      If your DeVilbiss Paint Sprayer's finish is thin, sandy, and coarse, drying before it flows out, it could be due to several reasons. The gun might be too far from the surface; ensure it's approximately 8 inches away. Also, excessive air pressure could be the problem; try reducing the air pressure and checking the spray pattern. Finally, the issue might stem from using an improper thinner; adhere to the paint manufacturer's mixing instructions.
  • J
    jacksonrachelAug 10, 2025
    How to prevent runs and sags when using my DeVilbiss Paint Sprayer?
    • T
      Teresa SandersAug 10, 2025
      If your DeVilbiss Paint Sprayer is causing runs and sags in the finish, it may be due to too much material flow; adjust the gun or reduce the fluid pressure. Alternatively, the material might be too thin; ensure it's mixed properly or apply light coats. Another potential cause is incorrect gun handling; hold the gun at a right angle to the work surface and adapt a proper gun technique.
  • J
    Jennifer WhiteAug 15, 2025
    Why does my DeVilbiss Paint Sprayer produce an "orange peel" finish?
    • T
      Tara DiazAug 15, 2025
      If your DeVilbiss Paint Sprayer produces a thick, dimpled finish resembling "orange peel", several factors could be responsible. The gun might be too close to the surface, so check the distance (normally about 8 inches). There might be too much material coarsely atomized, or the air pressure could be too low; in either case, increase air pressure or reduce fluid pressure. Ensure you are using the proper thinner and that the material is properly mixed, following the paint manufacturer's mixing instructions. Lastly, a rough, oily, or dirty surface can cause this issue, so properly clean and prepare the surface.
  • D
    Dean Tate PhDAug 20, 2025
    What to do if my DeVilbiss JGA-510 is leaking fluid from the front?
    • A
      annaandersonAug 20, 2025
      If fluid is leaking or dripping from the front of your DeVilbiss pressure feed gun, several issues could be the cause. The packing nut might be too tight, so adjust it. The packing could be dry, so lubricate it. The fluid tip or needle might be worn or damaged; replace the tip and needle with lapped sets. There could be foreign matter in the tip, so clean it. The fluid needle spring might be broken, so replace it. Finally, the wrong size needle or tip could be installed, so replace them.

Summary

Spray Gun Description

Spray Gun Operation

Preventive Maintenance Procedures

Fluid Inlet Gasket Replacement

Instructions for removing and installing the fluid inlet gasket on the spray gun.

Spray Gun Lubrication Guide

Daily lubrication points for maintaining spray gun components and ensuring smooth operation.

Safety Precautions and Warnings

Parts List and Identification

Baffle Seal Replacement Procedure

Step-by-step guide for replacing the GTI-33 baffle seal on the spray gun.

Spray Gun Troubleshooting Guide

Heavy Top or Bottom Spray Pattern

Addresses issues causing uneven spray patterns, specifically heavy top or bottom.

Heavy Right or Left Side Spray Pattern

Troubleshooting for spray patterns with excess material on the right or left side.

Heavy Center Spray Pattern

Diagnosing and correcting spray patterns with excess material in the center.

Split Spray Pattern

Solutions for spray patterns that appear split or have detached edges.

Jerky or Fluttering Spray

Resolving issues causing an inconsistent, jerky, or fluttering spray output.

Unable to Get Round Spray

Fixes for spray guns that fail to produce a round, uniform spray pattern.

Spray Gun Will Not Spray

Steps to take when the spray gun fails to dispense material or air.

Starved Spray Pattern

Addressing inadequate material flow resulting in a starved spray pattern.

Excessive Overspray

Methods to reduce excessive overspray during the spraying process.

Excessive Fog

Techniques to minimize or eliminate excessive fogging during spraying.

Dry Spray Condition

Resolving issues causing a dry, powdery finish on the sprayed surface.

Fluid Leaking from Packing Nut

Troubleshooting and fixing fluid leaks originating from the packing nut.

Fluid Leaking from Pressure Feed Gun Front

Diagnosing and stopping fluid leaks from the front of a pressure feed gun.

Available Accessories

Product Warranty Policy

DeVilbiss JGA-510 Specifications

General IconGeneral
BrandDeVilbiss
ModelJGA-510
CategoryPaint Sprayer
LanguageEnglish

Related product manuals