9
ENGLISH
2. Rotate the chisel to the desired position.
3. Set the mode selector switch (d) to the
“hammering only” position.
4. Twist the chisel until it locks in position.
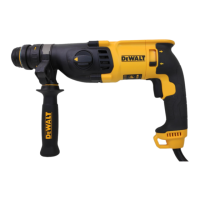
Inserting and Removing SDS Plus
Accessories (fig. 3)
This tool uses SDS Plus accessories (refer to the
inset in fig. 3 for a cross-section of an SDS Plus
bit shank). We recommend using professional
accessories only.
1. Clean and grease the bit shank.
2. Insert the bit shank into the SDS Plus tool
holder (f).
3. Push the bit down and turn it slightly until it fits
into the slots.
4. Pull on the bit to check if it is properly locked.
The hammering function requires the bit to be
able to move axially several centimetres when
locked in the tool holder.
5. To remove a bit, pull back the tool holder sleeve
(j) and pull out the bit.
WARNING: Always wear gloves when
you change accessories. The exposed
metal parts on the tool and accessory
may become extremely hot during
operation.
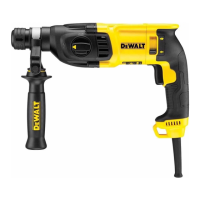
Fitting the Side Handle (fig. 4)
The side handle (h) can be fitted to suit both right-
handed and left-handed users.
WARNING: Do not use the tool without
the side handle properly assembled.
1. Loosen the side handle.
2. For right-handed users: Slide the side handle
clamp over the collar behind the tool holder,
handle at the left.
For left-handed-users: Slide the side handle
clamp over the collar behind the tool holder,
handle at the right.
3. Rotate the side handle to the desired position
and tighten the handle.
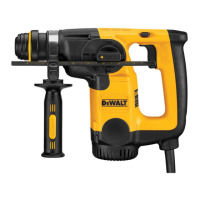
SIDE HANDLE WORK LIGHT (FIG. 5)
D25144, D25263
The side handle on the D25144 and D25263 has
a work light (o). The light is battery powered and
operated by using the on/off button(q).
To replace the worklight’s batteries (CR2032 x 2):
1. Remove battery door screw(p) as shown in
Figure5.
Using an Extension Cable
If an extension cable is required, use an approved 3–
core extension cable suitable for the power input of
this tool (see technical data).The minimum conductor
size is 1.5 mm
2
; the maximum length is 30 m.
When using a cable reel, always unwind the cable
completely.
ASSEMBLY AND ADJUSTMENTS
WARNING: To reduce the risk of
injury, turn unit off and disconnect
machine from power source before
installing and removing accessories,
before adjusting or changing set-
ups or when making repairs. Be sure
the trigger switch is in the OFF position.
An accidental start-up can cause injury.
Selecting the Operating Mode
(fig. 2)
The tool can be used in the following operating
modes:
Rotary drilling: for screwdriving and for
drilling into steel, wood and plastics
Hammerdrilling: for concrete and masonry
drilling operations.
Bit rotation: non-working position used
only to rotate a flat chisel into the desired
position
Hammering only (D25033, D25133,
D25134, D25144, D25263): for light
chipping, chiselling and demolition
applications. In this mode the tool can
also be used as a lever to free a jammed
drill bit.
1. To select the operating mode, press the mode
selector button (e) and rotate the mode selector
switch (d) until it points to the symbol of the
required mode.
2. Release the mode selector button and check
that the mode selector switch is locked in place.
WARNING: Do not select the operating
mode when the tool is running.
Indexing the Chisel Position
(fig. 2)
The chisel can be indexed and locked into different
positions.
1. Press the mode selector button (e) and rotate
the mode selector switch (d) until it points to the
“bit rotation/hammerdrilling” position.