ENGLISH
22
Fig. C
9
10
3. Release the button to lock rod into position. When
drilling with the depth rod, stop when end of rod
reaches surface ofmaterial.
Bit and Bit Holder
WARNING: Burn Hazard. ALWAYS wear gloves when
changing bits. Accessible metal parts on the tool and
bits may get extremely hot during operation. Small
bits of broken material may damage barehands.
WARNING: Do not attempt to tighten or loosen drill
bits (or any other accessory) by gripping the front part
of the chuck and turning the tool on. Damage to the
chuck and personal injury mayoccur.
The rotary hammer can be fitted with various chisel bits
depending on the desired application. Use sharp drill
bitsonly.
Bit Reccomendations
• For wood, use twist bits, spade bits, power auger bits or
holesaws.
• For metal, use high-speed steel twist drill bits or
holesaws. Use a cutting lubricant when drilling metals.
The exceptions are cast iron and brass which should be
drilleddry.
• For masonry, such as brick, cement, cinder block, etc.,
use carbide-tipped bits rated for percussiondrilling.
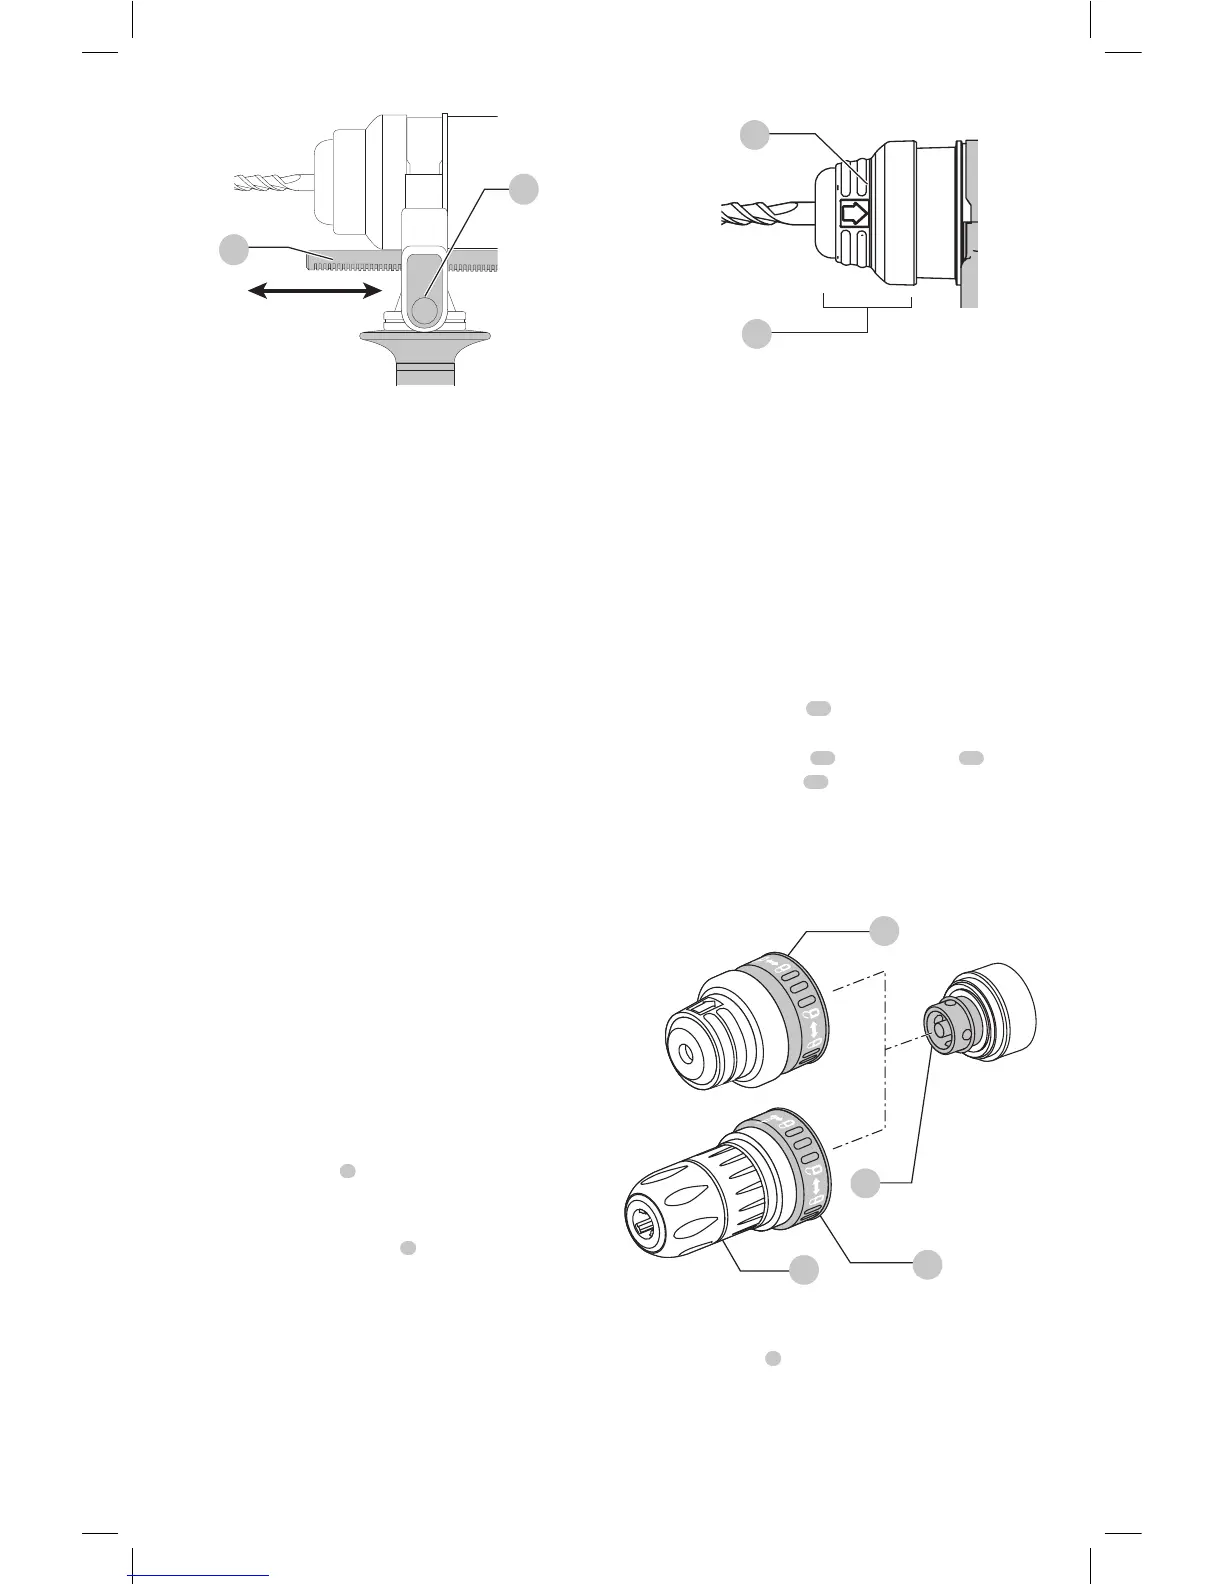
SDSPlus Bit Holder (Fig.D)
NOTE: Special adapters are needed to use the SDSPlus
bit holder with straight shank bits and hexagonal
screwdriverbits.
To Insert a Drill Bit or Other Accessory:
1. Insert the shank of the bit about 3/4" (19mm) into
SDSPlus tool holder
7
.
2. Push and rotate bit until it locks in place. The bit will be
securelyheld.
3. To release bit, pull the sleeve
8
back and remove
thebit.
Fig. D
7
8
To remove the bit, pull back the locking sleeve and pull the
bitout.
Keyless Chuck (Fig. E, F)
D25334
On some models, a keyless chuck can be installed in place of
the SDSPlus bitholder.
WARNING: Never use standard chucks in the rotary
hammeringmode.
Replacing the SDSPlus Bit Holder with the Keyless
Chuck
1. Select hammering only mode (see Operation Modes),
this locks the spindle to prevent it from rotating when
unlocking the removable toolholder.
2. Turn the locking collar
13
into the unlocked position
and pull the installed bit holderoff.
3. Push the keyless chuck
14
onto the spindle
15
and
turn the locking collar
13
into the lockingposition.
4. To replace the keyless chuck with the SDSPlus bit
holder, first remove the keyless chuck the same way as
the SDSPlus bit holder was removed. Then replace the
SDSPlus bitholder the same way as the keyless chuck
wasreplaced.
13
13
14
15
Fig. E
To Insert a Drill Bit or Other Accessory in Keyless
Chuck
1. Grasp the sleeve
8
of the chuck with one hand and use
the other hand grasping the base of thechuck.
2. Rotate the sleeve counterclockwise (as viewed from the
front) far enough to accept the desiredaccessory.
3. Insert the accessory about 3/4" (19mm) into the chuck
and tighten securely by rotating the chuck sleeve
 Loading...